I was at Wal-Mart this past Friday night and saw they'd mark the jelly rolls on sale for only $14.95! Our Wal-Mart is closing their fabric department and they've started to mark a few things down.
It got me to thinking that I bet ours isn't the only one doing that - and how cute would it be to sew a skirt (or several) using one jelly roll? What about a skirt that you don't have to cut out the material - at all? Even better, NO measuring or making a ton of cuts?!
Hmmm...
How about the only real measurement you have to take is your child's waist size?
And the only cutting might be a bit of trimming? I got obsessed with the idea the more and more I thought about it! I wished I went ahead and bought a jelly roll at Wal-Mart - then I remembered the pretty Woodland Bloom jelly roll I've had for months but never did anything with it (I was going to make a purse).
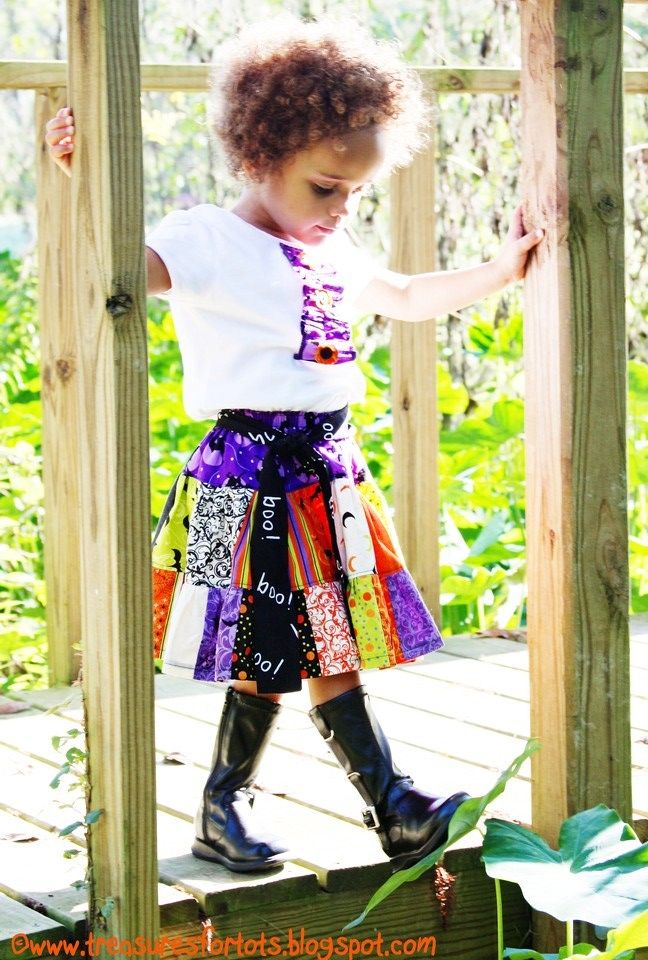
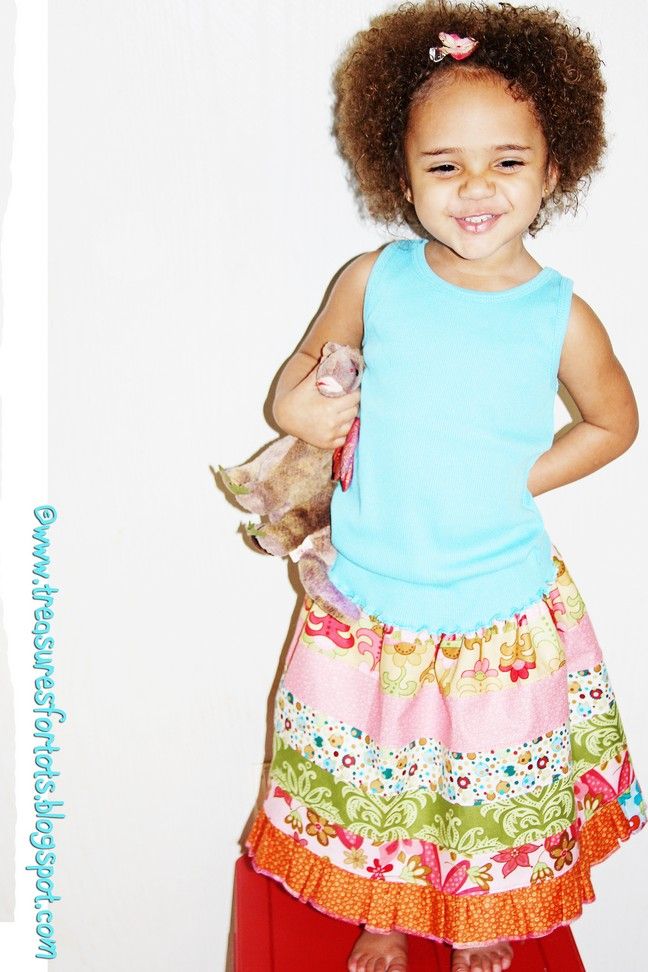
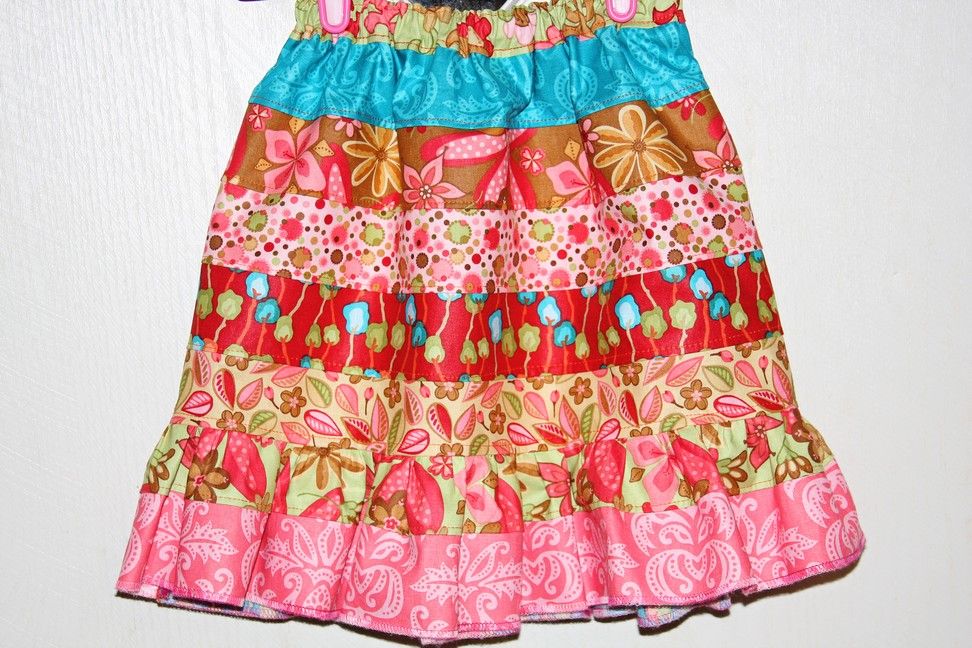
So I got busy and made a test skirt (the one above) for Serenity and everything ended up coming together just like I imagined. Excellent!! AND it's a skirt that is totally different - I've never seen one done quite this way. The possibilities with this type of skirt are only limited to your imagination too.
Wanna see how I did it?
Let's get started!
Remember to click on a picture if you need to ZOOM in.
And read all the instructions through carefully before beginning.
Materials needed:
1 Jelly Roll
Matching or coordinating thread
3/8" elastic
embroidery needle
fray check
2 safety pins
iron
pins
Optional:
pinking shears
bodkin
serger
POST-IT-NOTE:
I've serged all my seams - but you don't need a serger.
It got me to thinking that I bet ours isn't the only one doing that - and how cute would it be to sew a skirt (or several) using one jelly roll? What about a skirt that you don't have to cut out the material - at all? Even better, NO measuring or making a ton of cuts?!
Hmmm...
How about the only real measurement you have to take is your child's waist size?
And the only cutting might be a bit of trimming? I got obsessed with the idea the more and more I thought about it! I wished I went ahead and bought a jelly roll at Wal-Mart - then I remembered the pretty Woodland Bloom jelly roll I've had for months but never did anything with it (I was going to make a purse).
So I got busy and made a test skirt (the one above) for Serenity and everything ended up coming together just like I imagined. Excellent!! AND it's a skirt that is totally different - I've never seen one done quite this way. The possibilities with this type of skirt are only limited to your imagination too.
Wanna see how I did it?
Let's get started!
Remember to click on a picture if you need to ZOOM in.
And read all the instructions through carefully before beginning.
Materials needed:
1 Jelly Roll
Matching or coordinating thread
3/8" elastic
embroidery needle
fray check
2 safety pins
iron
pins
Optional:
pinking shears
bodkin
serger
POST-IT-NOTE:
I've serged all my seams - but you don't need a serger.
The material of a jelly roll is pinked - and pinking helps to keep the material from unraveling.
Everybody who sews should have a pair a pinking shears - they are a very helpful tool!
You could also zig-zag the edges of your seams.
Keep this in mind when you see that I've serged my seams in the photos - you have other options if you don't have a serger.
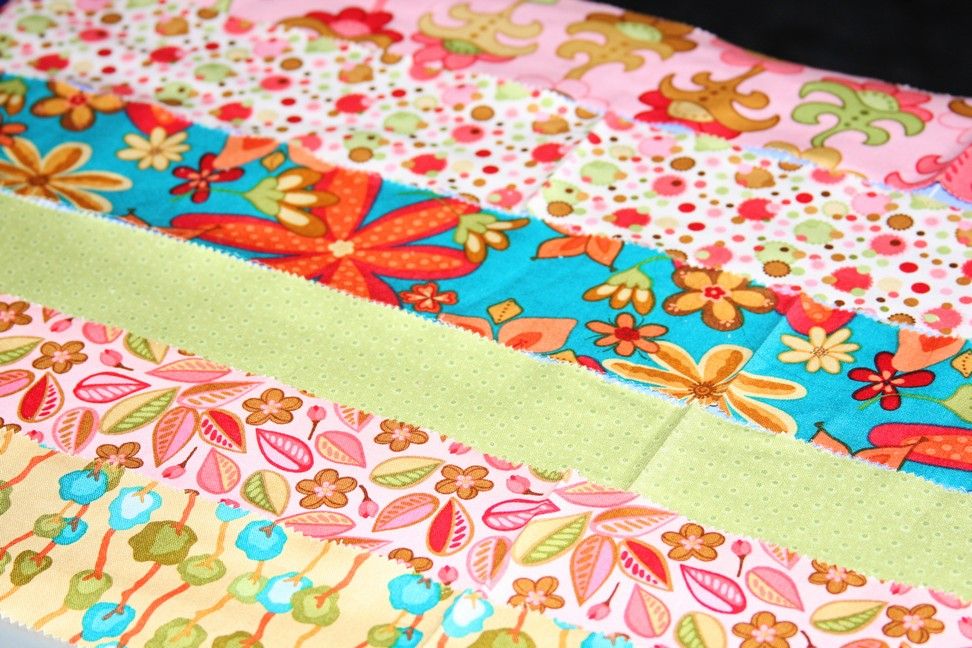
Open the jelly roll and arrange the strips in a horizontal pattern you like the best. There are so many fun possible fabric combinations too!
The amount of strips you use depends on how long you'd like your finished skirt to be. Once you have it the length you'd like - add one more strip (it's for the "waistband" and seam allowances). Set two more strips aside for your ruffle. Keep all these extra strips in mind when you're determining the length.
Sewing the skirt:
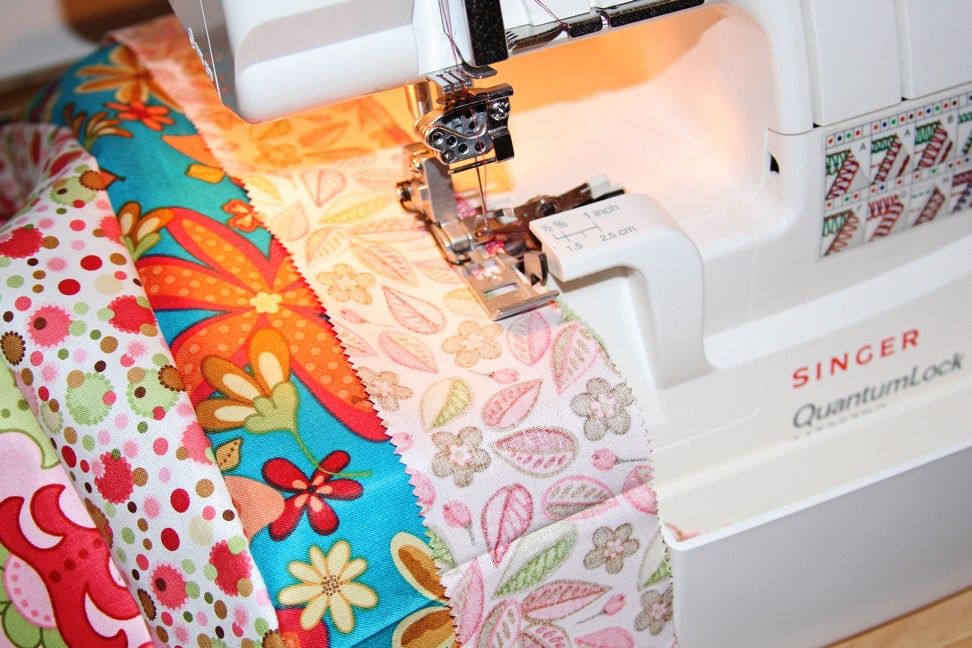
Place two strips right sides facing (no need to pin, just hold them in place), and sew 1/4" from the edge (I serged my pieces together). Keep doing this until you've sewed all your strips together. Serge or zig-zag the seams. Or you can leave the pinked edges alone.
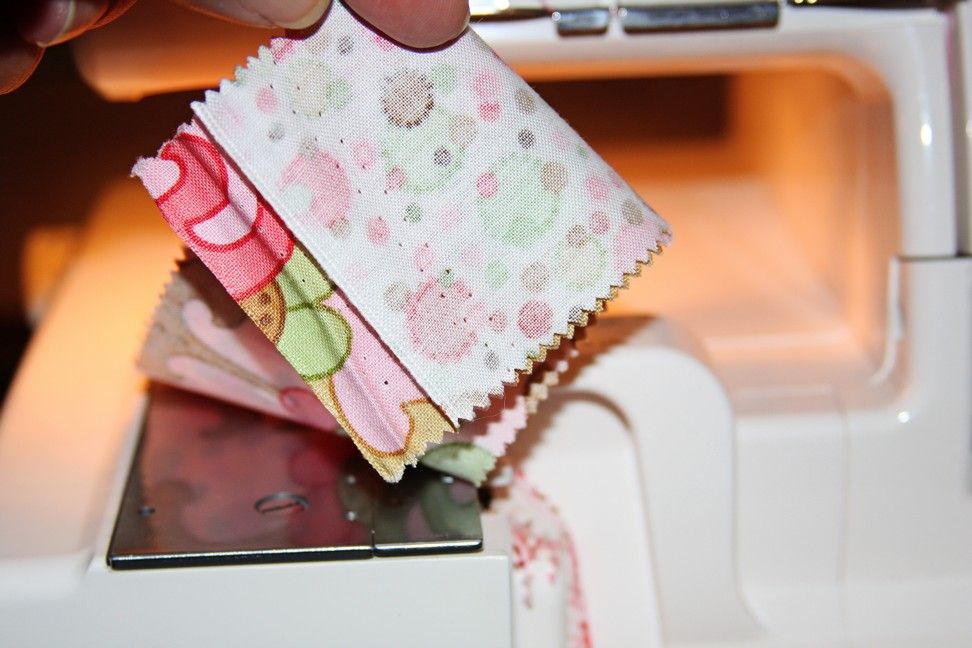
Some strips are a little longer than others. No problem! After you've finished sewing all the strips together, trim the ends to make them even.
If you don't have a serger or don't want to zig-zag your seams, then this will be the only cutting you'll do on the skirt.
I'll explain more further down.


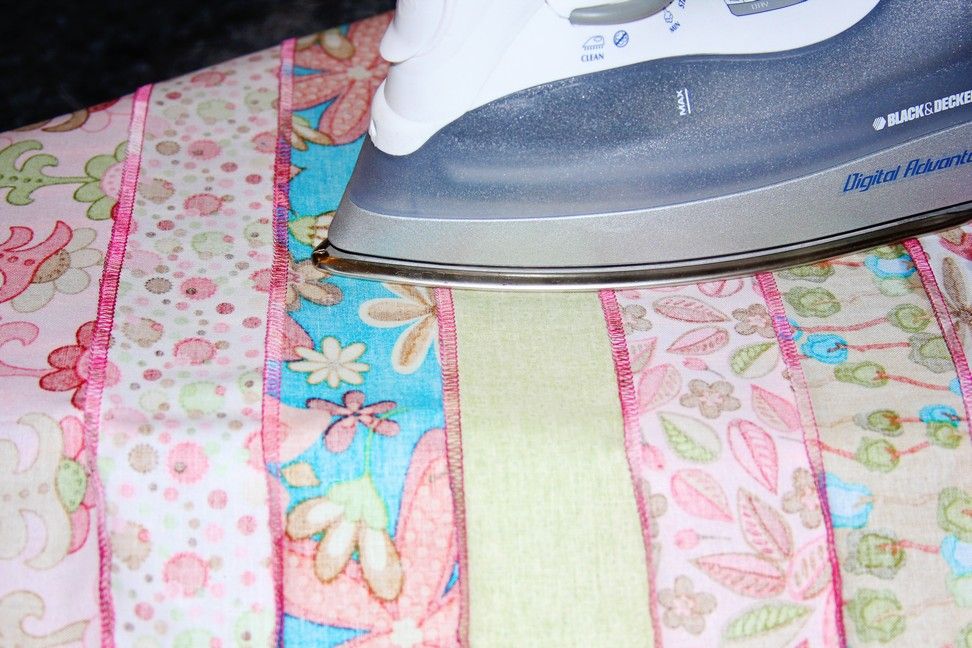
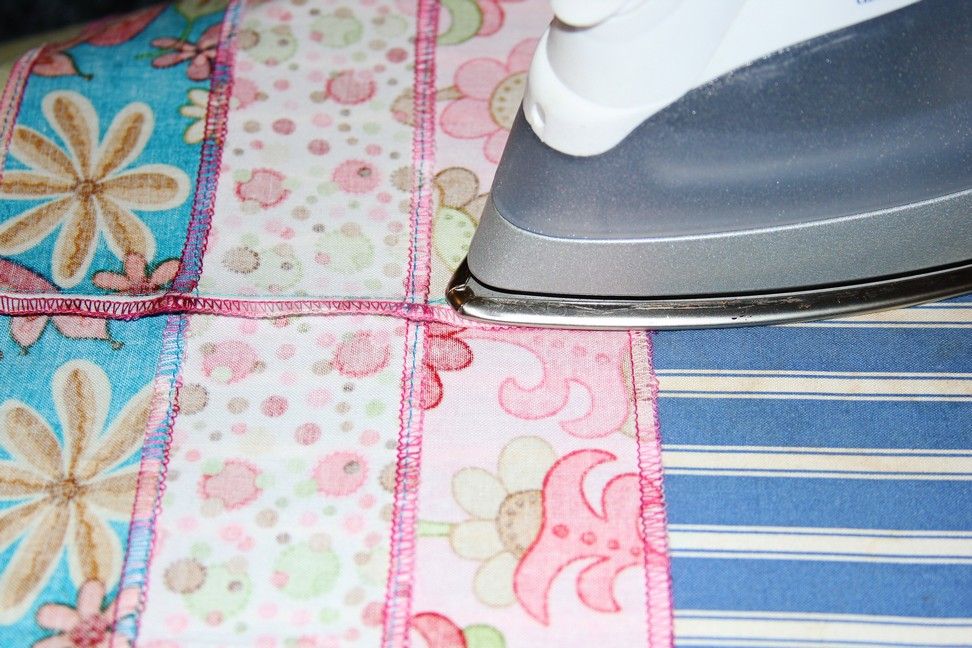
Iron all the seams up towards the top of the skirt.
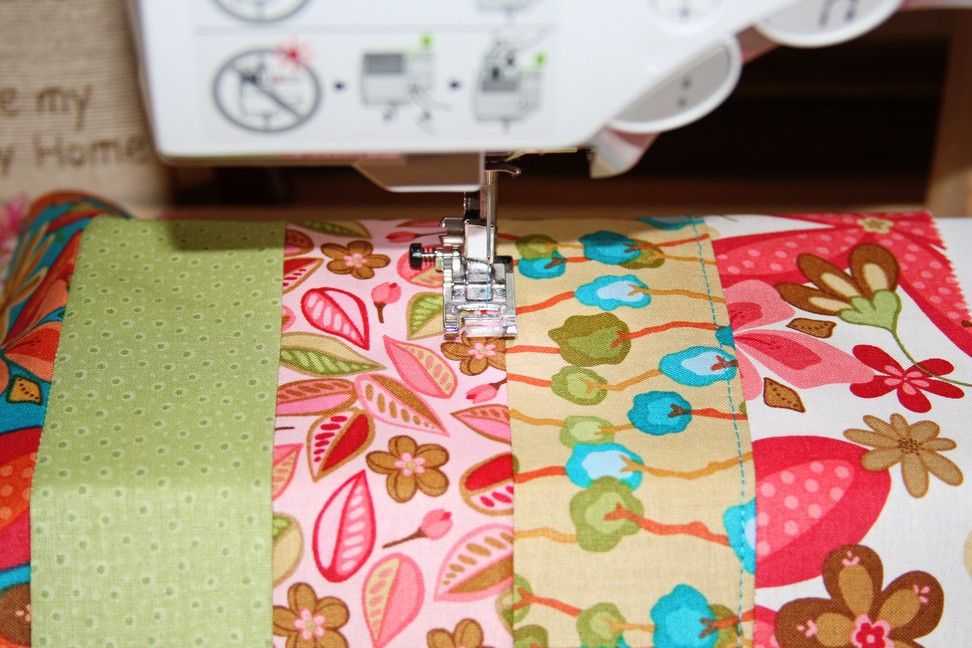
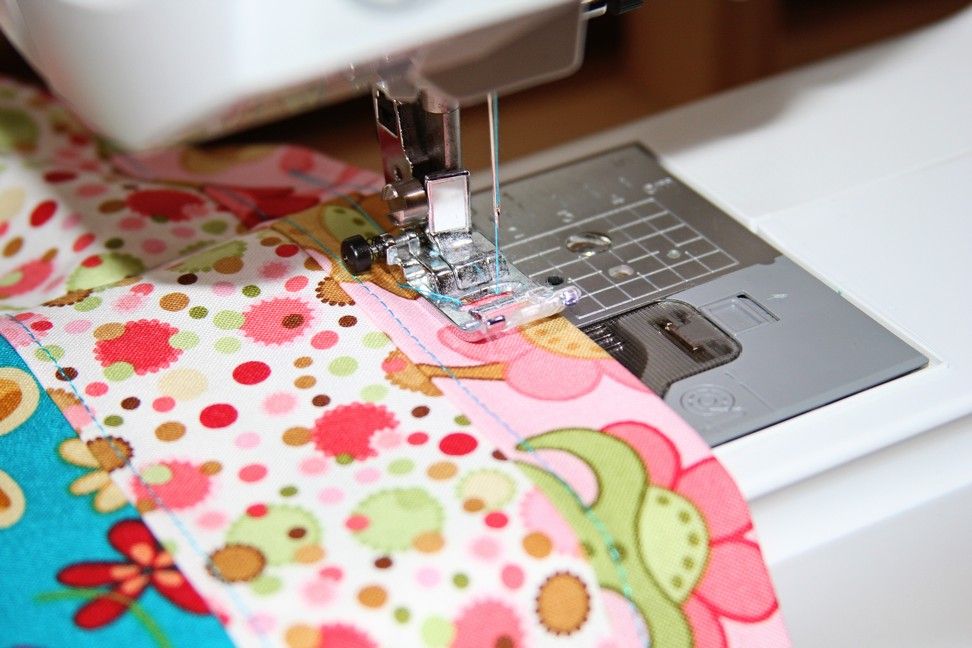
Top stitch to hold your seams down. You don't have to do this, but I think it gives the skirt a more finished, nicer look and the skirt keeps its shape better too. If you're a beginner sewer, think of it as good practice!
Now set the panel aside, and grab the two ruffle pieces. With right sides facing, sew 1/4" seam allowance (or use a serger) along the 2 1/2" length of the strips.
Now you have one wide strip of material.
Serge or zig-zag the seams. Or you can leave the pinked edges alone (you're gonna hear this alot).
(For an interesting design option, make your ruffle longer by sewing two wide ruffle strips together! Or three!)
On the bottom of the ruffle piece, serge or iron a 1/4" hem and top stitch. I serged the bottom of my ruffle but I actually forgot this step and had to do it later - it wasn't as easy.


Now sew a gathering stitch along the top of the ruffle piece.
Pull the bobbin thread on both sides of the ruffle piece until it's the same width as the skirt panel.
With right sides facing, match up one end of the ruffle piece to the end of the skirt panel. Wrap the gathering thread around the needle.


Push the needle down to hold the gathering thread in place. Repeat on the other side of the ruffle and skirt panel.
This will keep your ruffle from stretching out while you straighten and arrange them evenly across the skirt panel.
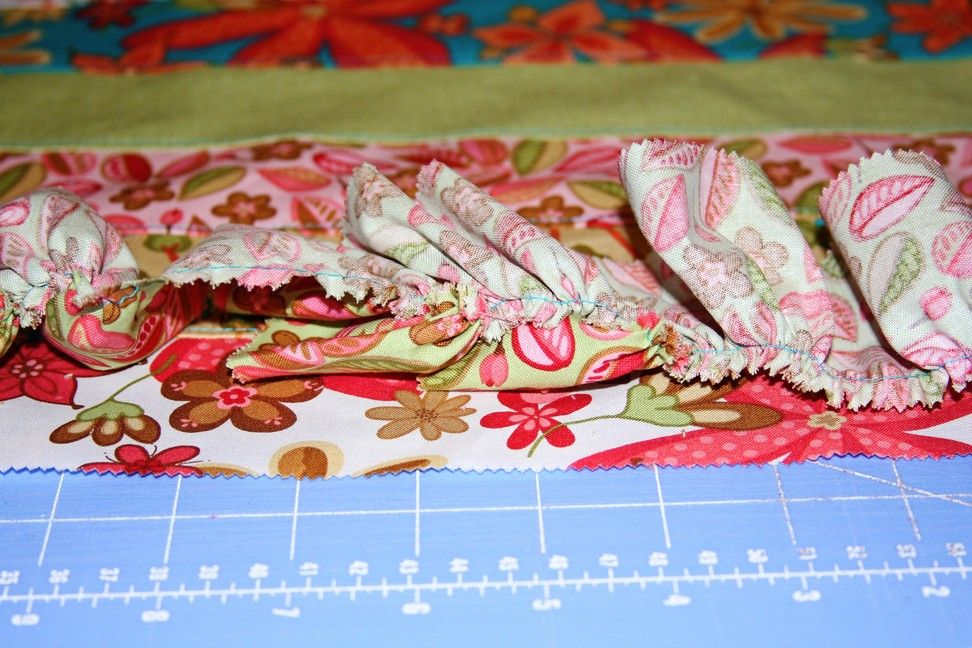
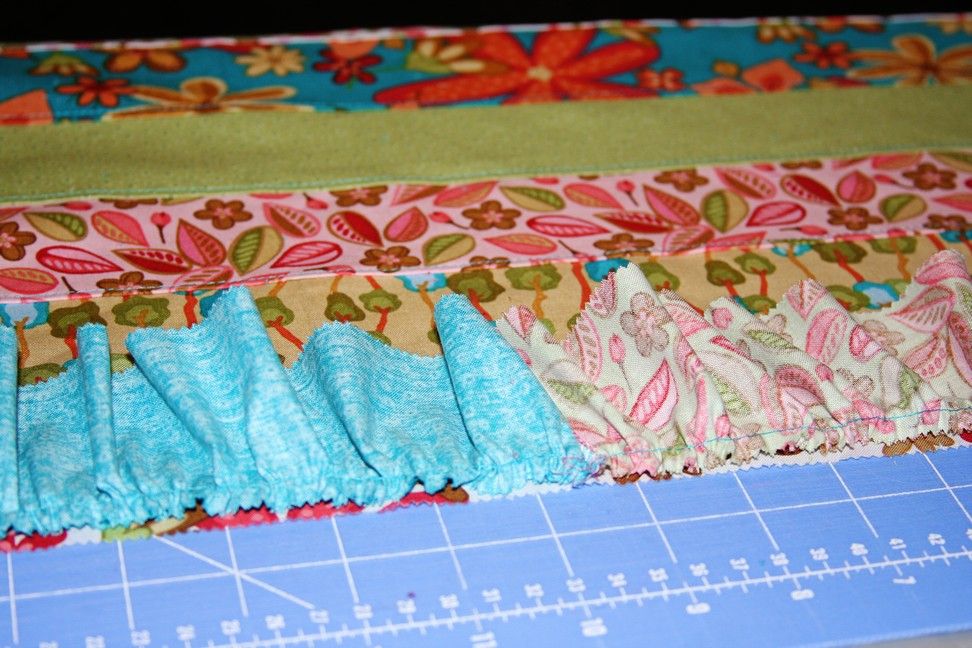
See the difference in the ruffle before and after I've arranged it evenly across the skirt panel? Ruffles are time consuming, but not hard - just take your time. Besides, it's totally worth the extra effort!


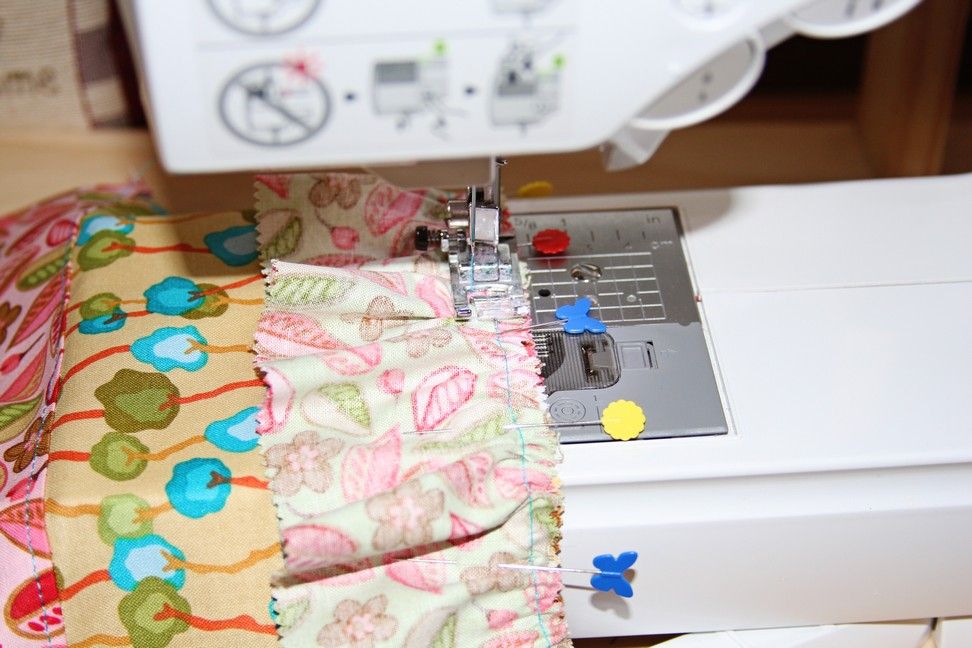
Pin the ruffle to the skirt panel - I use a lot of pins. Sew a little to the side of your gathering stitch.
DON'T stitch over the gathering stitch.
Pull out the gathering stitch - this is very easy and you don't need a seam ripper. Pull the bobbin thread and it should come right out - as long as you didn't sew over it. Remove all the gathering threads.
Serge or zig-zag the seams.
Or using your pinking shears, trim the seams - be careful not to trim too close to your stitches.
Or you can just leave the seams as-is.
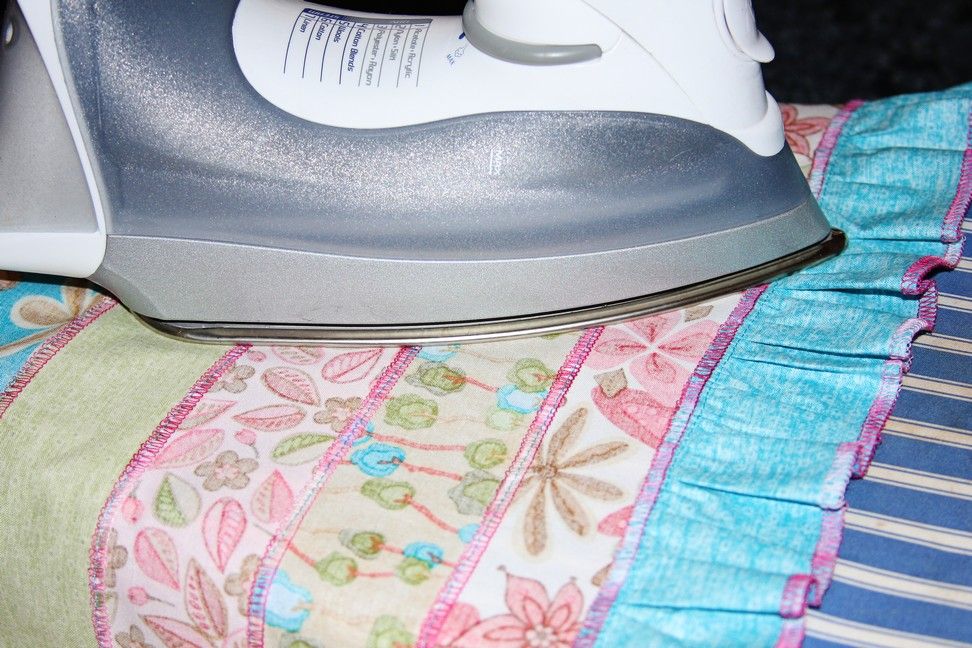
Iron the ruffle seam up, and then top-stitch.


Serge the top of the skirt - or you can just leave the pinked edges alone. I serged the top of my skirt.
Fold the skirt in half, and starting at the ruffle, match up the side seams and pin. I match where I've top stitched and pin there - it holds the skirt in place better.
Sew down the side of the skirt. Take your time and back stitch at the beginning and end.
POST-IT-NOTE 2:
To make a skirt big enough for older children (or if you just want a fuller skirt) - make a second skirt panel, then place both panels right sides facing, carefully line up the edges, pin and then sew up both sides. Follow the rest of the instructions to finish.
Serge or zig-zag the seams. Or using your pinking shears, trim the seams - be careful not to trim to close to your stitches. Or you can just leave the pinked seams as-is.
Almost finished!


Flip the skirt inside-out and thread the loose ends on the side seam back through, and apply fray check.
Iron the side seam flat.
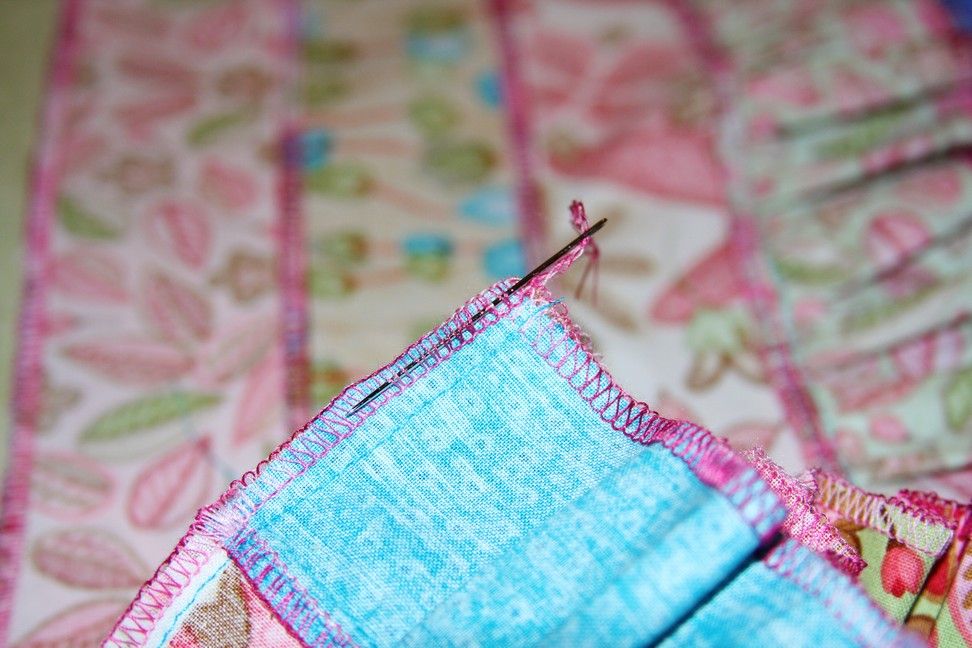
Now we are going to form the elastic casing. Fold the top of the skirt down even with the seam beneath it and iron flat. Continue all the way around the skirt.
Make sure the edge completely overlaps the seam. Refer to the pictures:


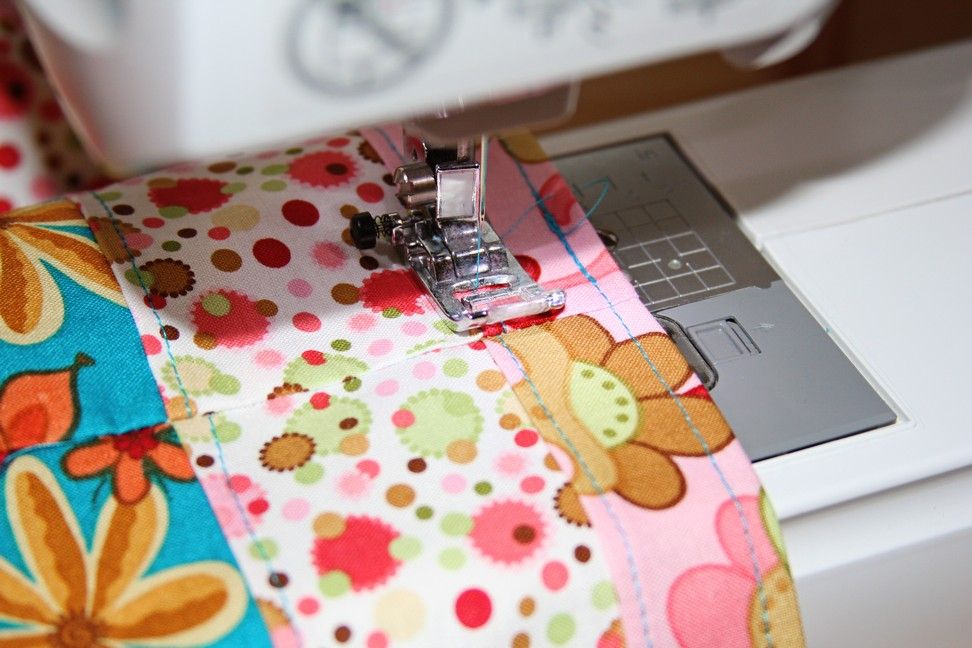
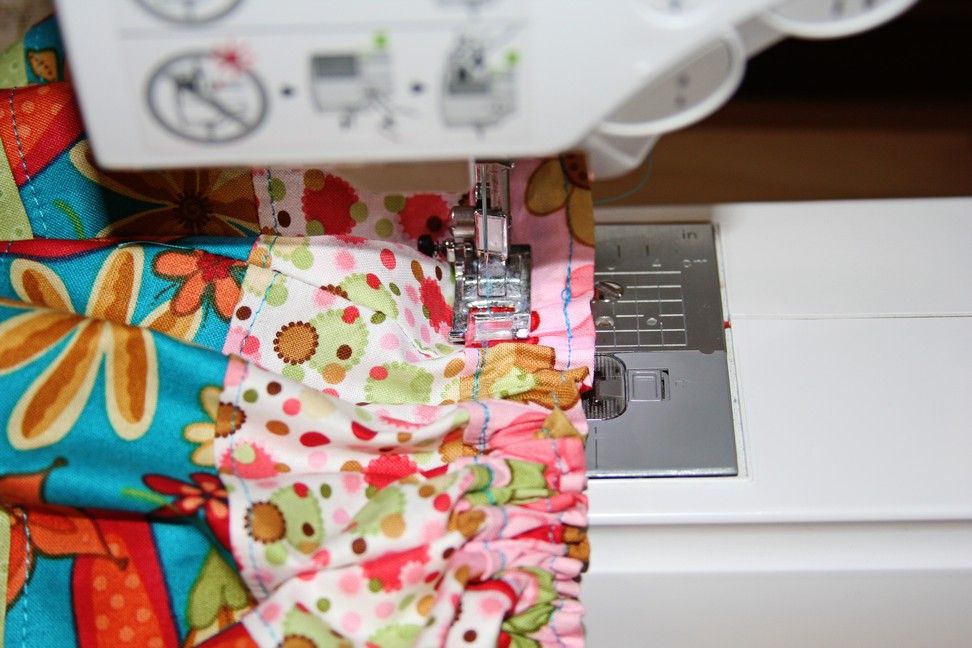
Flip the skirt back right side out, and top stitch 1/4" from the top edge all the way around. Make sure to back-stitch at the end. I usually try to start and stop at the back of the skirt.
Now top stitch OVER the top-stitching that is already there.
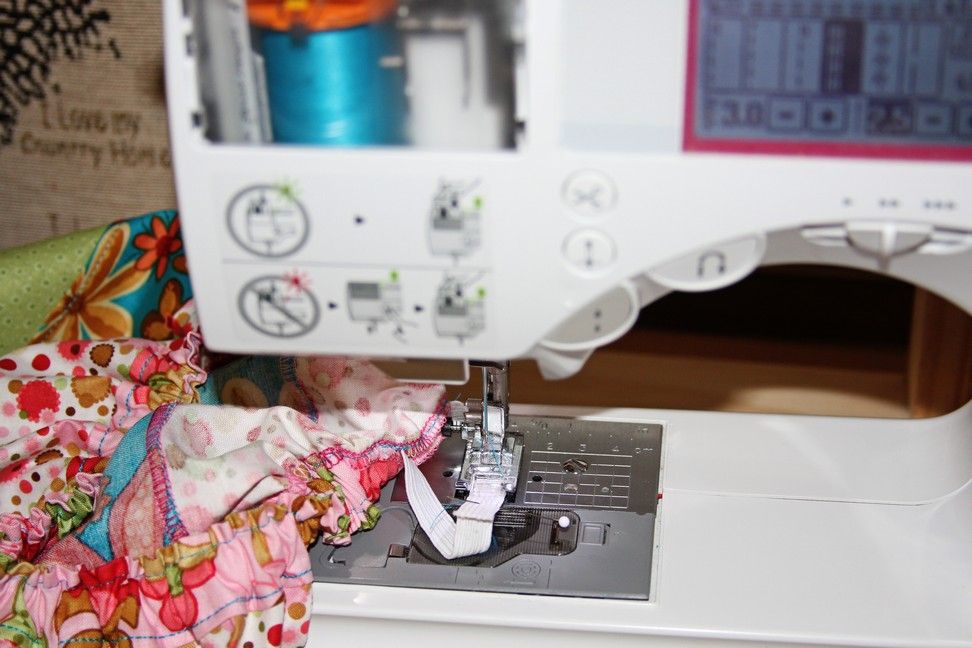
Stitch around the skirt leaving a 1" opening to thread the elastic through the casing.
Back stitch at the beginning and end.
Measure your child's waist and subtract 1 inch. Cut your elastic that length.
Attach a bodkin (or safety pin) to one end of the elastic.


Pin the other end of the elastic to the skirt - this so it won't slip inside the casing when you pull the elastic through.
Now pull the elastic though the casing, bunching up the waist as you go around.
Once through, pin the ends of the elastic together and then try the skirt on your child to make sure it fits right - sometimes the elastic stretches out a bit after you've pulled it through the casing.
Stitch the elastic together. I used a triple stitch.
If your machine doesn't have one, just go over you stitches several times.
Triple stitch the opening closed.


All done!

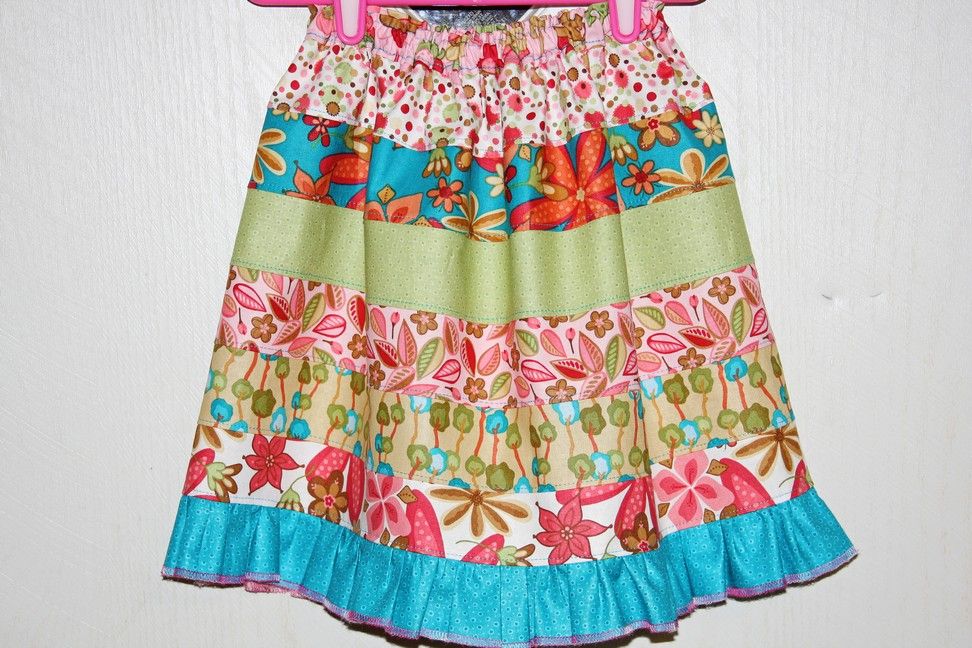
This is the test skirt I made for Serenity:

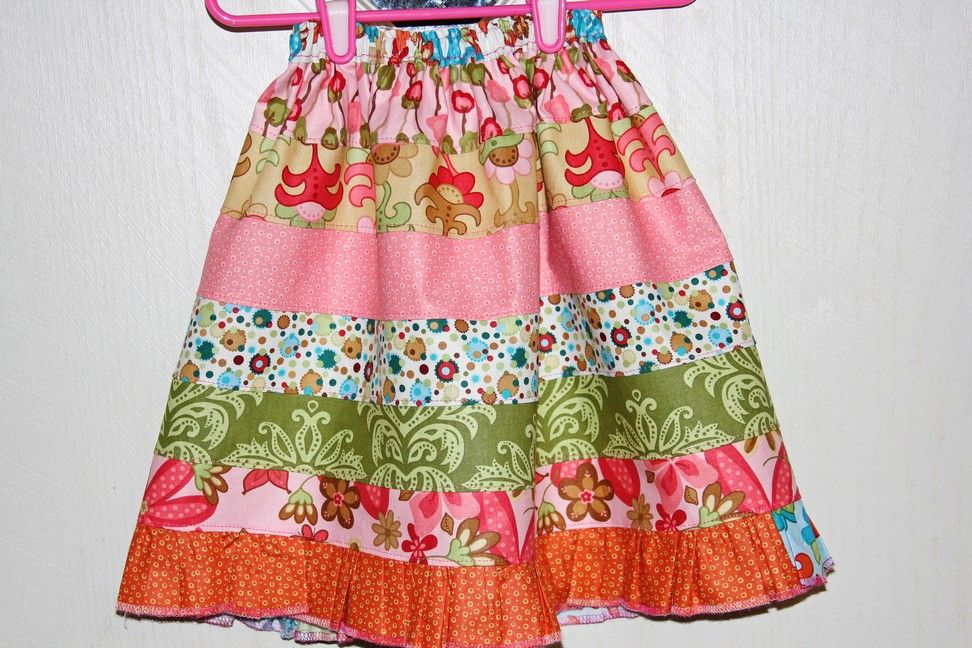
Here's the newest skirt I made with a longer ruffle:

I hope y'all like my newest tutorial!!
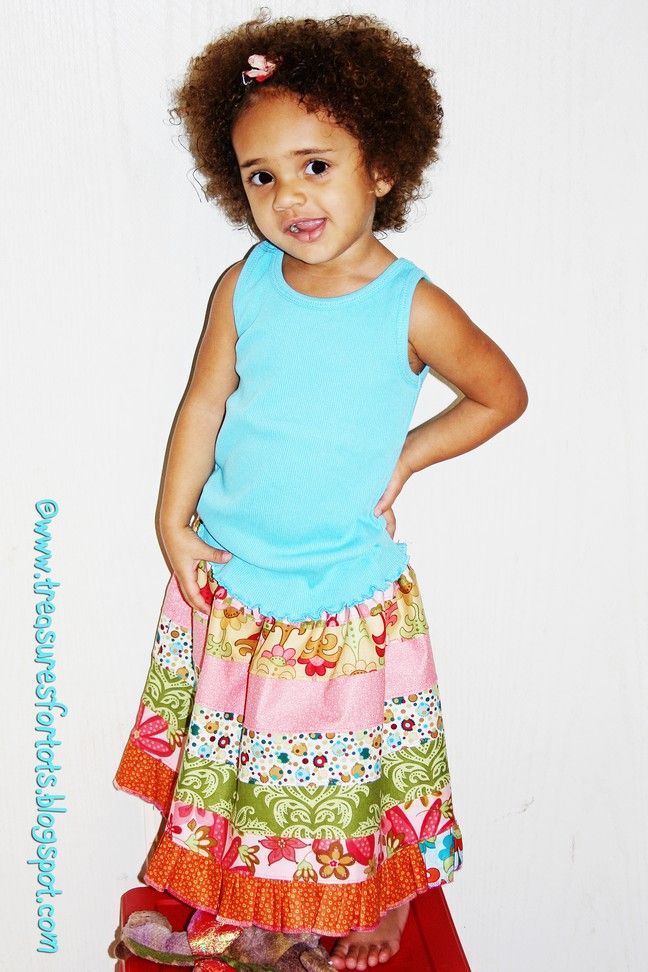
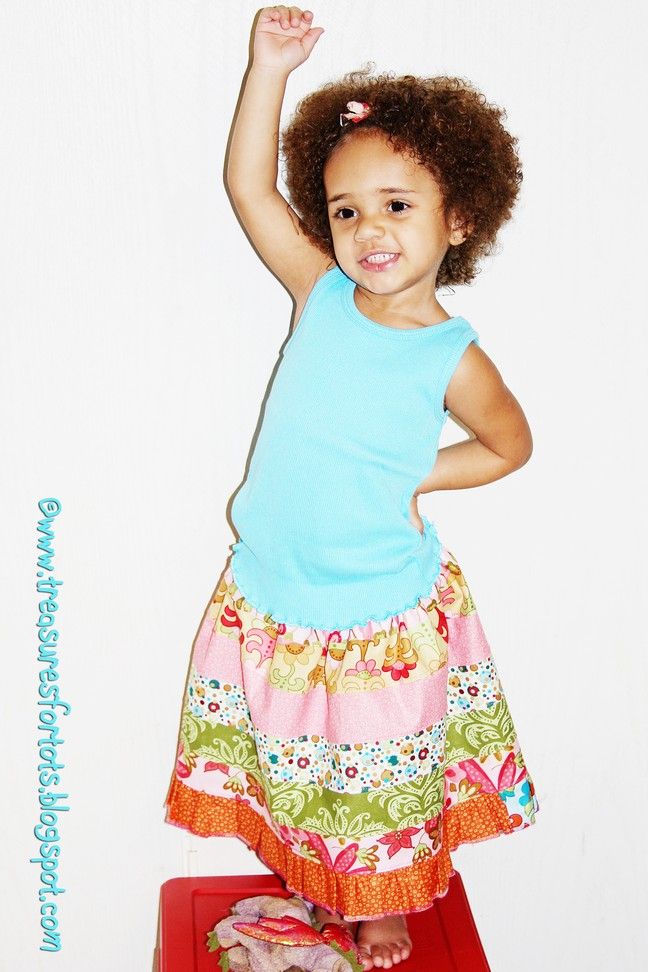
Here's some more of Serenity modeling her skirt for me!


Open the jelly roll and arrange the strips in a horizontal pattern you like the best. There are so many fun possible fabric combinations too!
The amount of strips you use depends on how long you'd like your finished skirt to be. Once you have it the length you'd like - add one more strip (it's for the "waistband" and seam allowances). Set two more strips aside for your ruffle. Keep all these extra strips in mind when you're determining the length.
Sewing the skirt:
Place two strips right sides facing (no need to pin, just hold them in place), and sew 1/4" from the edge (I serged my pieces together). Keep doing this until you've sewed all your strips together. Serge or zig-zag the seams. Or you can leave the pinked edges alone.
Some strips are a little longer than others. No problem! After you've finished sewing all the strips together, trim the ends to make them even.
If you don't have a serger or don't want to zig-zag your seams, then this will be the only cutting you'll do on the skirt.
I'll explain more further down.
Iron all the seams up towards the top of the skirt.
Top stitch to hold your seams down. You don't have to do this, but I think it gives the skirt a more finished, nicer look and the skirt keeps its shape better too. If you're a beginner sewer, think of it as good practice!
Now set the panel aside, and grab the two ruffle pieces. With right sides facing, sew 1/4" seam allowance (or use a serger) along the 2 1/2" length of the strips.
Now you have one wide strip of material.
Serge or zig-zag the seams. Or you can leave the pinked edges alone (you're gonna hear this alot).
(For an interesting design option, make your ruffle longer by sewing two wide ruffle strips together! Or three!)
On the bottom of the ruffle piece, serge or iron a 1/4" hem and top stitch. I serged the bottom of my ruffle but I actually forgot this step and had to do it later - it wasn't as easy.
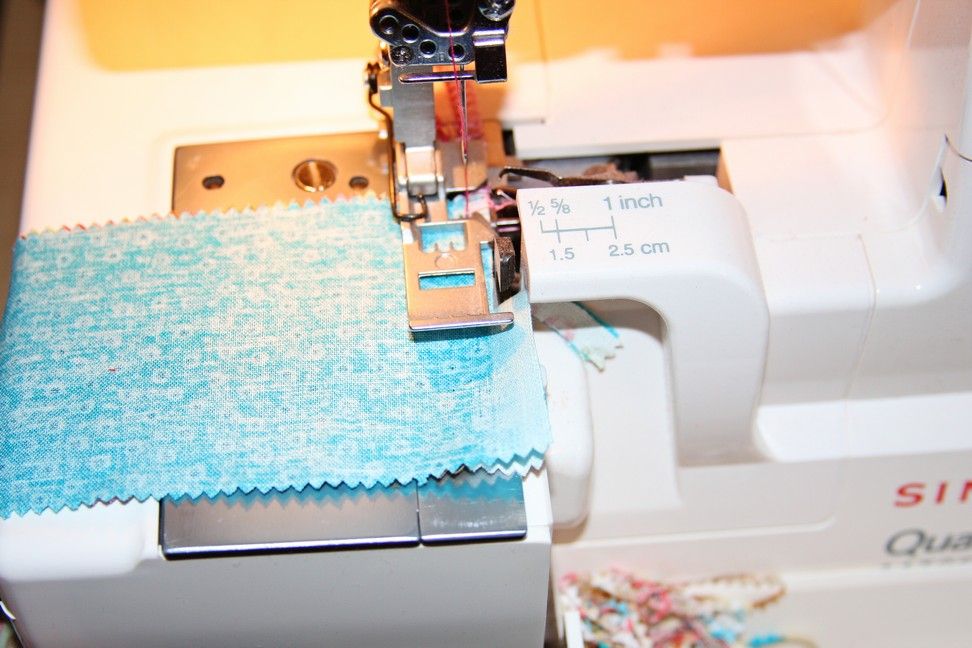
Now sew a gathering stitch along the top of the ruffle piece.
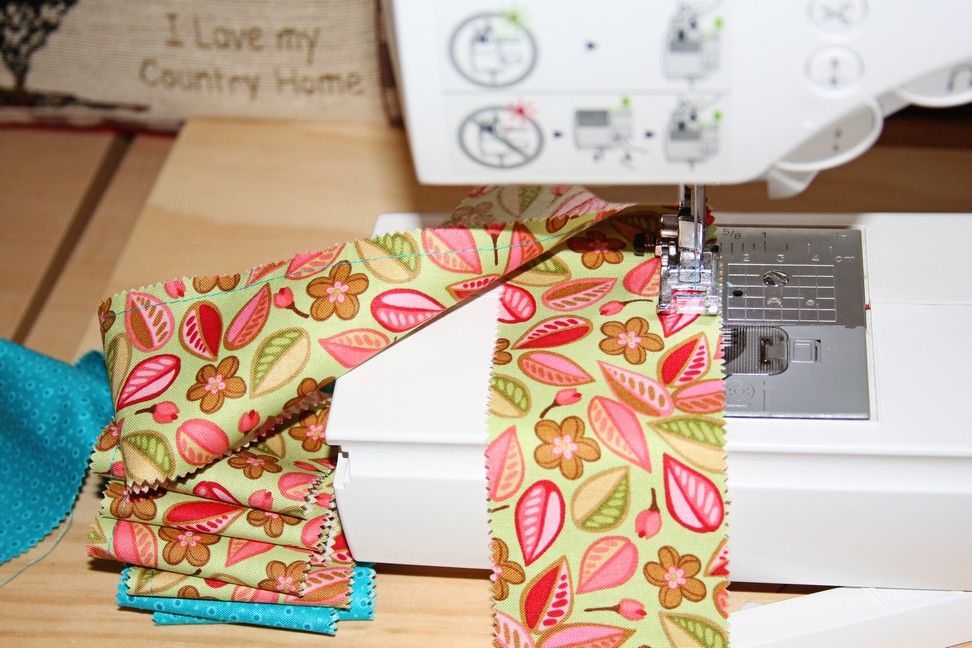
Pull the bobbin thread on both sides of the ruffle piece until it's the same width as the skirt panel.
With right sides facing, match up one end of the ruffle piece to the end of the skirt panel. Wrap the gathering thread around the needle.
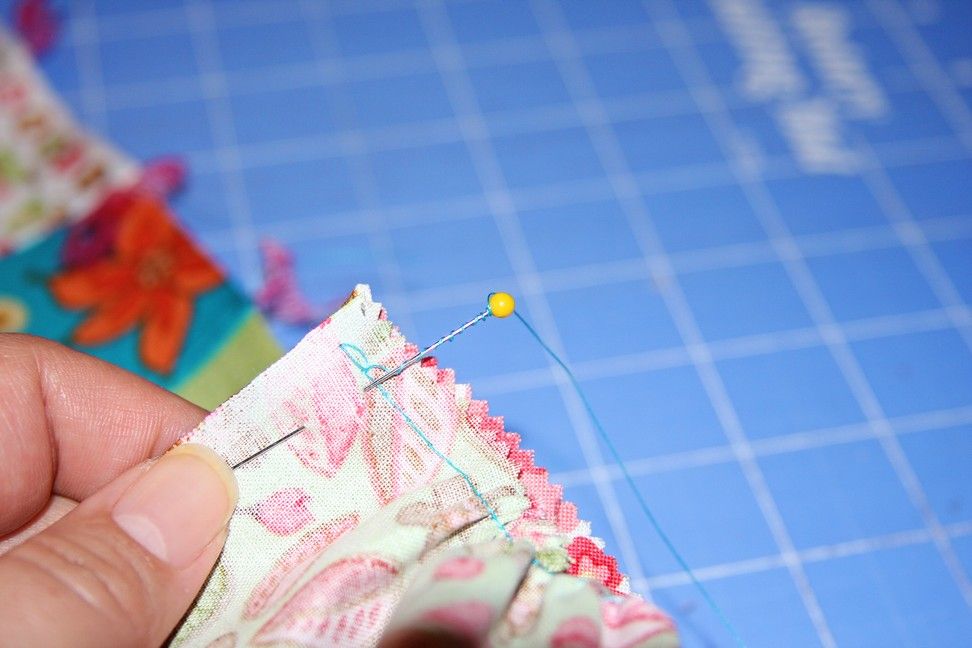
Push the needle down to hold the gathering thread in place. Repeat on the other side of the ruffle and skirt panel.
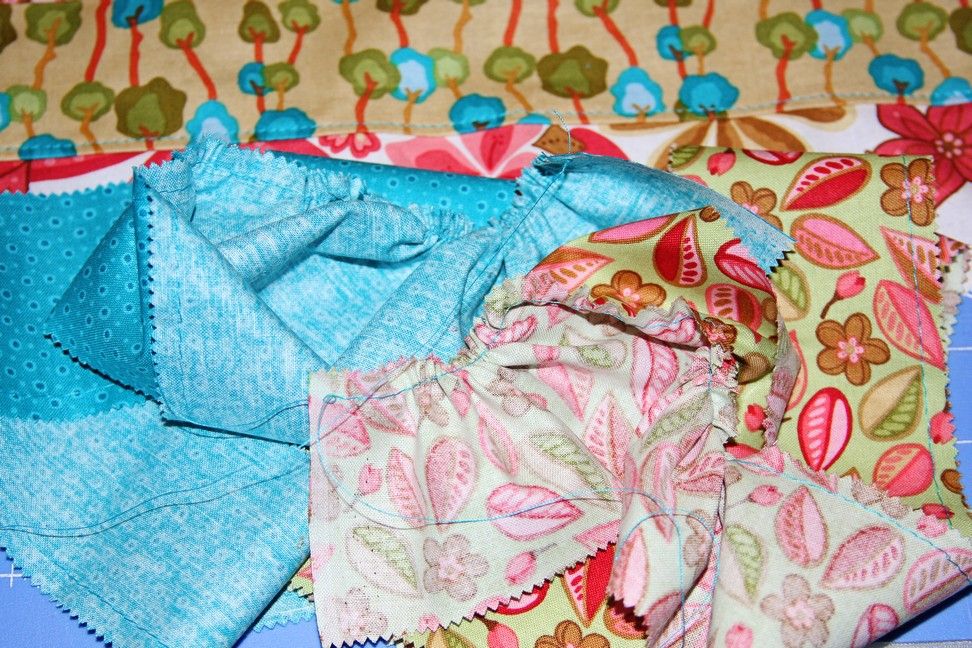
This will keep your ruffle from stretching out while you straighten and arrange them evenly across the skirt panel.
See the difference in the ruffle before and after I've arranged it evenly across the skirt panel? Ruffles are time consuming, but not hard - just take your time. Besides, it's totally worth the extra effort!

Pin the ruffle to the skirt panel - I use a lot of pins. Sew a little to the side of your gathering stitch.
DON'T stitch over the gathering stitch.
Pull out the gathering stitch - this is very easy and you don't need a seam ripper. Pull the bobbin thread and it should come right out - as long as you didn't sew over it. Remove all the gathering threads.
Serge or zig-zag the seams.
Or using your pinking shears, trim the seams - be careful not to trim too close to your stitches.
Or you can just leave the seams as-is.
Iron the ruffle seam up, and then top-stitch.
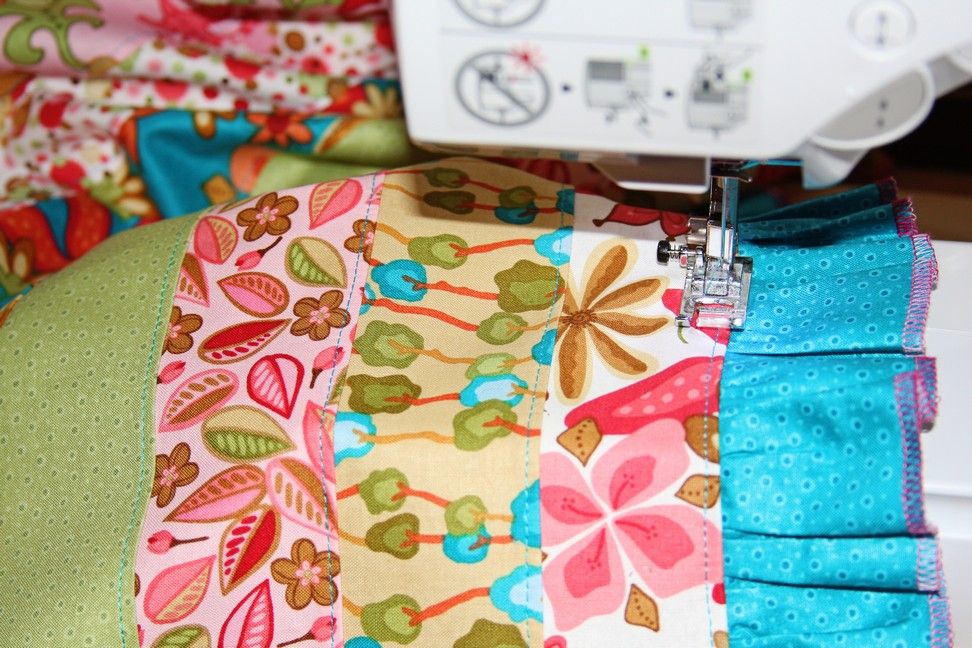
Serge the top of the skirt - or you can just leave the pinked edges alone. I serged the top of my skirt.
Fold the skirt in half, and starting at the ruffle, match up the side seams and pin. I match where I've top stitched and pin there - it holds the skirt in place better.
Sew down the side of the skirt. Take your time and back stitch at the beginning and end.
POST-IT-NOTE 2:
To make a skirt big enough for older children (or if you just want a fuller skirt) - make a second skirt panel, then place both panels right sides facing, carefully line up the edges, pin and then sew up both sides. Follow the rest of the instructions to finish.
Serge or zig-zag the seams. Or using your pinking shears, trim the seams - be careful not to trim to close to your stitches. Or you can just leave the pinked seams as-is.
Almost finished!
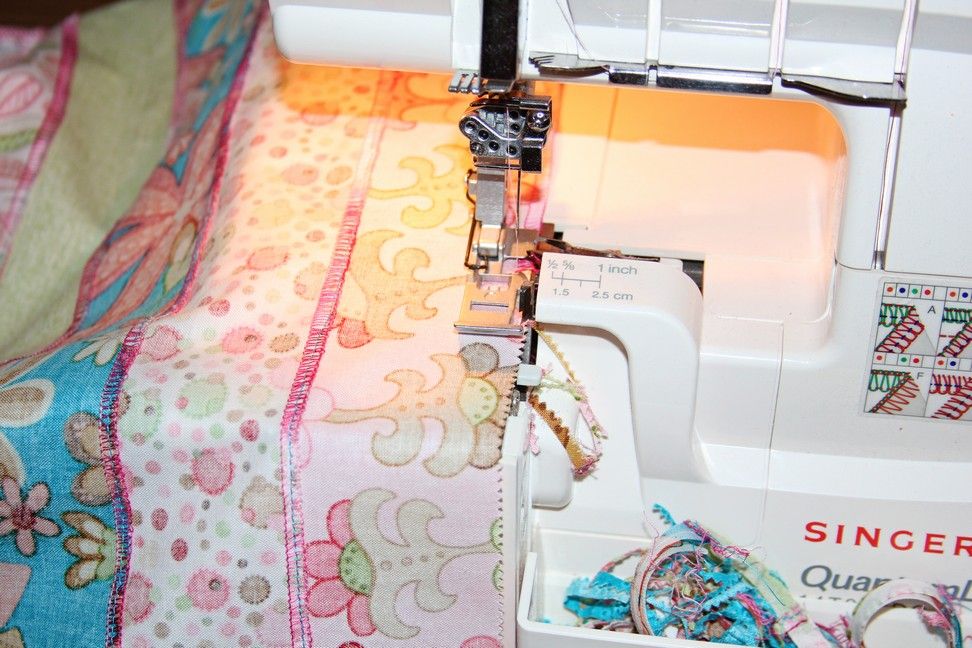
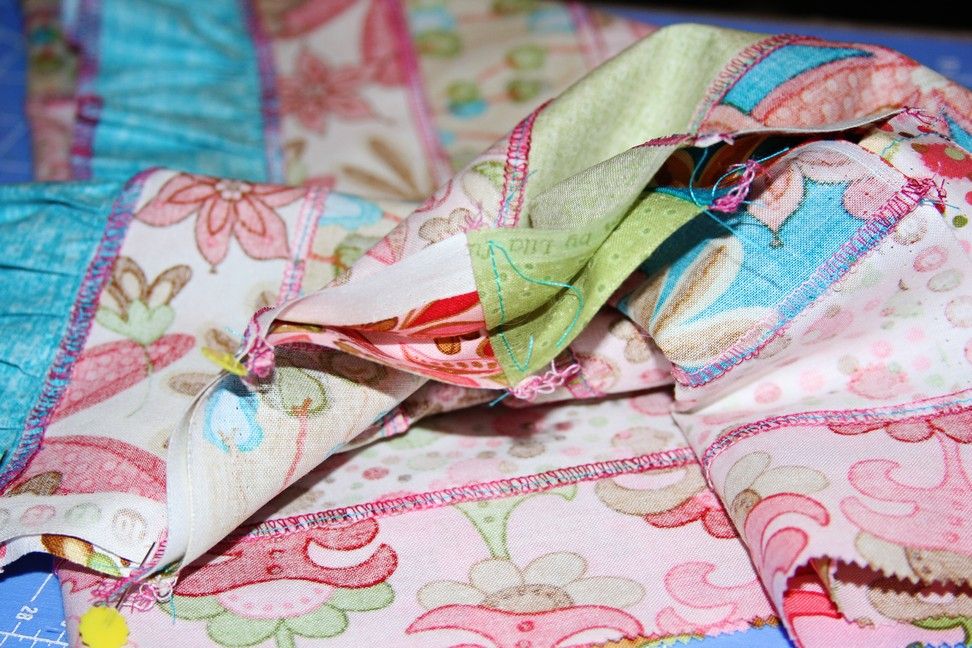

Flip the skirt inside-out and thread the loose ends on the side seam back through, and apply fray check.
Iron the side seam flat.
Now we are going to form the elastic casing. Fold the top of the skirt down even with the seam beneath it and iron flat. Continue all the way around the skirt.
Make sure the edge completely overlaps the seam. Refer to the pictures:

Flip the skirt back right side out, and top stitch 1/4" from the top edge all the way around. Make sure to back-stitch at the end. I usually try to start and stop at the back of the skirt.
Now top stitch OVER the top-stitching that is already there.
Stitch around the skirt leaving a 1" opening to thread the elastic through the casing.
Back stitch at the beginning and end.
Measure your child's waist and subtract 1 inch. Cut your elastic that length.
Attach a bodkin (or safety pin) to one end of the elastic.
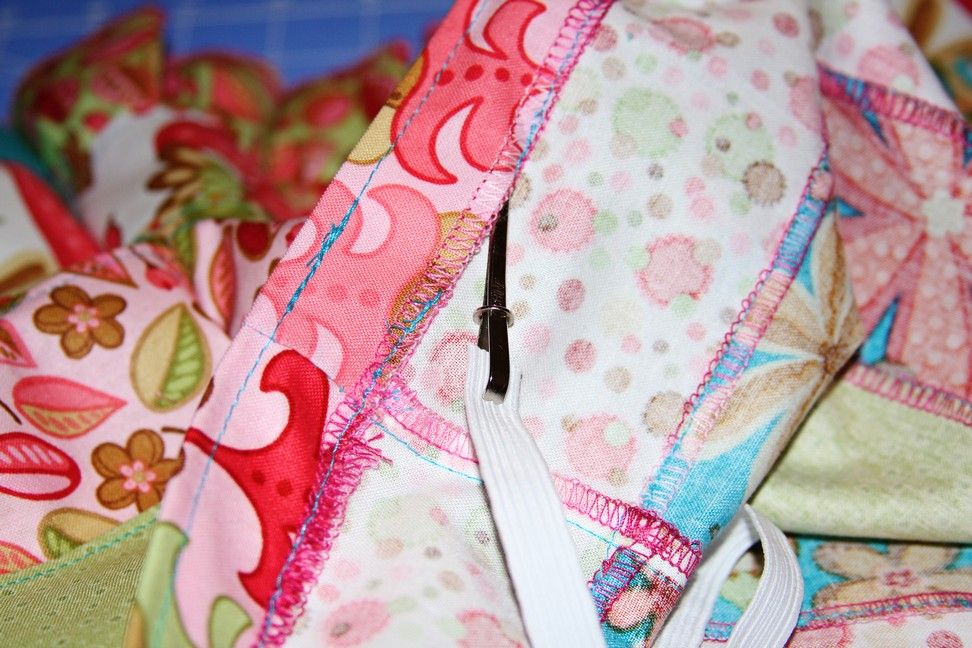
Pin the other end of the elastic to the skirt - this so it won't slip inside the casing when you pull the elastic through.
Now pull the elastic though the casing, bunching up the waist as you go around.
Once through, pin the ends of the elastic together and then try the skirt on your child to make sure it fits right - sometimes the elastic stretches out a bit after you've pulled it through the casing.
Stitch the elastic together. I used a triple stitch.
If your machine doesn't have one, just go over you stitches several times.
Triple stitch the opening closed.

All done!
This is the test skirt I made for Serenity:
Here's the newest skirt I made with a longer ruffle:
I hope y'all like my newest tutorial!!
Here's some more of Serenity modeling her skirt for me!

Of course you don't have to use a jelly roll - you can use any size strips that you want. With this skirt I wanted to try making a skirt with as few cuts as possible, and I wanted to make something little different than the normal stripwork dresses and skirts I've seen in boutique stores and online stores like Etsy.
Have fun!!
The inspiration and technique that went into the making of this skirt is unique.
I have NOT seen a skirt made quite this way before today (1/18/10).
This tutorial is for personal use only.
If you do make a skirt using this tutorial, I would appreciate a link back to this tutorial please!
I have no problem sharing how I did something, but I think it's only fair that I be given full credit for my ideas considering the time and effort it took to put together a picture tutorial.
Besides, it's just plain dishonest to steal other's ideas and claim them as your own.
I always try to give full credit to the creative blogs and people who inspire me - you can see evidence of this all over my blog!
I only ask for the same curtsy in return.
Thank you!
I have no problem sharing how I did something, but I think it's only fair that I be given full credit for my ideas considering the time and effort it took to put together a picture tutorial.
Besides, it's just plain dishonest to steal other's ideas and claim them as your own.
I always try to give full credit to the creative blogs and people who inspire me - you can see evidence of this all over my blog!
I only ask for the same curtsy in return.
Thank you!