Showing posts with label felt. Show all posts

Tuesday, November 15, 2011

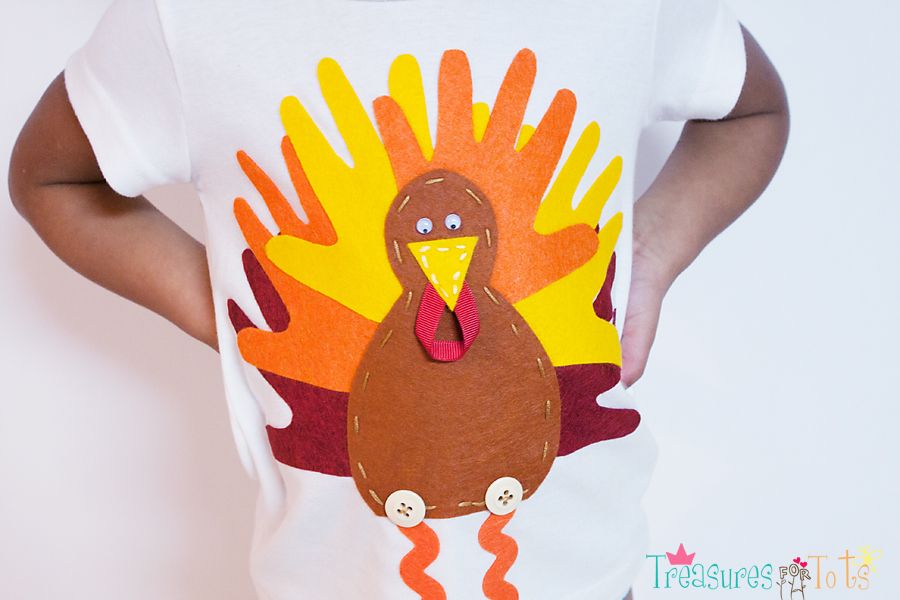
Tiny Hands Turkey FELT Applique

I wanted to make another Tiny Hands Turkey shirt for Serenity, but wanted to do it little differently this year.

So I decided to use felt!
I've made a Gingerbread House shirt for Serenity using eco-fi felt and it work out great.
You can find a huge selection of eco-fi felt at Wal-Mart for only 20¢ each or in bundles for less than $4.

For the Turkey shirt I wanted to try wool blend felt.
It's nicer than eco-fi, but more expensive too.
Both types can be washed in cold water, but I suggest hanging it to dry only.

I also tried to do a tiny bit of embroidery, but I messed up on the beak.
It was a little hard to go through two thick pieces of wool felt!
Maybe next time some little french knots all over the beak would look cute?
Embellishments on the turkey's belly and the hands would look adorable, but I was worried I'd mess up.
I used the last of my orange and yellow felt on this shirt!

I do like how the felt shirt turned out.
Sewing of any kind isn't required, but small extras are fairly easy to do.
It's going to look great with the Thanksgiving outfit I'm planning for Serenity.
---------------

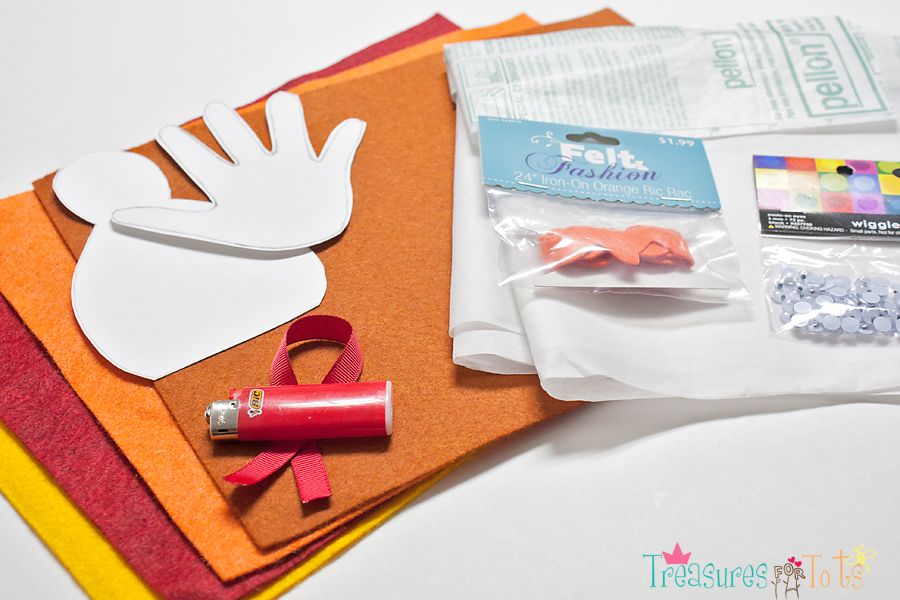
Materials:
yellow, orange, red and brown felt
iron-on transfer web (I used Pellon)
permanent sewing glue (Hobby Lobby $3.49)
2 wiggly eyes (Hobby Lobby 99¢)
felt ric-rack (Hobby Lobby $1.99)
a template of your child's hand
turkey template (I used this picture)
lighter or fray check
red ribbon
2 buttons
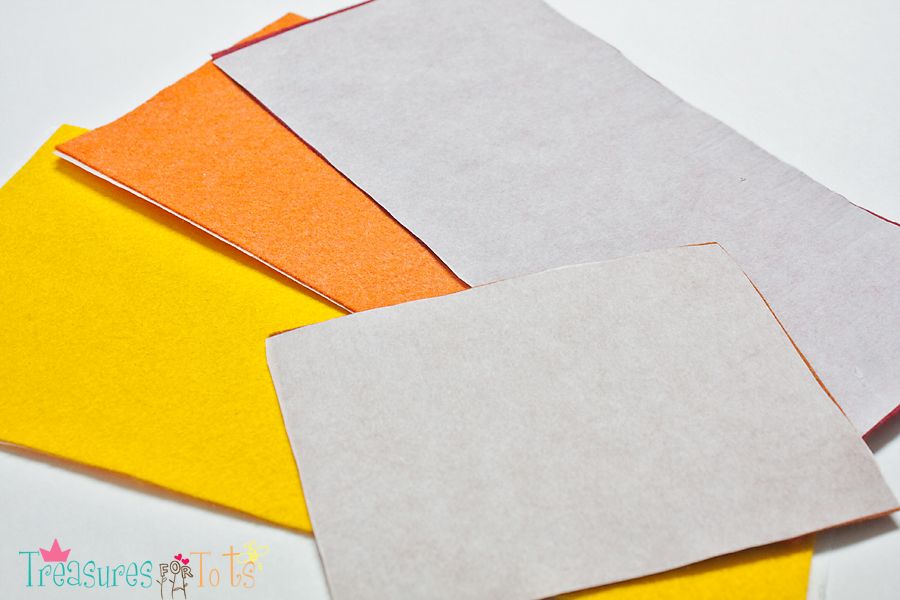
Iron the transfer web to the felt.
Use a hot iron (wool or medium setting), NO steam.
Cut out all the pieces.
2 hands of red, yellow and orange, and a brown turkey.
Make sure the flip the hand templates so you have a right and left hand of each color.

I embroidered around the turkey's body and beak using a running stitch, and then attached the ribbon wattle.
I thought about making a running stitch around the fingers too, then realized I would probably be in for a huge headache if I tried!
I think it would look nice, but that's beyond my skills - for now!
------------
Before ironing the felt pieces to the shirt, try moving them around until you've decided you like the placement.
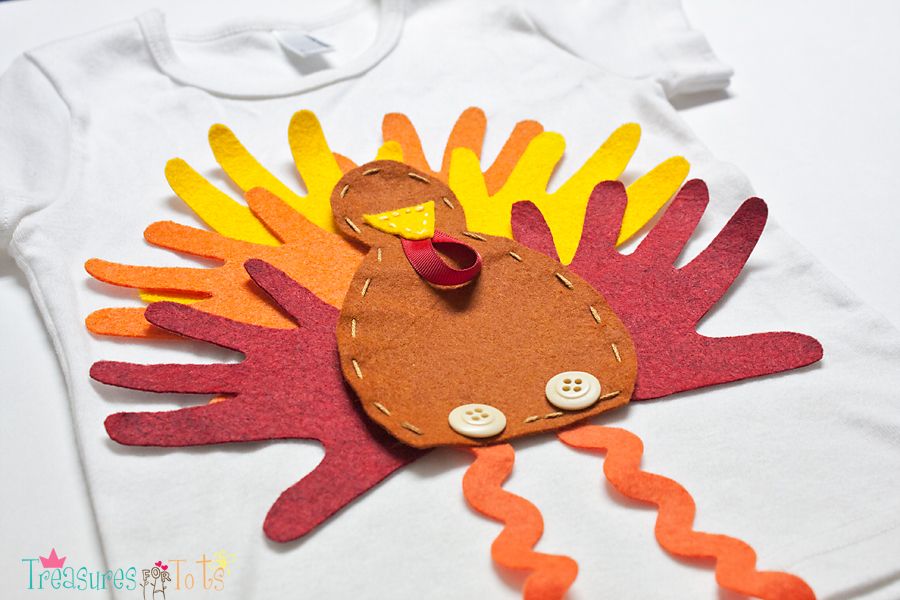
Iron down.
Take your time, press down firmly, and move slowly over the pieces.
Sew on the buttons using embroidery floss.
Glue down the eyes and give them time to dry before handling the shirt.
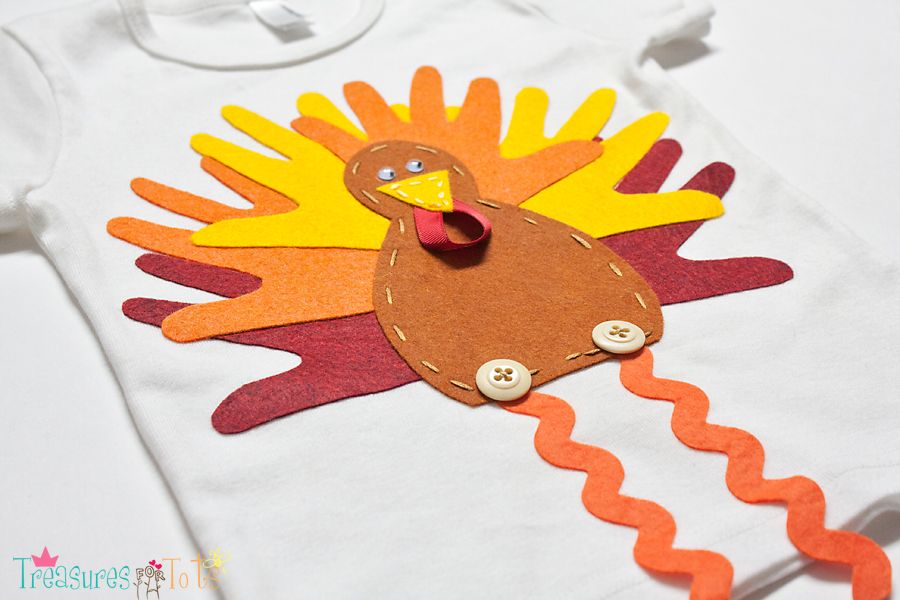
All done!
Update:
I forgot to put the glue I used in the list of materials picture.
I found this at Hobby Lobby for only $3.49.
It worked very good, it's cheap, dries quickly and bonds permanently without heat and can be washed.
So far I like it better than the liquid stitch I used previously, but I still have to try the wash test to be sure.

Have Fun!!


IhookedupwithHoHlamespiceWhat I'm Making Monday
Making Monday Marvelous Linky Party


StumbleUpon.com

Monday, March 29, 2010

Serenity's Little Crochet Purse

Serenity's little voodoo dress was designed and sewn by courtneycourtney.
I crocheted the little purse and made the pretty matching butterfly clippie!


This is a very easy project - perfect for beginners!


Materials needed:
Clover Wonder Knitter (or Knitting Nancy)
Size I crochet hook
2 skeins of cotton yarn (I used Sugar 'n Cream)
Yarn needle
Buttons
Felt (optional)
bits and pieces of different colored cotton yarn (optional)


Body:
Start off by doing a Foundation Single Crochet 6" wide. Futuregirl has the best picture and video tutorial I've ever seen! She breaks it down step by step and makes it so easy to learn.


Here's my finished 6" wide FSC piece.

*Chain 1, turn, sc in each sc across*. Repeat from * until the piece measures 13" long.


(chain 3 counts as 1 dc)


Chain 3, turn, dc in each sc across.


Chain 3, turn, dc in each dc across.


Chain 3, turn, dc in the next 3 dc, skip 1 dc, chain 2, dc in the next dc and in each dc across until the last 5 dc, skip 1 dc, ch 2, dc in the next 4 dc.


Chain 1, turn. sc in the next 4 dc, 1 sc in ch-2 space, sc in each dc until the next ch-2 space, 1 sc in ch-2 space, sc in next 4 dc.


Chain 1, turn, sc in each sc across.


Fasten off.


Strap:
I used the Clover Wonder Knitter to make the strap for Serenity's purse. But there's no need to go out and buy one. The following directions are for crocheting the strap instead of using the WK.


FSC about 3" wide.


*Chain 1, turn, sc in each sc across*. Repeat from * until the handle is as long as you want it. Fasten off.


Assembly:
Your finished piece should measure around 15" long. Fold the bottom piece up until the piece measures about 9" long.


Using the yarn needle, whip stitch both sides, and then attach the strap along the sides. Turn the purse inside out.


Close-up of the work I did on the little purse:


Sew on the buttons and any other embellishments that you'd like. On Serenity's multicolored purple purse, I attached a little felt bird and did a very simple embroidery stitch using some small pieces of cotton yarn. I got the idea to embroidery on the purse from Futuregirl - she makes some of the prettiest embroidered crochet handbags! She even offers the pattern for her awesome handbags for FREE!

That's it! Very simple.

If you don't know how to crochet, check out the tons of helpful videos on YouTube! It's not that hard - I promise!


While you're here, check out my other tutorials too!


Have fun!

StumbleUpon.com

Tuesday, January 26, 2010

Felt Flower & Heart Headband Tutorial


I bought a felt flower headband from Target this past weekend for Serenity. It's cute - but it was $4 for one headband! I figured I could make one just as cute - but for a lot less!

So tonight I used one of Serenity's headbands, a few small pieces of felt I already had, and less than 15 minutes later I had a very pretty new flower headband for Serenity - and it didn't cost me a single penny!

Here's a quick step-by-step how I did it!

Materials needed:
felt
pins
headband
button (and/or other embellishments)
embroidery floss
embroidery needle
scissors
glue gun & glue sticks
flower template (download here)


Cut out all the flowers and 2 leaves. Embroidery a running stitch along edges of both leaves. Using embroidery thread, attach the button to the smallest flower and add a few embroidered stitches on it too (or on all the flowers). Arrange the flowers and leaves, and then hot glue them together.


Cut a small strip of felt about 1 1/2"l x 3/8"w (or so). Hot glue the flower off-centered on the headband. Then hot glue the strip over the headband and to the wrong side of the flower. Refer to the pictures:


All done! Very cute!
So many different creative possibilities too!
The headband I bought from Target is on the right.


I added some hearts to the template too!
To make a pretty Valentine's Day accessory:

1. Cut out pink and red felt hearts.
2. Embroidery a running stitch around the edges.
3. Sew a button or glue a jewel to the smallest heart.
4. Stack them all on top of each other and glue in place.
5. Attach (like I did above) to a red or pink headband!

Simple and sweet!


Have fun!


Photobucketmonogram


 IamOnly1Woman MakingSumo's Sweet Stuff
DIY Day @ ASPTLMake it Yours @ My Backyard EdenPhotobucketCreations by Kara http://www.thethriftyhome.commonogramBCD Show and tellGet your craft on Thurs.Creative Crafts by FloralShowers


StumbleUpon.com

Friday, January 22, 2010

Blog Swap w/Fireflies and Jellybeans: Cute Apron & Felt Cookies!

Hello Treasure for Tots Readers! I am so excited to be blog swapping with Angie today... she had the CUTEST stuff for little ones- right!?!
Let me introduce myself!
I am Fawnda from Fireflies and Jellybeans a little DIY blog that I co-author with my best friend Jeannine.


I am a mom to a 2 year old son (Who is the joy of my life!) I am a part time math tutor for High School math and I LOVE to create!


I love sewing, paper crafts, re-purposing and generally anything crafty!


I love to take on a new project and share my knowledge with others!


Today I have a cute project for you. A cute little apron and cookies for your little baker!

Here is what you will need:
A place mat
Ribbon
A water soluble pencil
Sewing machine (with sewing tools such as scissors, thread, pins etc...)
1.) Fold the top corners down on the WRONG side of the place mat and pin.
2.) sew a 1 to 1 1/2 inch seam on the folder side of the corner. You are making a casing for your ribbon. Repeat on the other corner


3.) Flip the place mat over to the RIGHT side and fold up the bottom edge about 4 inches and pin. (I sewed ribbon on the bottom edge -the back side so that when I folded it up you could see it)


4.) With a water soluble pencil (or something washable) make vertical lines at 2 inches, 4 inches, 8 inches and 10 inches. This is to make our pocket with little slots to hold our utensils. (click on the picture to see it better.)


5.) Top sew your pocket on the edges and on the lines that you marked.

I also sewed ribbon across the top part of the apron for a little extra decoration... this is optional!

6.) Cut your ribbon long enough to go over the head and be able to tie about the back, I cut mine about 4.5 feet. Attach a safety pin to one of the ends

7.) feed the safety pin into your casing.

up and out of the top and back down the other side.


Fill it with some baking utensils and you have a CUUUUUTE gift! Use Bryssy's Freezer Paper Stencil tutorial to personalize it!


Want to make some Cookies to go along with it?
Here is what you will need:
Felt (cream, light brown, dark brown, pink and red)
Needle and thread
Stuffing
Sewing machine (optional)
1.) Cut your felt. Cut the cookie shapes (the great thing about most cookies is that they are not perfectly round!) You need 2 pieces for the cookie. The frosting is just a waving blob - you only need one piece for that. and the chocolate chips are just little rectangles.

2.) Hand sew on the chips and the frosting to one side of your cookie.

3.) Place cookie pieces RIGHT sides together and sew around the edge leaving a 1-2 inch opening to turn right-side-out and stuff.


4.) Flip your cookie right-side-out and stuff and top sew the opening closed.


You could also hand sew around the edge if you prefer that! I used a blanket stitch...I learned how to make the blanket stitch from YouTube. I just typed in "blanket stitch" in to the search line and got a ton of videos... you can learn anything on the Internet!


Serve them up on a cookie sheet!
It would be SUPER cute to cut your cookies in heart shapes for Valentines day!


Be sure to stop by Fireflies and JellyBeans for some fun ideas!

Thanks Angie for letting invade your blog today! It was so fun!

StumbleUpon.com
Related Posts with Thumbnails