Sunday, January 10, 2010

GWMG: Flowers & A New Start!


Okay we are totally addicted to Kim's GWMG kits.
The last kit Serenity and I did together produced some very pretty flowers.
Serenity was so excited too!


It was time to start over and dispose of the old plant - it got really tall!
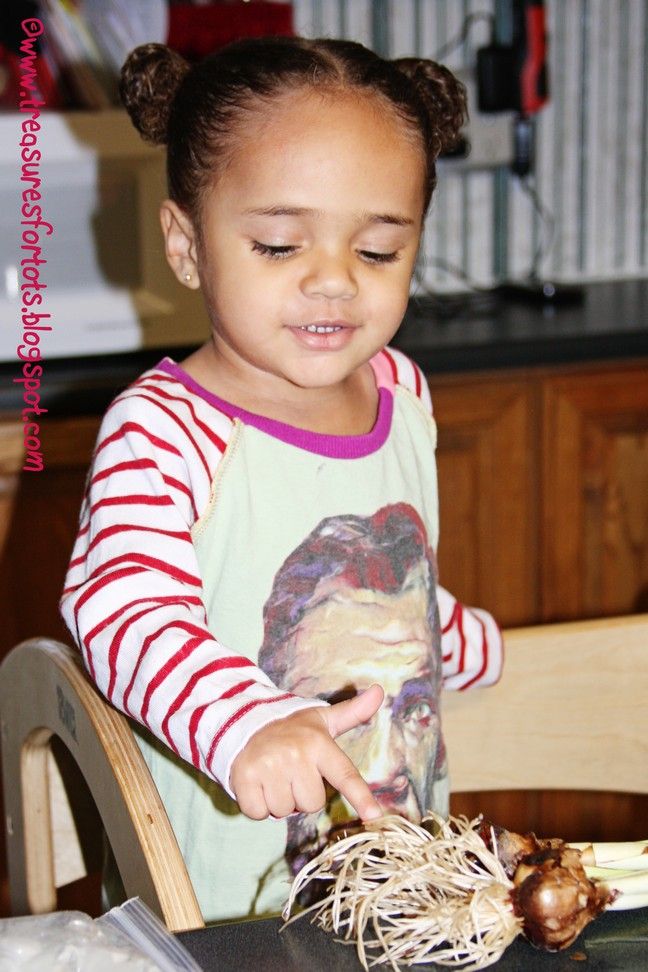
Serenity got to touch the roots and I explained to her how they helped the plant to grow and make flowers.
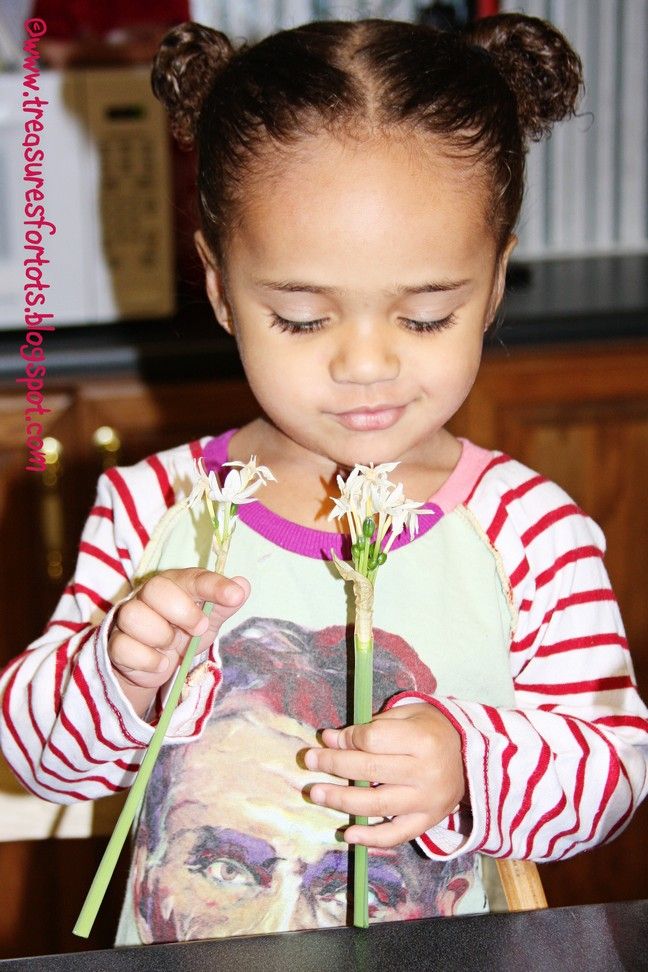
Then I cut the pretty white flowers off the plant so she could hold and smell them - she thought it was lots of fun!


We started another kit immediately after this one.
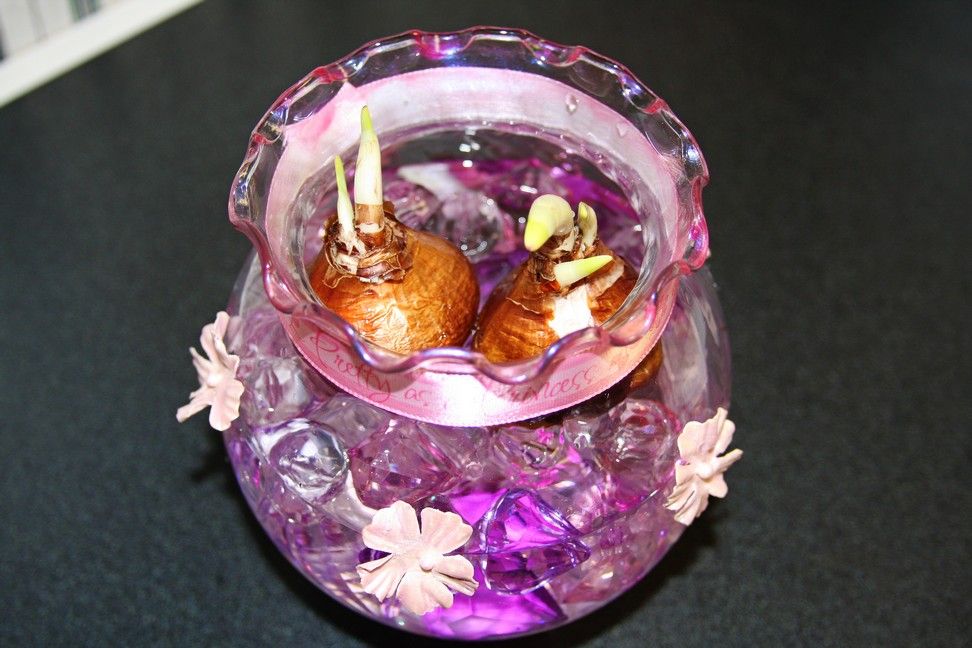
I bought the last paperwhite bulb (a Princess!) kit in Kim's Etsy store, and we are hoping to get more flowers!
Soon Kim will have her Spring/Summer kits available.
Remember to stay tuned to her Etsy store and her Facebook Grow With Me Gifts fan page for more details!


On to the next kit:

I washed the pretty "jewels" from our last kit, and Serenity put them in the new vase and arranged the bulbs.
She's getting to be an old hand at this!
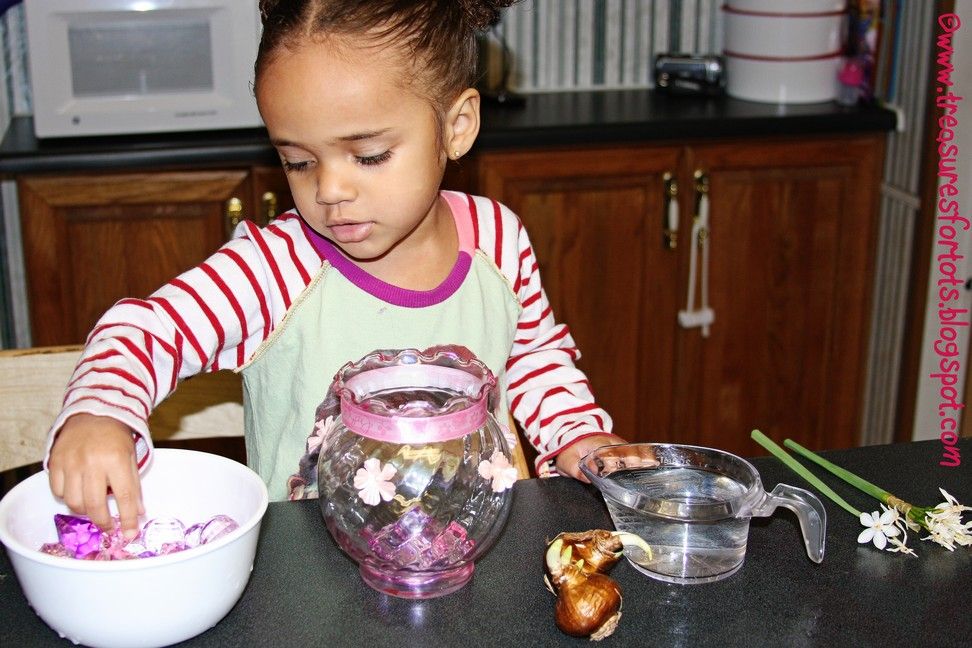
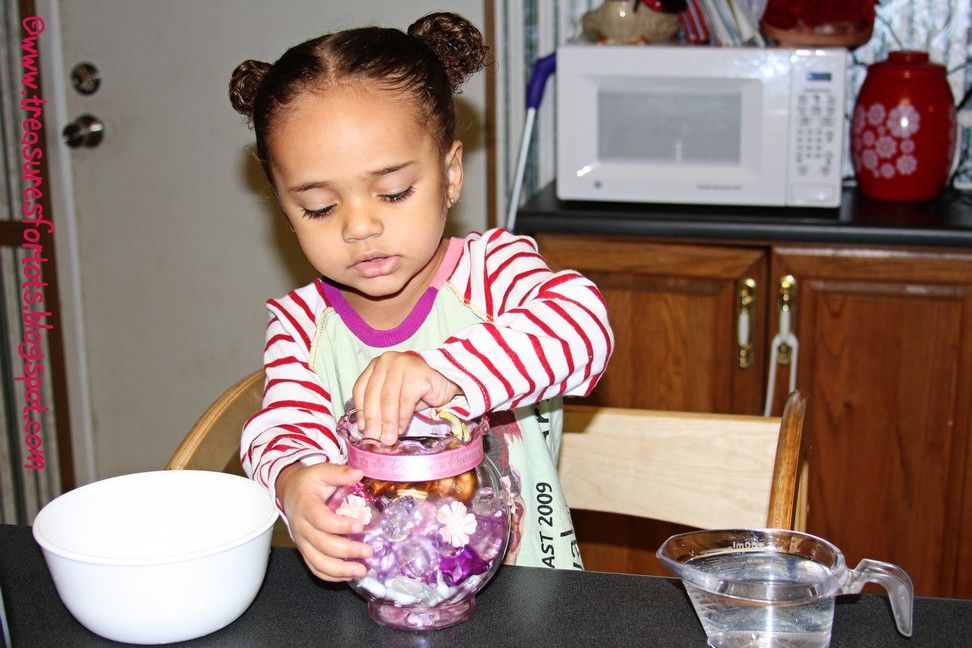

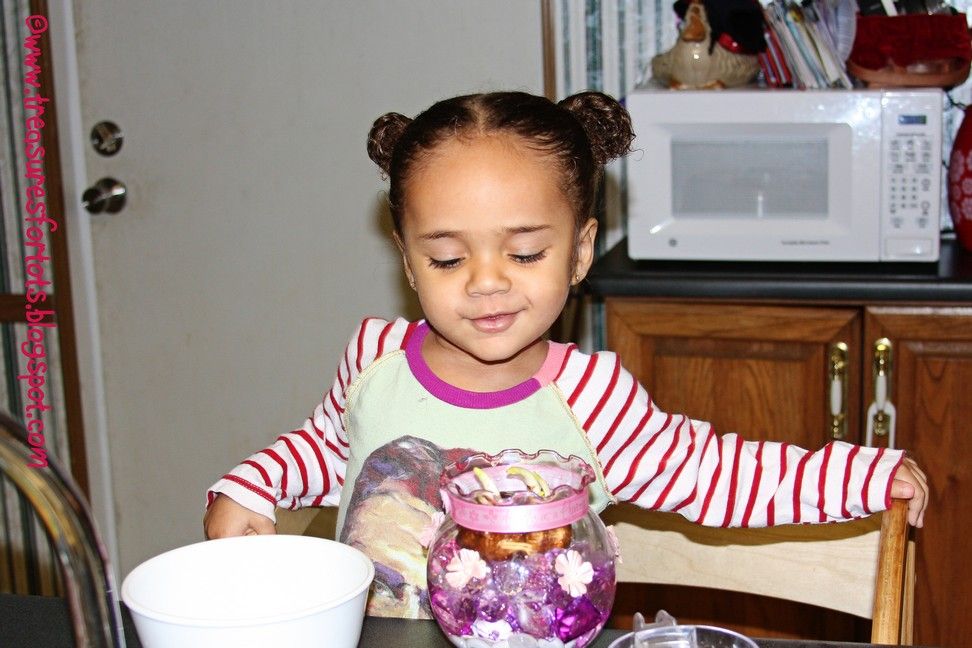
Then she watered her new plant and sat back and admired her handiwork!
She's always so proud of her plants, and taking care of them gives her a huge sense of accomplishment!
I just love that!
Maybe she'll have a green thumb when she grows up?!
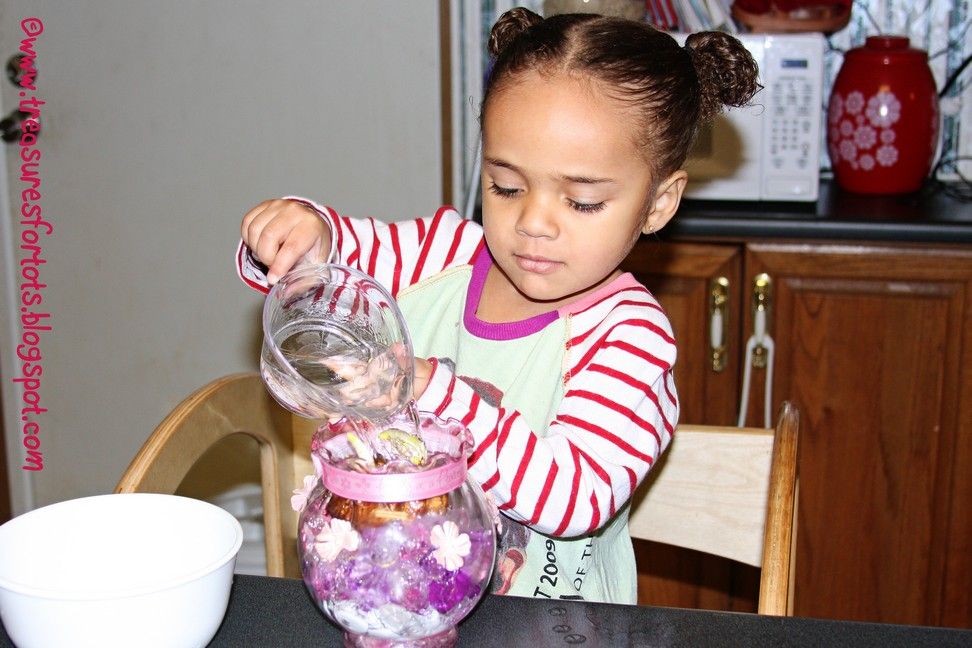
I totally recommend the Grow With Me Gift kits - and your child will enjoy putting one together just as much as Serenity does.
But you'll have to wait until Kim lists her new Spring/Summer kits since she's completely sold out of all her Fall/Winter kits.


POST-IT-NOTE:
And oh yeah, you know that's a courtneycourtney Serenity is wearing!!
It's an Abe Lincoln dress - very adorable!
I'll post more pictures of the dress when I get some full-length pictures.
To see more pictures of Serenity wearing CC dresses, check out my posts here.

AND...

Head over to Courtney's blog today and learn how you can win a FREE CC original for your little girl!!


Have fun!

StumbleUpon.com

Friday, January 8, 2010

Valentine Felt Bracelet/Cuff


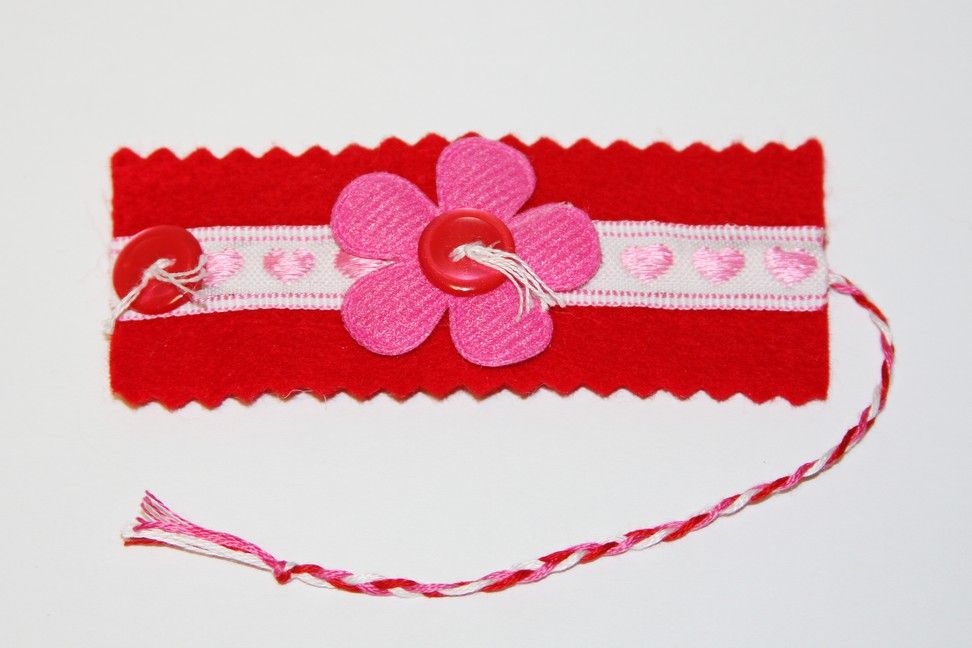
I whipped up Serenity's sweet bracelet in no time.
This is a very easy little project to do with your kids.
It didn't cost me a penny to make either - I already had all the materials!
Help your kids to make several so they can hand them out to their friends on Valentine's Day!


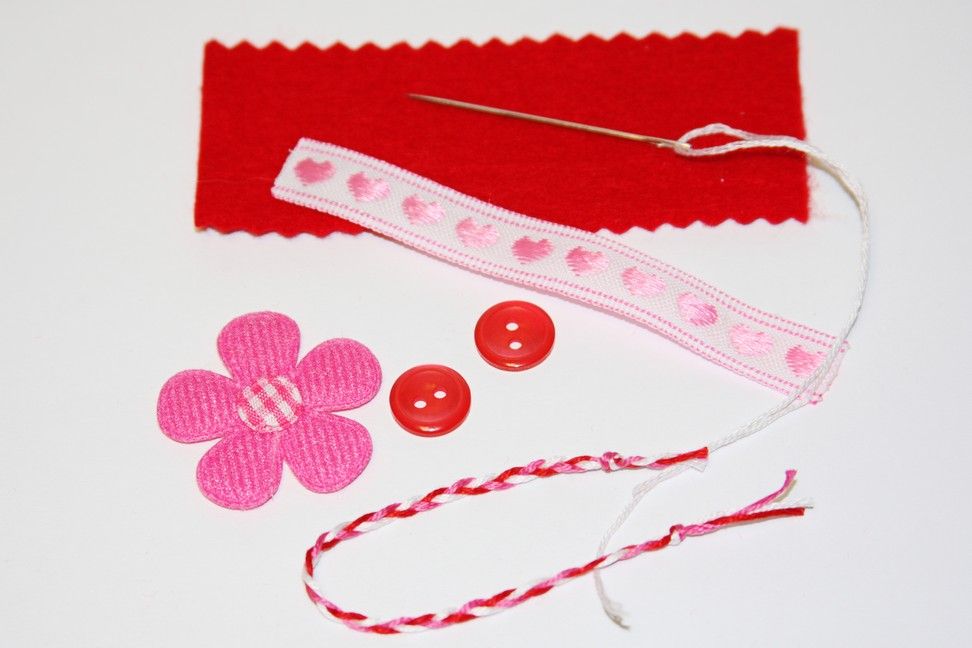
Materials needed:
3 3/4"l x 2"w strip of felt (or whatever length and width that fits your child)
2 buttons
felt applique
3 3/4" piece of ribbon (or the same length as the felt)
5" piece of braided embroidery floss
needle & a bit of embroidery floss
glue gun & glue
pinking scissors
lighter or fray check
(sorry, the last few items aren't pictured)


1. Pink the top and bottom edges of the felt - my piece is 1 1/2"w after pinking.
2. Apply fray check or use a lighter to seal the ends of the ribbon.
3. Hand sew a button to the felt flower applique.
4. Center the end of the braid on one side of the felt piece (on the top), and then hot glue it down.
5. Hot glue the ribbon down the center of the felt (covering end of the braid).
6. Hand sew a button on top of the ribbon - opposite the braid.
7. Hot glue the flower applique to the center of the bracelet.

All done!
I did this really quick, mostly hot gluing all the pieces together.
But I think it would look very pretty with a little hand embroidered stitching along the edges too.


Serenity liked her new bracelet so much, she asked me to make another one for her BFF Cobee Lynn, and it made me realize these would be super fun Friendship bracelets for Valentine's Day - or any day!


I hope y'all liked this quick little craft!

POST-IT-NOTE: Just in case y'all were wondering, I bought Serenity's shirt from Em Tanner Designs!

POST-IT-NOTE 2:I would like to give a HUGE thank you to Bobbityboo and Someday Crafts for linking this post!

Have fun!

monogramPhotobucket


Creative Crafts by FloralShowers http://www.thethriftyhome.comDIY Day @ ASPTLMakingDIY Day @ ASPTLBCD Show and tellgiveawaysSumo's Sweet StuffMake it Yours @ My Backyard EdenLINKPARTYBUTTON


StumbleUpon.com

Thursday, January 7, 2010

Thursday's Treasures: Week 4

Share your crafty ideas!

Welcome to another week of Thursday's Treasures!
All ideas, tutorials or crafting projects you've been working on are welcome!
You'll have until Saturday 12AM to post your links this week.
So don't forget to post anything crafty you've been doing!!


Check out some really cool ideas and tutorials that were linked last week:

Felt Candy Hearts Tutorial
via MiaMoo Designs


Remaking Play Food Boxes To Last
via Helping Little Hands


Thank y'all so much for sharing!!


Guidelines:

1. Click the "CLICK HERE" link below to add a permalink to your crafty project, idea and tutorial post - not your main blog. You can enter as many links as you'd like. However, NO links to Etsy or Ebay stores please!

2. Copy the HTML code for my feature button, and then add it to the
post or on your blog to spread the fun.

TREASURESFORTOTS


3. Don't forget to show a little love by leaving a comment too!


What a cool way to share tons of ideas and crafts across the Blogoshere and good way to promote your blog too!


All the links that get posted before the deadline will stay up indefinitely so you can always stop by to find them again!


Have fun!


StumbleUpon.com

Tuesday, January 5, 2010

Felt Valentine's Day Fortune Cookies


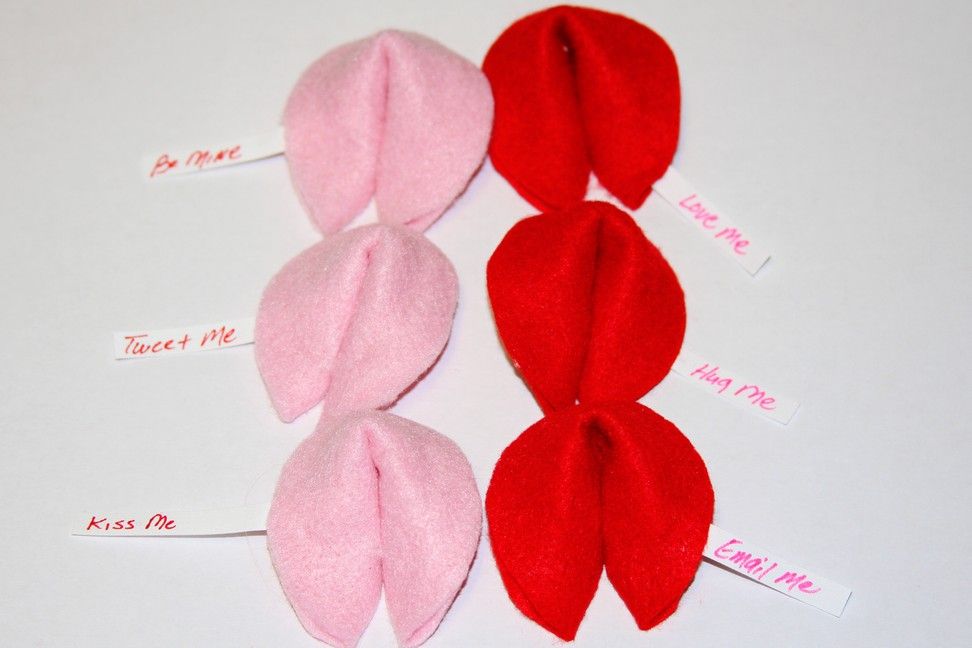
I made Serenity some felt pink and red fortune cookies for Valentine's Day tonight.
These are so quick to make (no sewing!), and cheap - it'll only cost you pennies!
Great little gifts for your kids to give to their friends too!

I found the Valentine's Day Chinese take-out box in the $1 section at Target.
One piece of craft felt was 29¢ at Michael's, and it's big enough to make 6 fortune cookies.

For a cute Valentine's Day gift:
Scrunch a sheet of pink and red tissue paper and put them in the take-out box.
Now put 6 red and 6 pink fortune cookies on top.
Total price?
Less than $2!

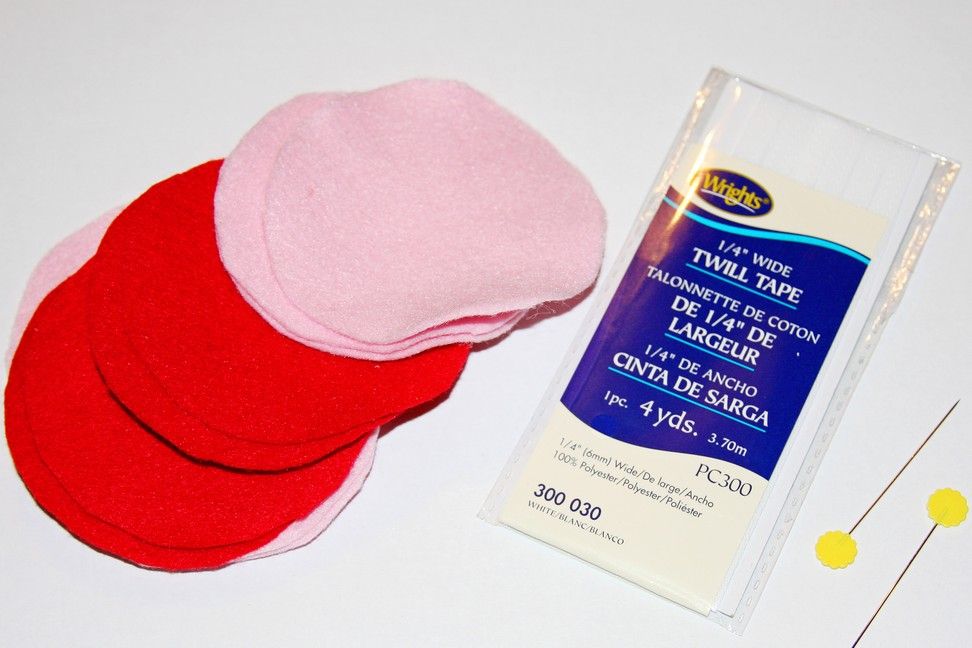
Materials needed:
1 1/2" red & pink felt circles
1/4" white twill tape
glue gun & glue stick
lighter or fray check
pins
(I pinned a circle template to the felt to cut my circles)
(Sorry - I've left a few things out of my picture!)


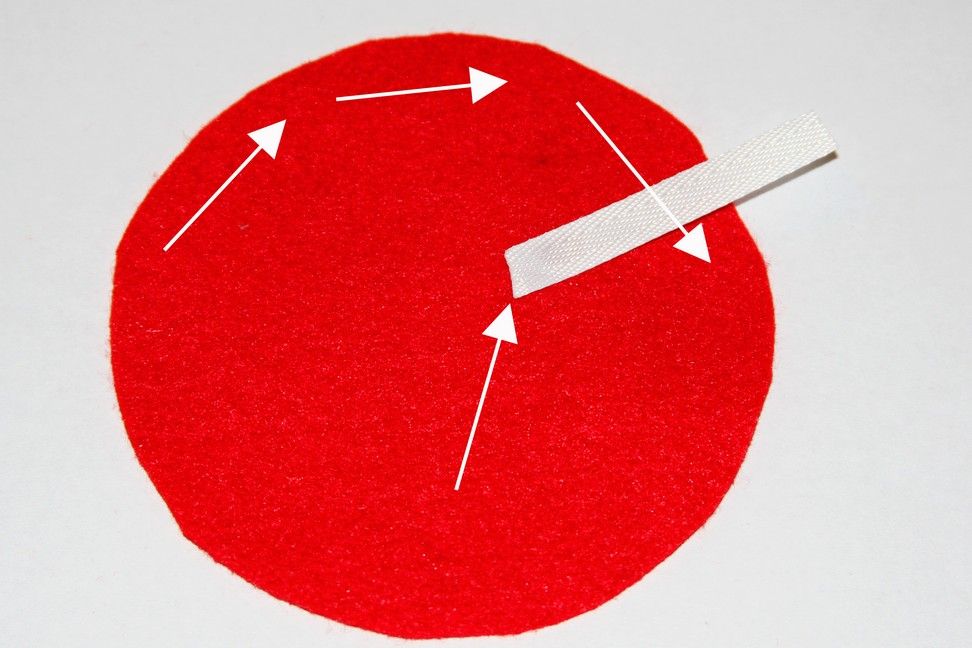
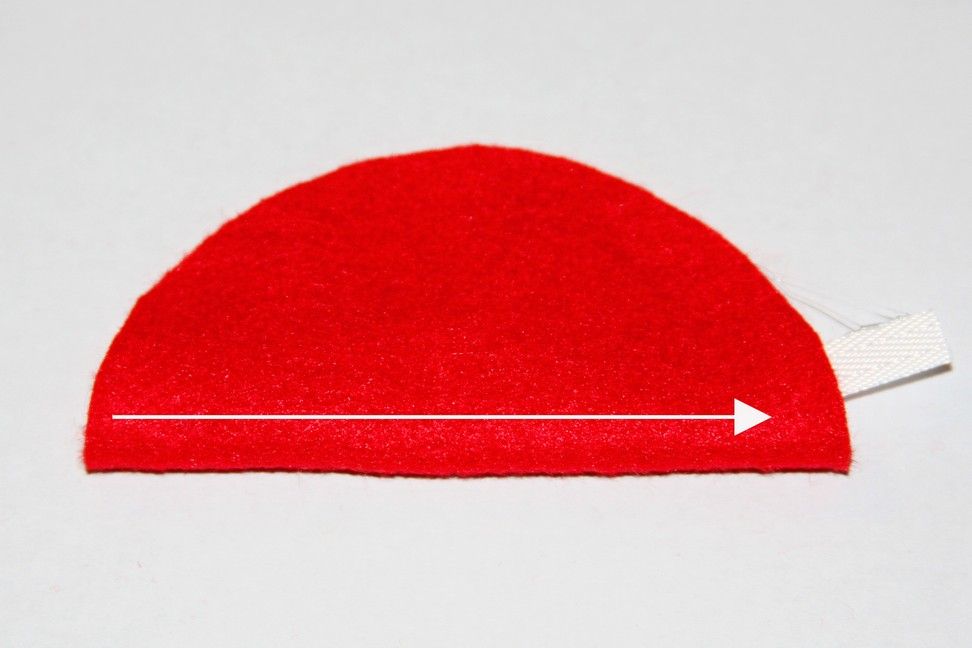
Cut pieces of twill tape around 1 1/2" long and apply fray check or use a lighter to seal the ends.
Glue the twill strip at a slant to the top half and kinda off to the side of the felt circle.
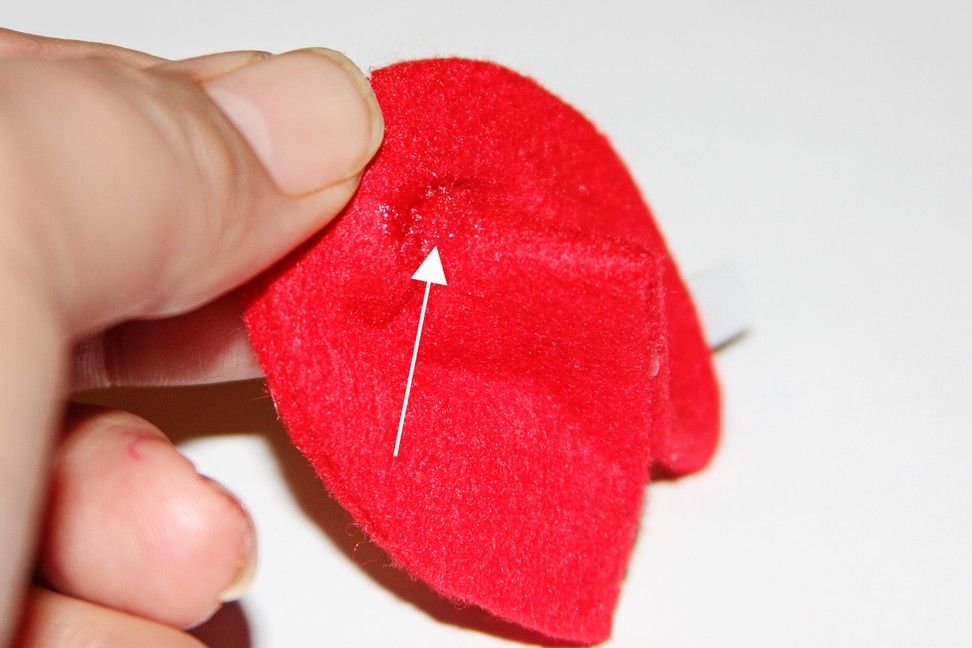
Next, apply a thin string of glue to the top part of the circle as shown by the arrows in the picture:


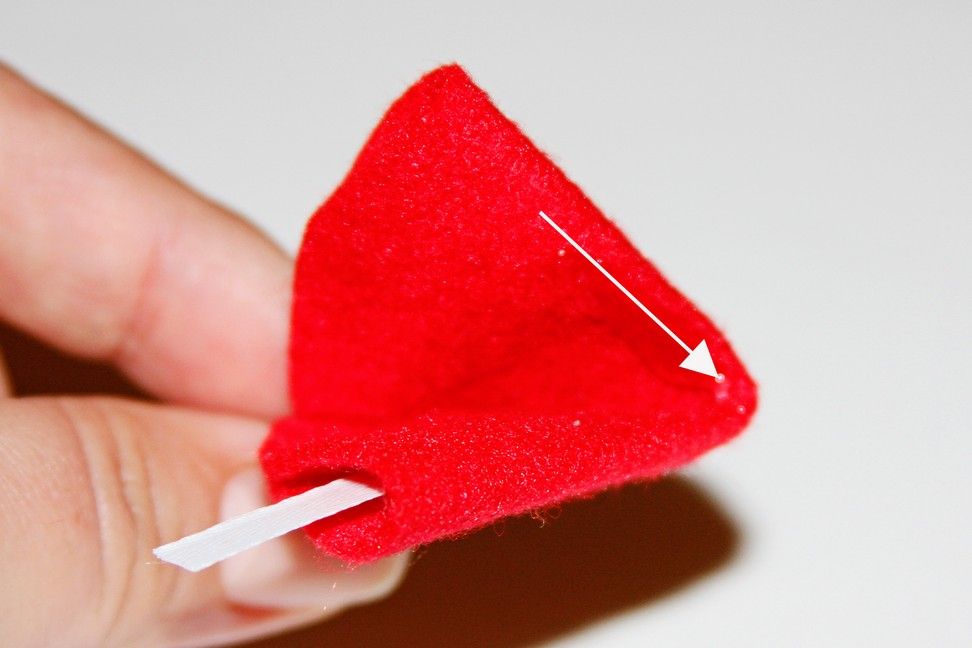
Fold the circle in half and pinch until the glue sets.
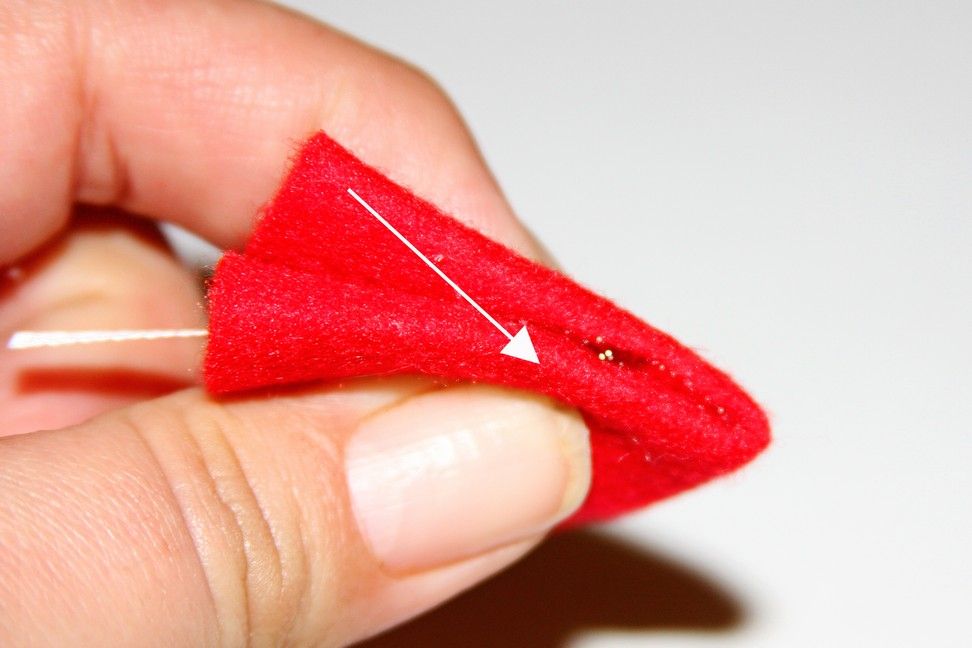
Fold again in half in the direction the arrow is pointing in the picture:


Add a strip of glue halfway down the inside of the fold. 


Pinch until the glue sets.
{I used a clothespin to hold it in place, and went on to the next cookie until I got to this step again. By then, the glue on the first cookie had set.} 


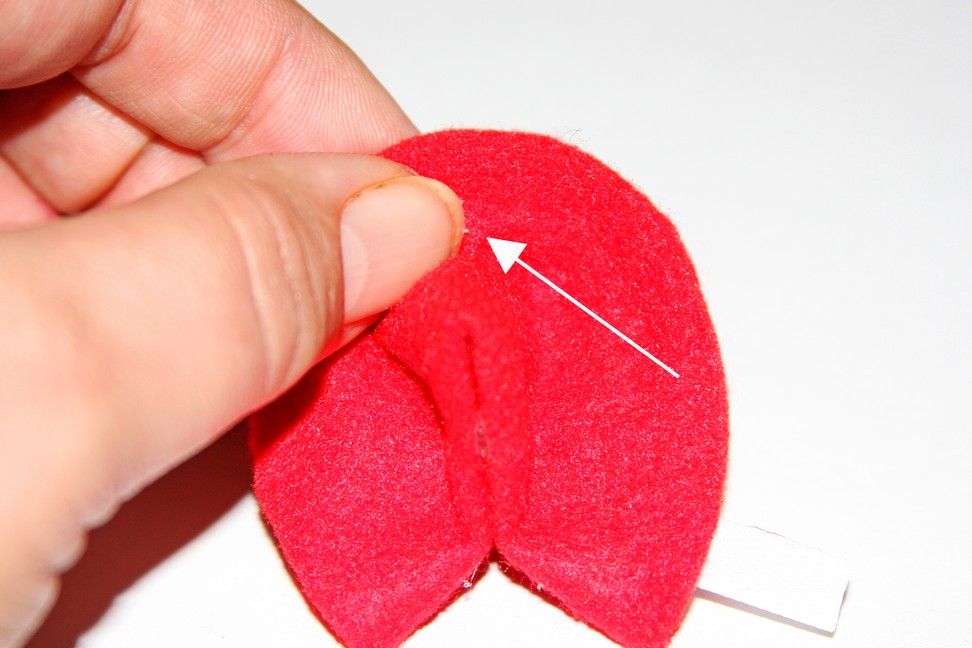
Holding the felt cookie just like I am in the picture, fold back the top.


Pull back the fold you just made, and add a dot of glue.


Pinch until the glue sets.


All done!


I hope y'all like my newest felt food!
I tried to make them as kid-friendly as possible - Serenity is three and still kinda rough with her toys!

Substituting the twill tape for some Valentine's Day ribbon would be really cute - I couldn't find any at Hancock today, but maybe I should check at Wal-Mart or Hobby Lobby.

Michael's had plastic Christmas take-out boxes on sale for 64¢. 
I bought a couple of red striped ones that could pass for Valentine's Day boxes, and they are more durable than the $1 ones I got at Target.

Or you can use Lit'l Brown Bird's Passion's Felt Chinese Take-Out Box tutorial to make your own Valentine's Day take-out box!

Also, using 1/4" red ribbon with the pink cookies and 1/4" pink ribbon with the red cookies would be beyond cute - don't cha think?!

UPDATE:
I used twill tape in the fortune cookies 'cause I was going to transfer little Sweet Tart Valentine candy sayings to them (just like you'd do to make your own clothing labels), but then I decided to just write them instead. 
Well that didn't work at all, the ink bled everywhere
Who knew? 
I've never used twill tape before, so I certainly didn't! 
I ended up leaving them blank 'cause I thought that was cute too.

Anyway, tonight I tried to print little sayings on some fabric sheets I already had - but after twenty minutes of trying to get ONE sheet to go through my printer, I finally gave up. 
I could've tried ironing freezer paper to the back of muslin, but since the fabric sheets wouldn't go through my printer, I figured that method wouldn't work either.

So I ended up just cutting the fabric sheets into 1/4" w x 2" l strips and wrote the Sweet Tarts sayings in pink and red ink - and that method ended up being the quickest and easiest to do!

Whatcha' think?


More felt foods I've made:
Pop-Tarts
Felt Bow-Tie Pasta
Felt Agnolotti Pasta
Felt Tortelloni Pasta and Tin
NO-SEW Felt Cheese & Spinach Ravioli
Felt Eggplant Spinach & Tomato Lasagna
I hope y'all like this latest felt-food addition!

Have fun!


StumbleUpon.com
Related Posts with Thumbnails