I wanted to show the process of brushing Serenity's hair everyday. One day I'll post a video - when I get a tripod or someone to hold my camcorder for me while I'm fixing her hair!
Brushing Serenity's hair is a little time consuming - but it helps so much to have good products to cut the time down it takes to get all the tangles out.
These are the four products I use pretty much everyday (you can read more about them on my Biracial Hare Care post)
Curly Q's Milkshake
Curly Q's Moist Curls Moisturize/Detangler
Tangle Teezer
Palmer's Olive Oil


I don't always use Palmer's Olive oil every day, it depends on how dry Serenity's hair might be that day. When I do use it, I start with about a quarter size amount and I concentrate on the ends of her hair. I'm very careful I don't use too much. When her hair is especially dry, I add about a dime size of Olive oil or Jojoba oil all over her hair after adding Milkshake to lock in the moisture.
Brushing Serenity's hair is a little time consuming - but it helps so much to have good products to cut the time down it takes to get all the tangles out.
These are the four products I use pretty much everyday (you can read more about them on my Biracial Hare Care post)
Curly Q's Milkshake
Curly Q's Moist Curls Moisturize/Detangler
Tangle Teezer
Palmer's Olive Oil
I don't always use Palmer's Olive oil every day, it depends on how dry Serenity's hair might be that day. When I do use it, I start with about a quarter size amount and I concentrate on the ends of her hair. I'm very careful I don't use too much. When her hair is especially dry, I add about a dime size of Olive oil or Jojoba oil all over her hair after adding Milkshake to lock in the moisture.
I like using Lavender Hair Mist I made too, but I tend to use that more to freshen up her curls.
I use the other three products every day. They are irreplaceable! If we're going somewhere, I like to Curly Q's Gel-les'c to hold Serenity's hair in place and help with the fizz, it works beautifully without weighing her hair down.
Okay here we go!
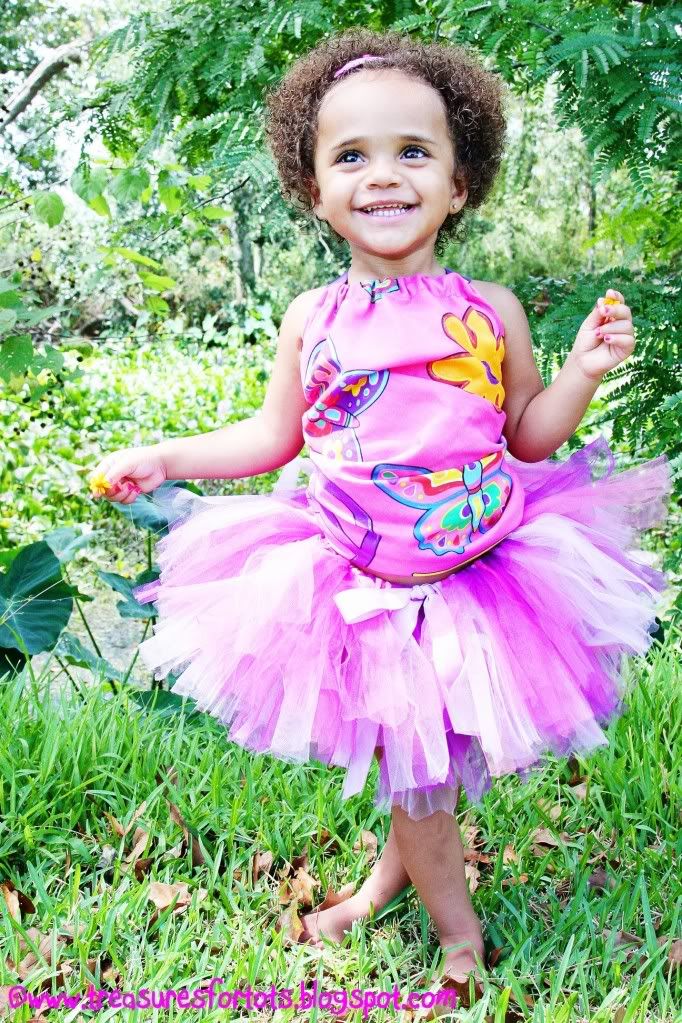
The first picture is how Serenity's hair looks after sleeping all night and before I've added anything to it. I didn't brush her hair before bedtime either, so it's especially poofy and tangley right now! It always reminds me of cotton candy when it looks like this - it feels so soft and fragile.
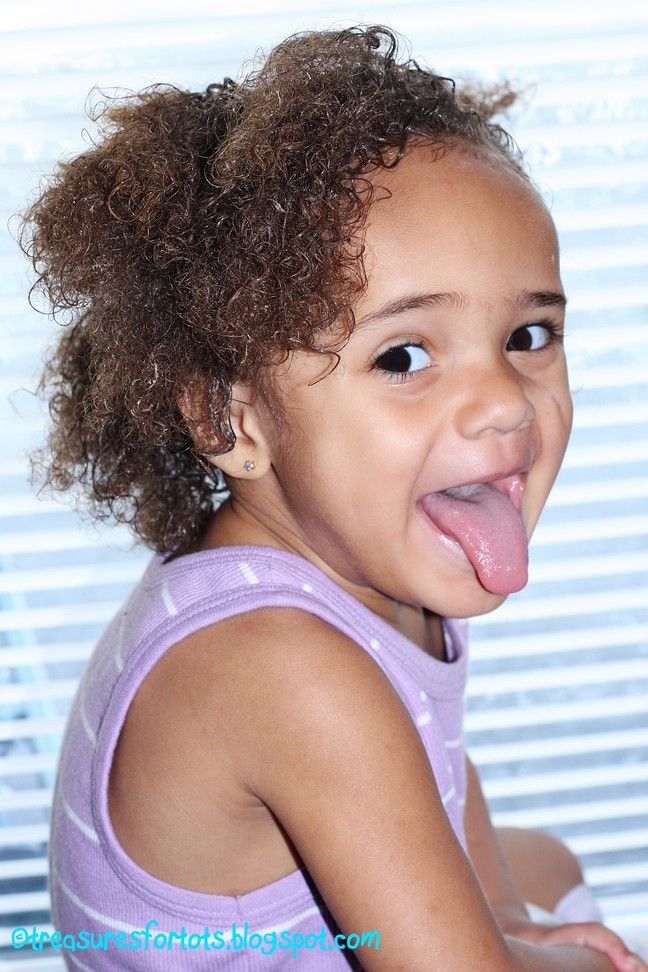
In the second picture I've added some Milkshake, Detangler, and a little Olive Oil on the ends. Look at her being silly!
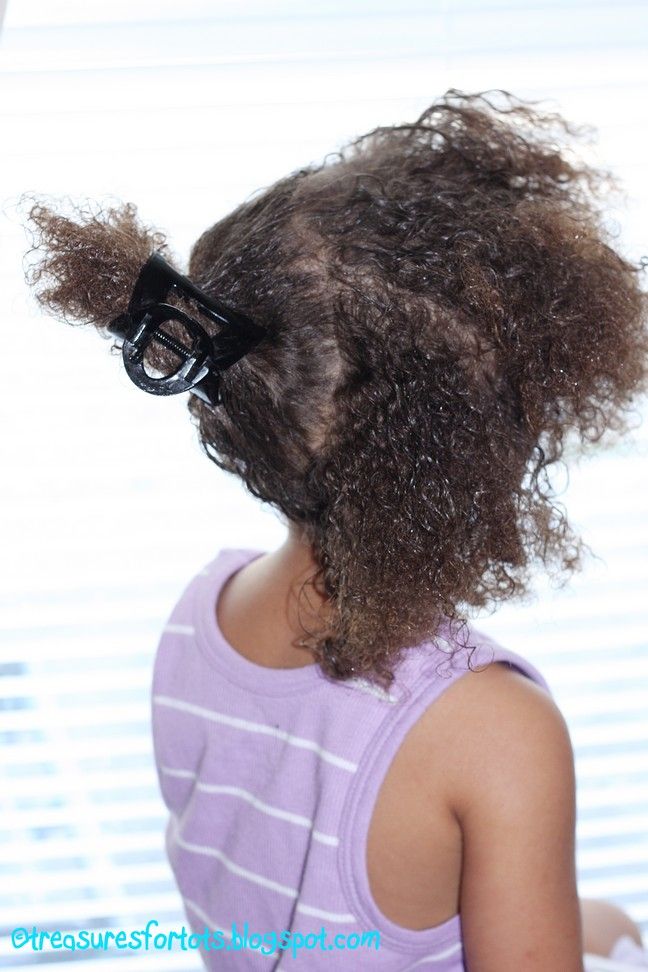
In the next two pictures, I've divided her hair in sections. Notice I'm not exact - I've just tried to be as careful as possible separating her hair.
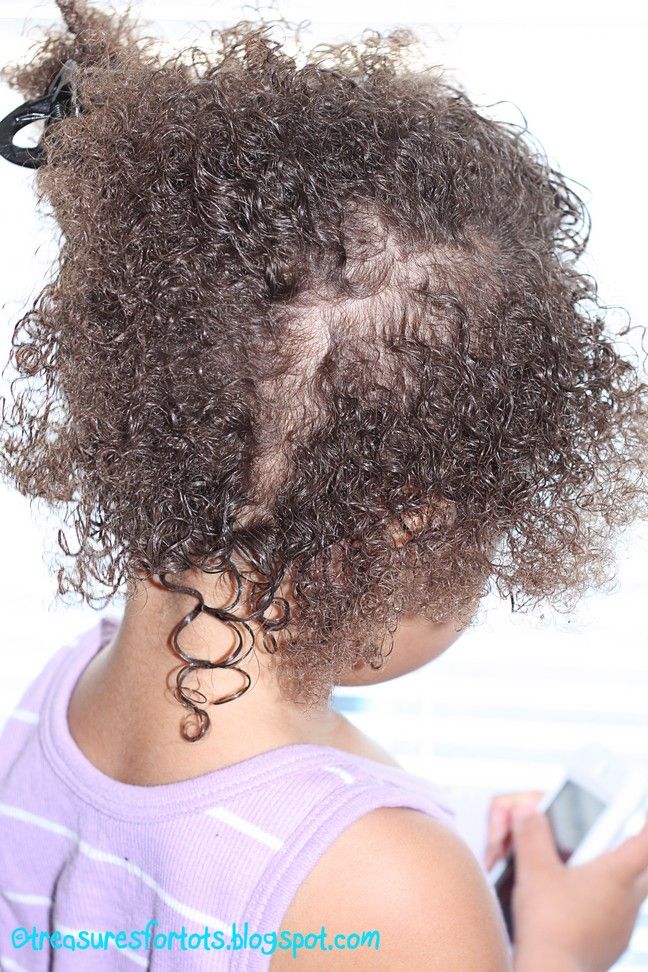
Then in the second picture, I've separated it even more - now I'll only be brushing small sections of her hair at a time. I used the Tangle Teezer to separate Serenity's hair into sections too, at this stage it works so much better than a comb.
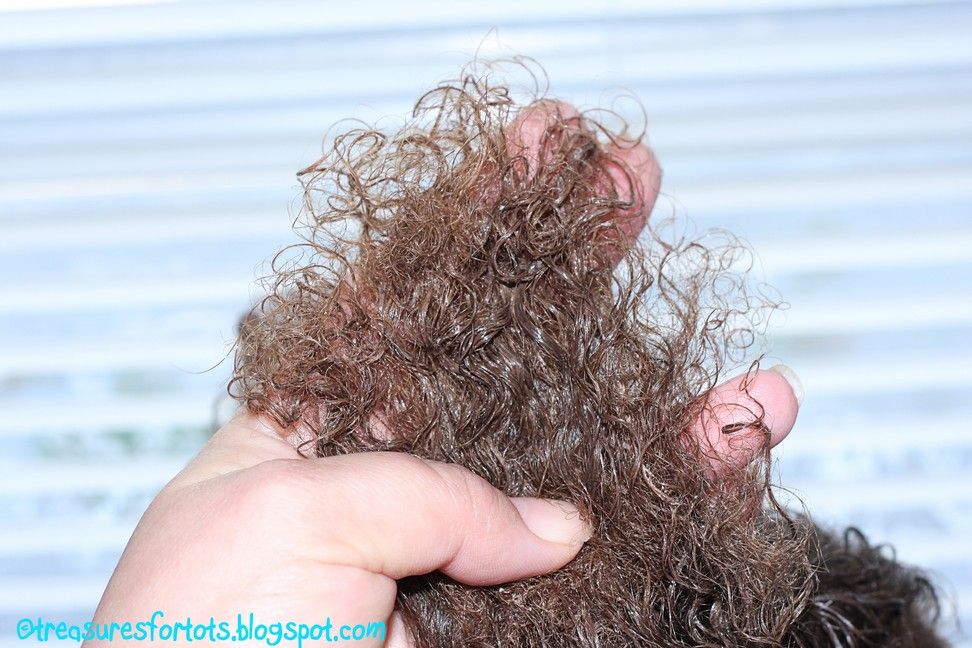
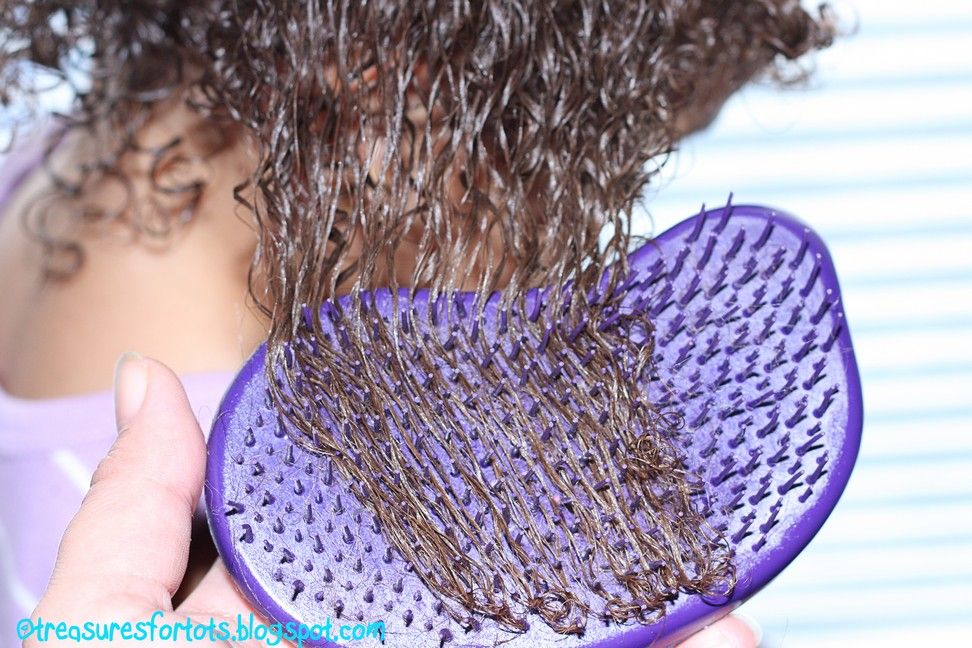
In the picture below, you can see how a small section of her hair looks before I've brushed it, and then how it looks after I've used the Tangle Teezer to get the knots out.
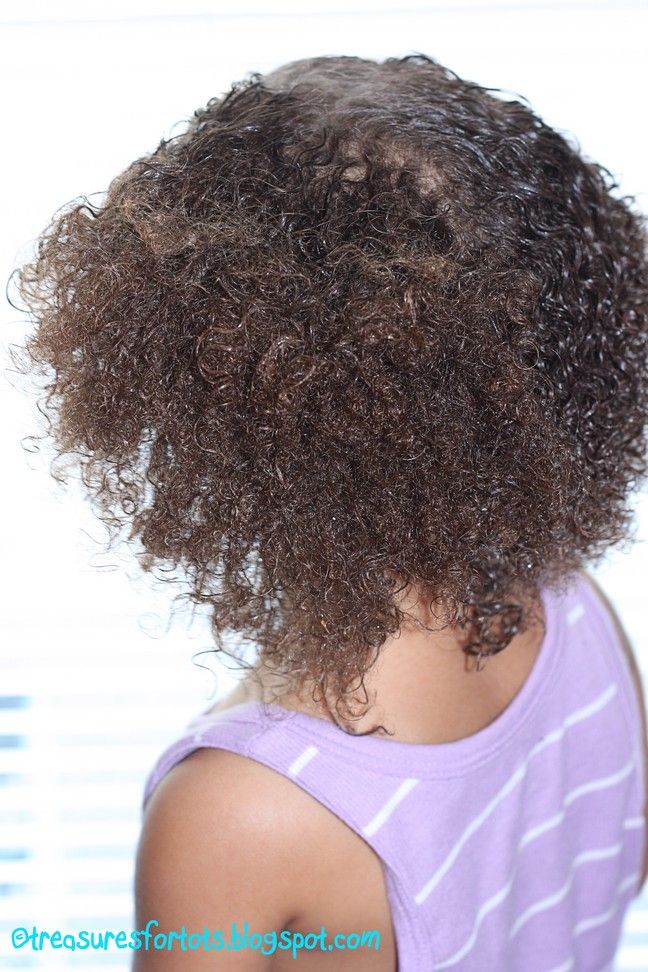
In the first picture below, one half of Serenity's hair is all brushed - no more knots! You could pass a comb through her hair now!
Do you see the big difference between the finished side and the unfinished side of Serenity's hair in the second picture?
I use the other three products every day. They are irreplaceable! If we're going somewhere, I like to Curly Q's Gel-les'c to hold Serenity's hair in place and help with the fizz, it works beautifully without weighing her hair down.
Okay here we go!
The first picture is how Serenity's hair looks after sleeping all night and before I've added anything to it. I didn't brush her hair before bedtime either, so it's especially poofy and tangley right now! It always reminds me of cotton candy when it looks like this - it feels so soft and fragile.
In the second picture I've added some Milkshake, Detangler, and a little Olive Oil on the ends. Look at her being silly!
In the next two pictures, I've divided her hair in sections. Notice I'm not exact - I've just tried to be as careful as possible separating her hair.
Then in the second picture, I've separated it even more - now I'll only be brushing small sections of her hair at a time. I used the Tangle Teezer to separate Serenity's hair into sections too, at this stage it works so much better than a comb.
In the picture below, you can see how a small section of her hair looks before I've brushed it, and then how it looks after I've used the Tangle Teezer to get the knots out.
In the first picture below, one half of Serenity's hair is all brushed - no more knots! You could pass a comb through her hair now!
Do you see the big difference between the finished side and the unfinished side of Serenity's hair in the second picture?
For the last step, I warm about a dime size of olive or jojoba oil in my palm and apply it all over her hair to help lock in the moisture.

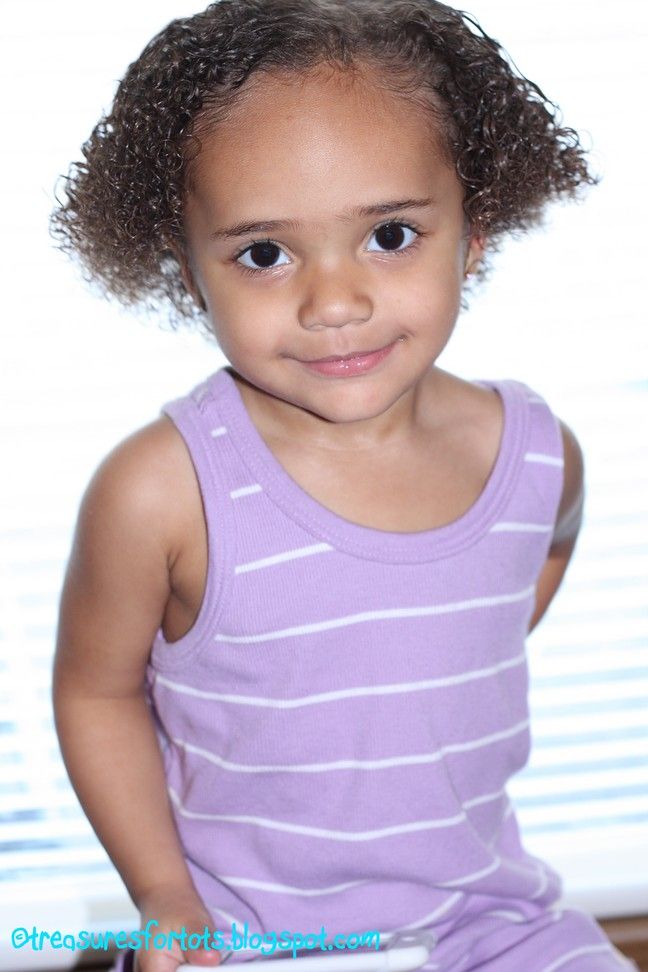
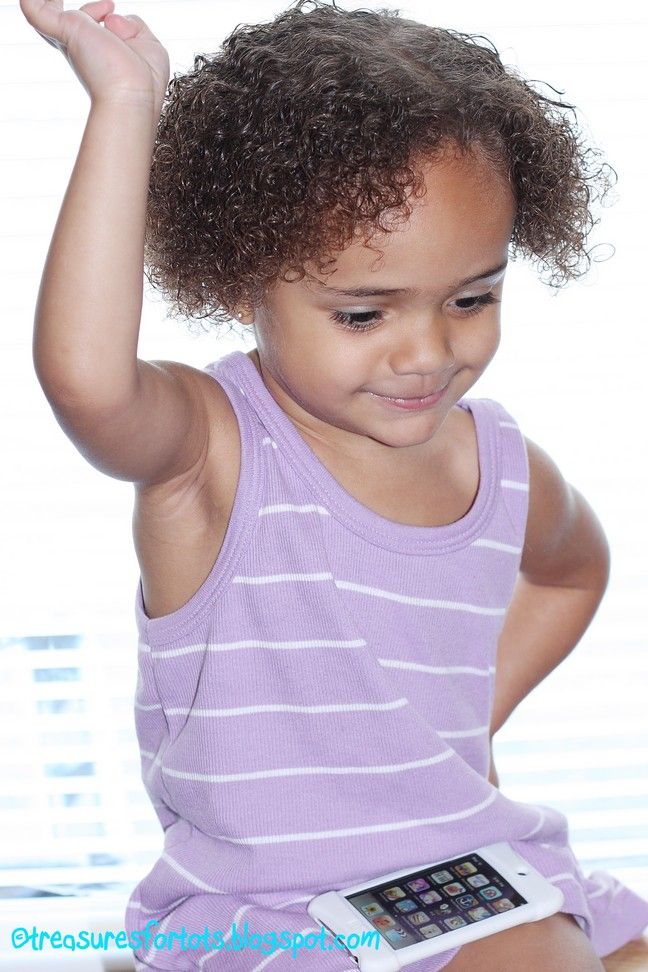
Now here's my baby with her hair tamed, and looking so pretty, being silly and cheesing for the camera!

I really need to get some video so y'all can see how awesome these products work AND hear - 'cause Serenity sits quietly the whole time I'm fixing her hair. It's like magic the way the Tangle Teezer tackles those knots! Sometimes we hit a few rough spots and she lets me know! But it's nothing like using a traditional brush or different products - believe me I've tried.
I've tested lots of different hair products in Serenity's hair - and I'll probably test more in future to see if they do a good job, but I keep coming back to Curly Q's since that line is so wonderful and the results can't be beat. And no other brush has ever given such amazing results like the Tangle Teezer!
Now here's my baby with her hair tamed, and looking so pretty, being silly and cheesing for the camera!
I really need to get some video so y'all can see how awesome these products work AND hear - 'cause Serenity sits quietly the whole time I'm fixing her hair. It's like magic the way the Tangle Teezer tackles those knots! Sometimes we hit a few rough spots and she lets me know! But it's nothing like using a traditional brush or different products - believe me I've tried.
I've tested lots of different hair products in Serenity's hair - and I'll probably test more in future to see if they do a good job, but I keep coming back to Curly Q's since that line is so wonderful and the results can't be beat. And no other brush has ever given such amazing results like the Tangle Teezer!
While you're here, check out my other tutorials too!
Have fun!


Have fun!