I've been wanting to make one of these ever since I saw one like it over at Dollar Store Crafts and Trey and Lucy!
Someday Crafts has a really cute version too!
I sewed my apron kinda different though.
Here's how:
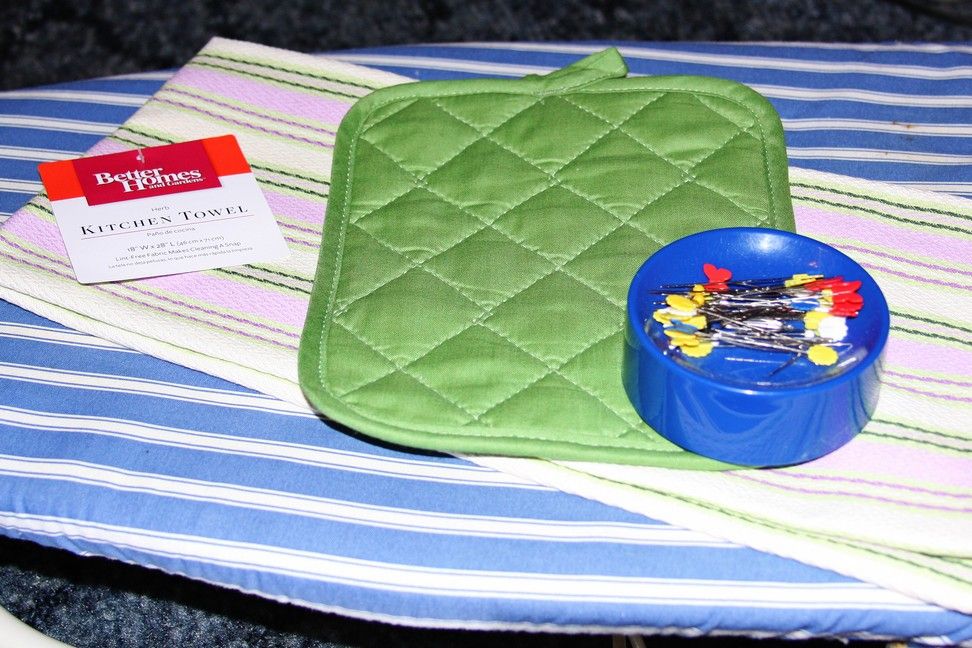
Materials Needed:
Dishtowel - 18"w x 28"l ($3.50 @Wal-Mart)
Potholder (2/$1 @Wal-Mart)
pins
hem gauge or sewing gauge (I forgot to add it to the picture!)
seam ripper (I forgot to put it in the picture too!)
Turn the towel sideways, and fold it in half. It'll measure 14"w x 18"l.
Cut off a 2"w strip from the top of the towel.
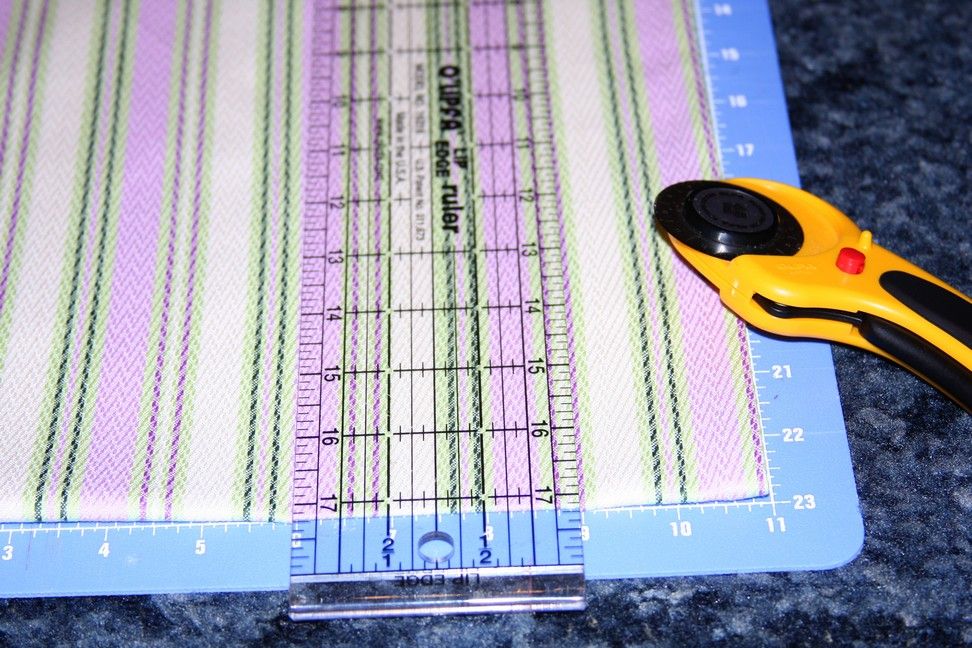
Then cut a 4"w strip.
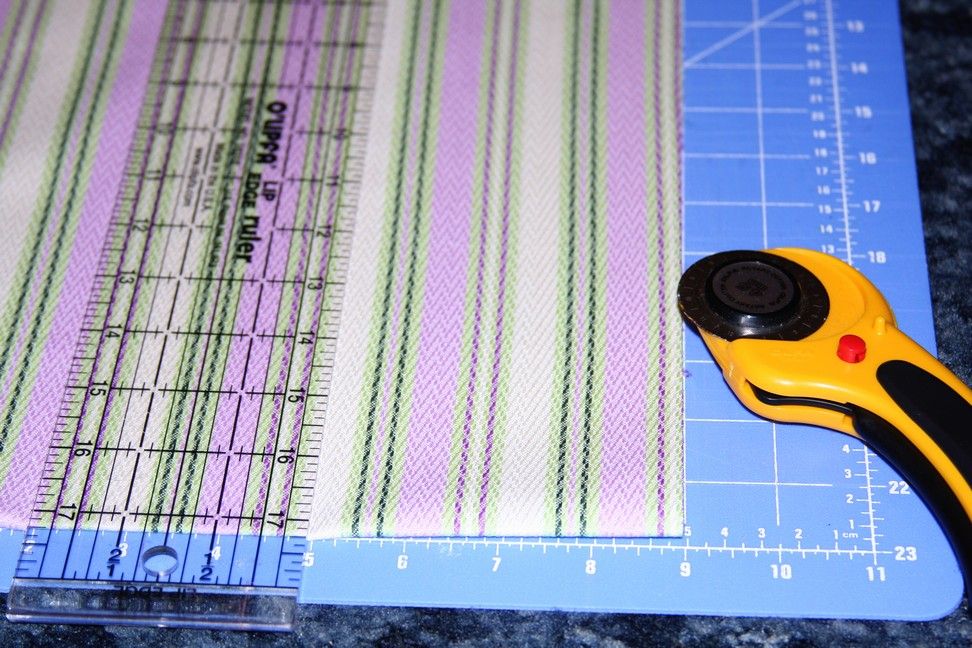
Your towel should now measure 28"w x 10"l - unfolded.
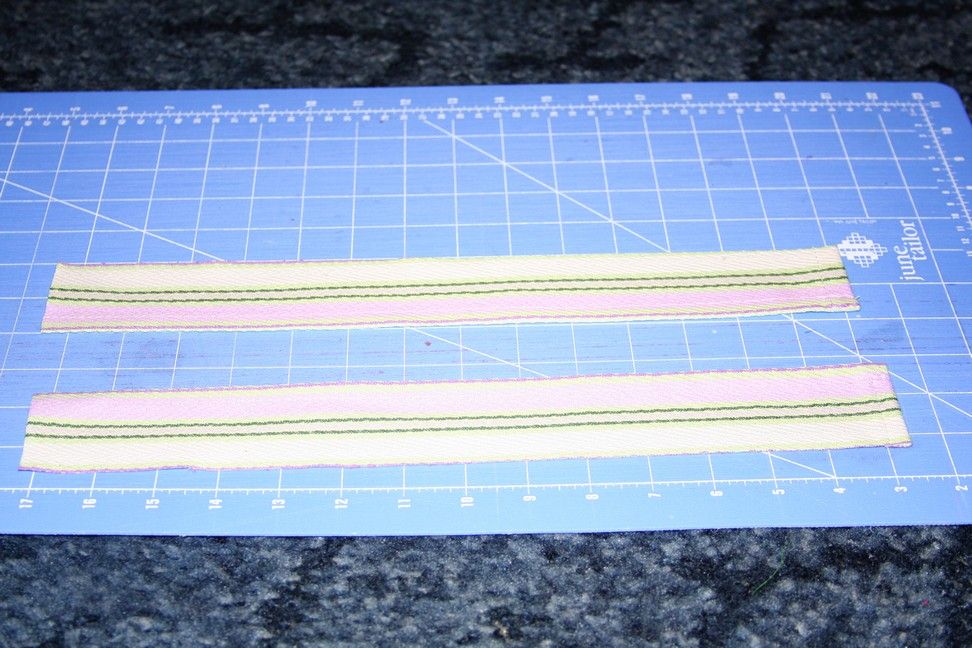
Cut your 2" strip in half, then set aside for now - these will be your neck straps.
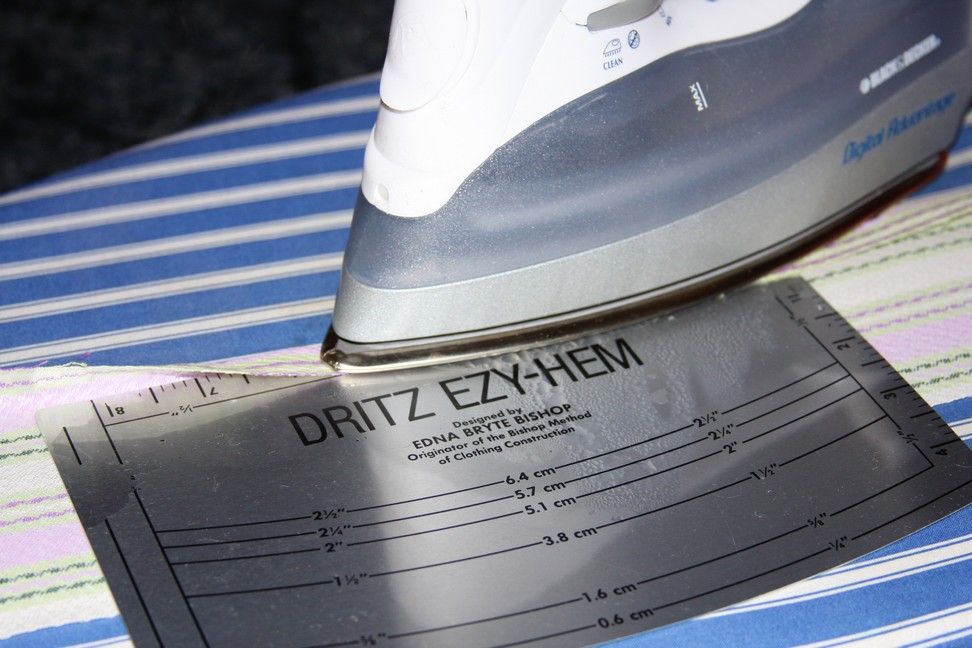
Lay the 4" piece with the right side down.
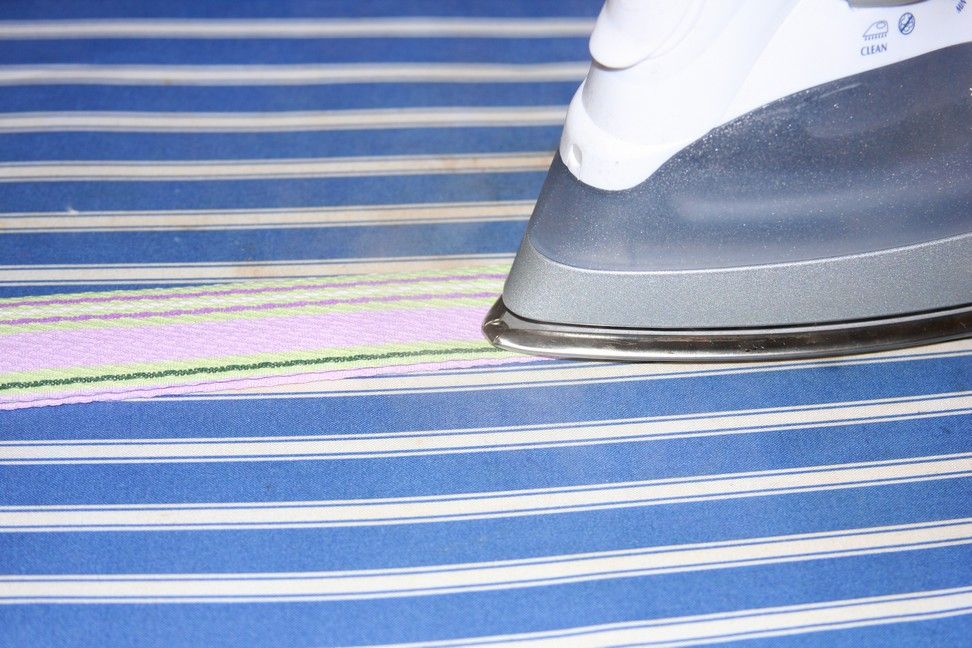
Fold over the raw edge 1/2" on both sides (use your hem or sewing gauge), and iron.
Fold the piece in half and iron again.
Fold the piece in half (side to side) to determine the center - mark with a pin.
This will be the waistband.

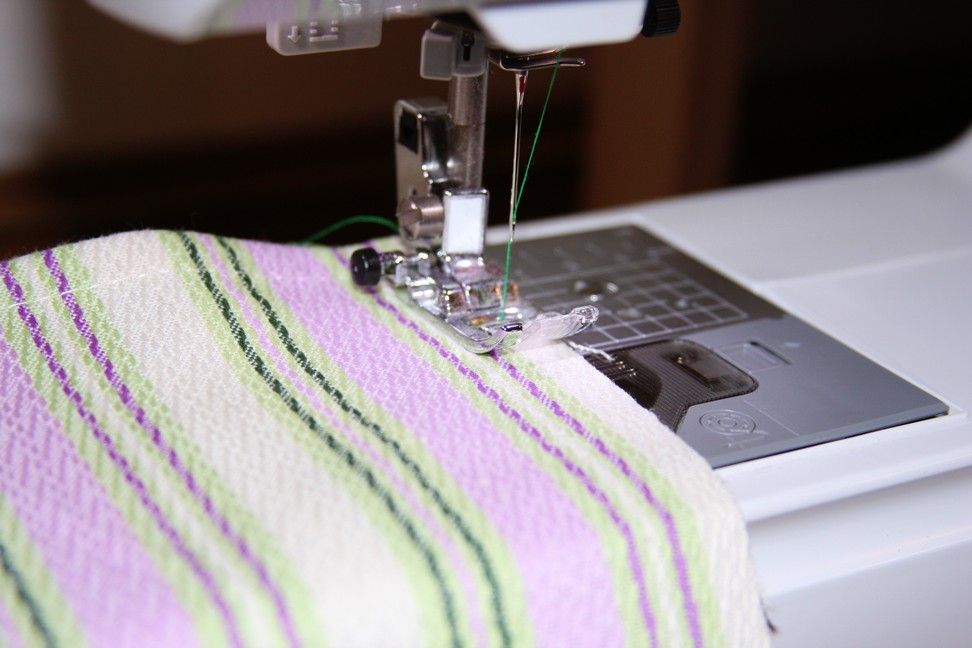
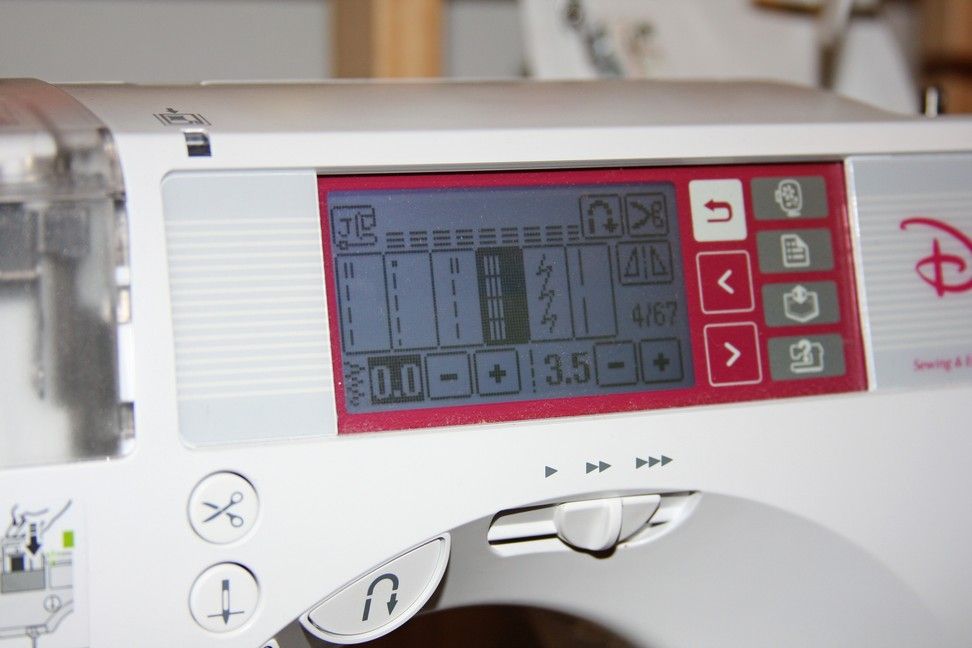
Set your machine to a gathering stitch, or the longest stitch.
Sew the raw edge of the dishtowel.
Turn the potholder sideways, and gather the dishtowel (by pulling the bobbin thread), until it's the same width as the potholder.
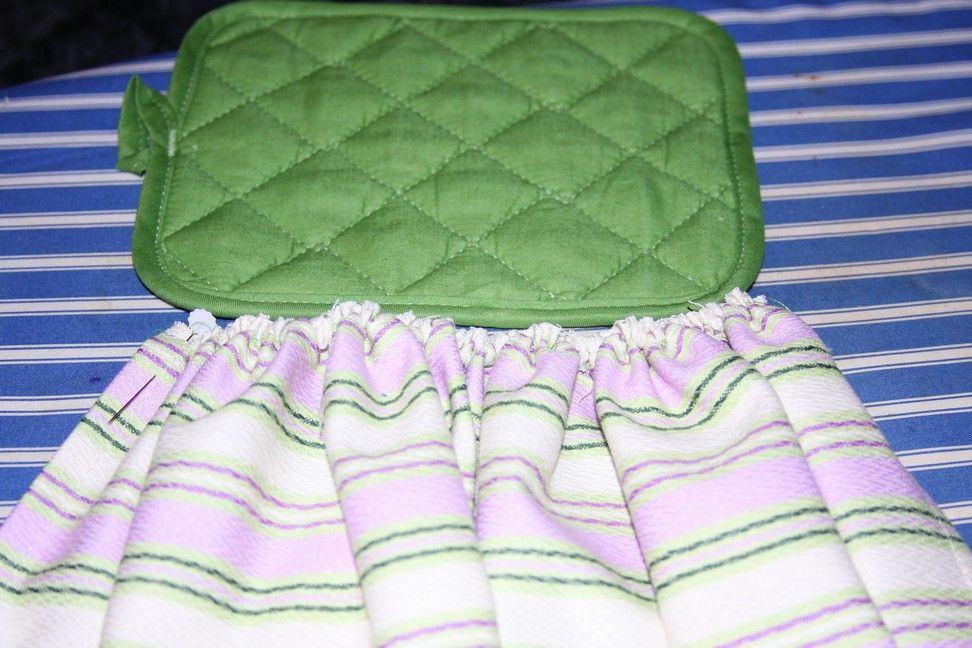
After it's gathered, fold the dishtowel in half to find the center - mark with a pin.
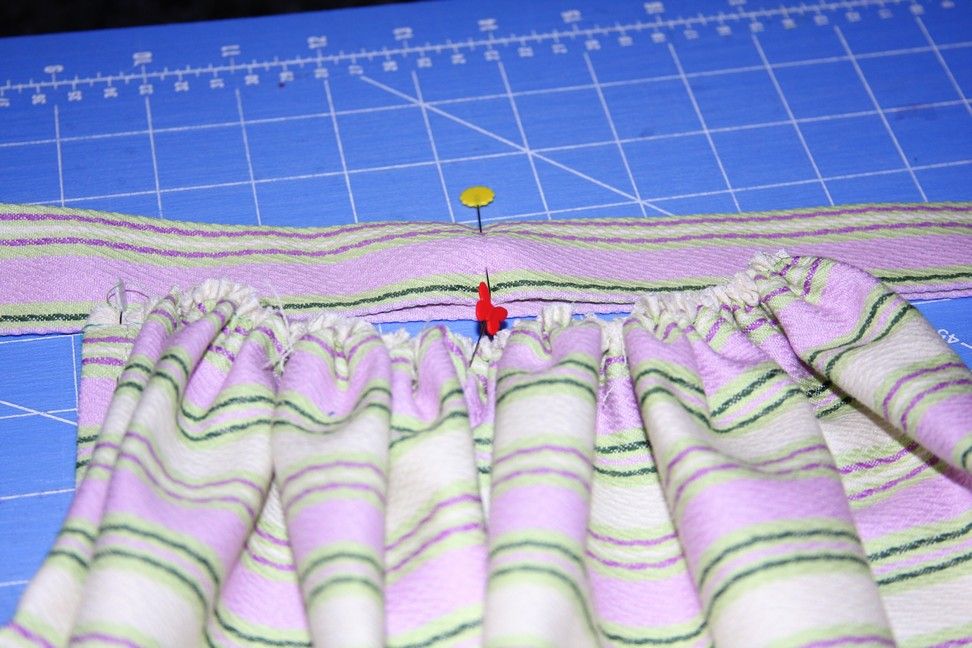
Match up the center pins, open the waistband and pin the center of the pieces together.
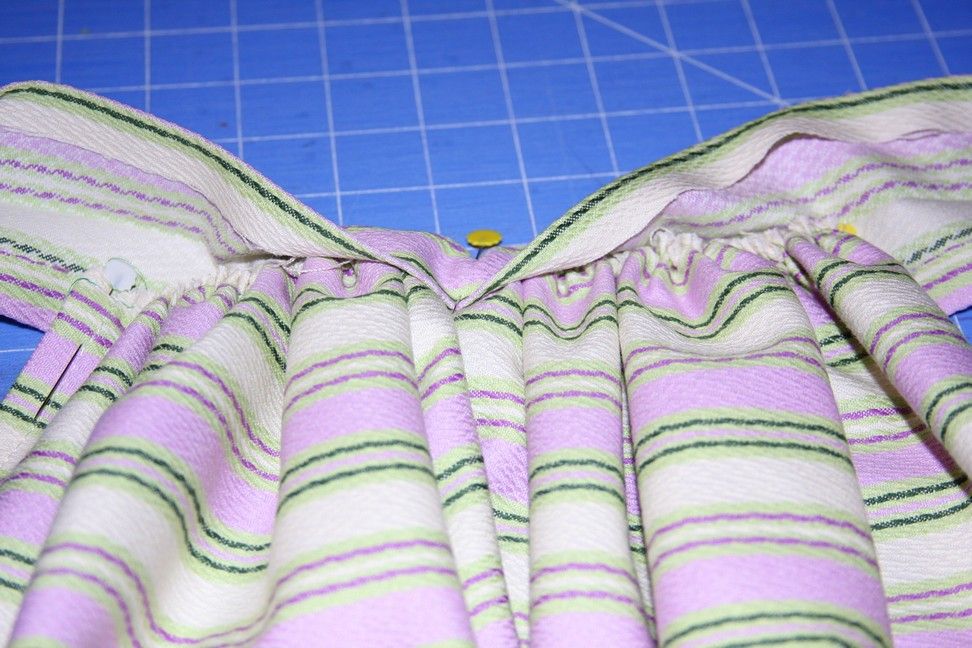
Sandwich the rest of the gathers inside the waistband.
Pin down using a LOT of pins!
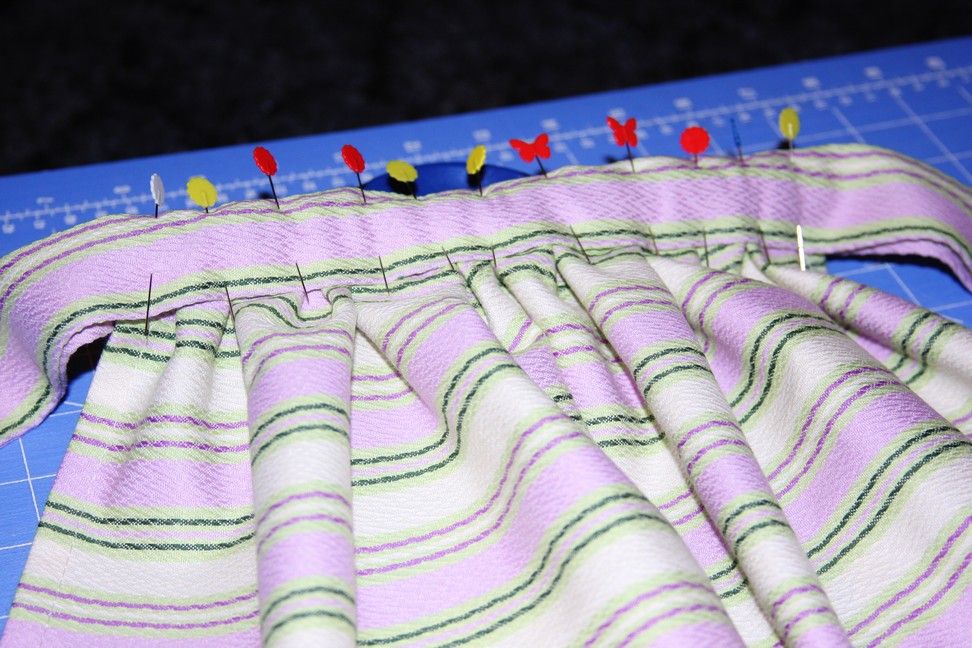
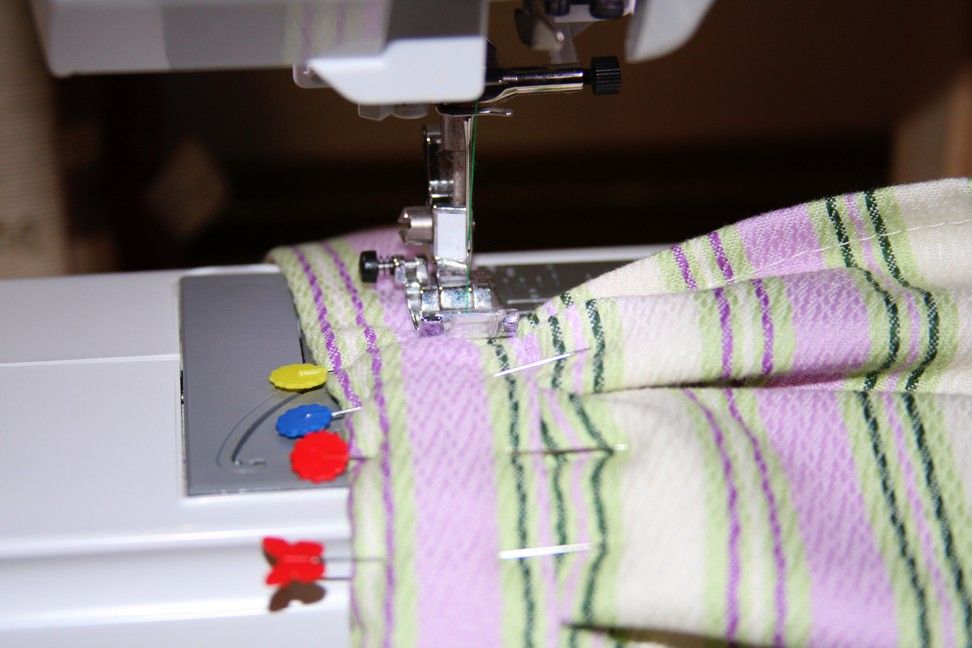
Starting at one end of the waistband, sew all the way to the other end about 1/4" from the edge.
POST-IT-NOTE:
It's starting to look really cute, and you could stop right here (don't forget to top-stitch the top edge of the waistband) for a quick and easy "barkeeper's apron". Okay, maybe not the right word usage, but I have no clue what the little short kitchen aprons are called!!
Uh, little short cute kitchen aprons?!
Hmmm...
Anyways, add some lace, a pocket or other cutesy stuff to dress it up a bit!
or
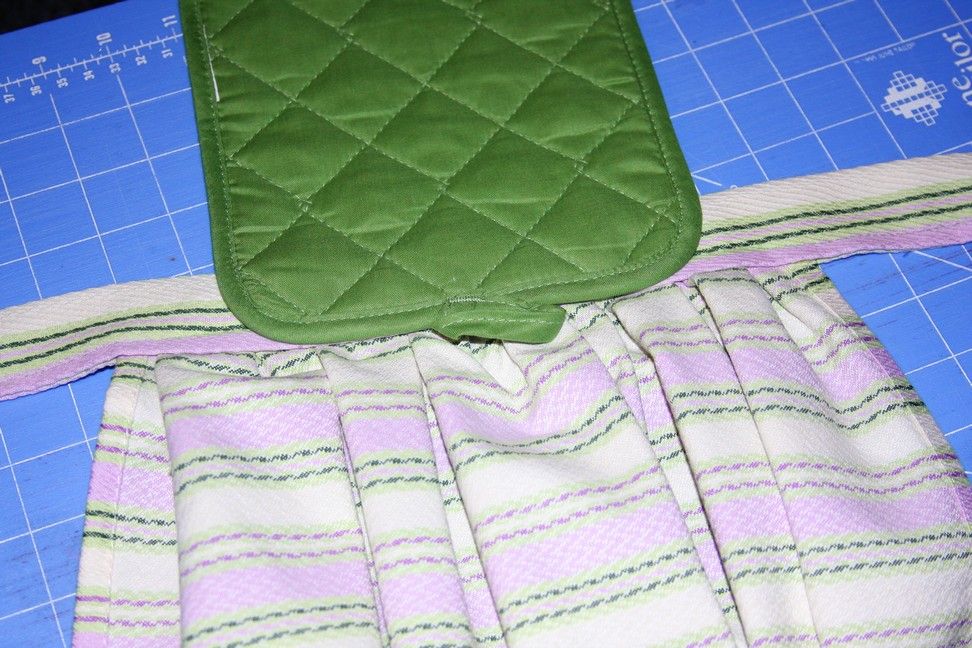
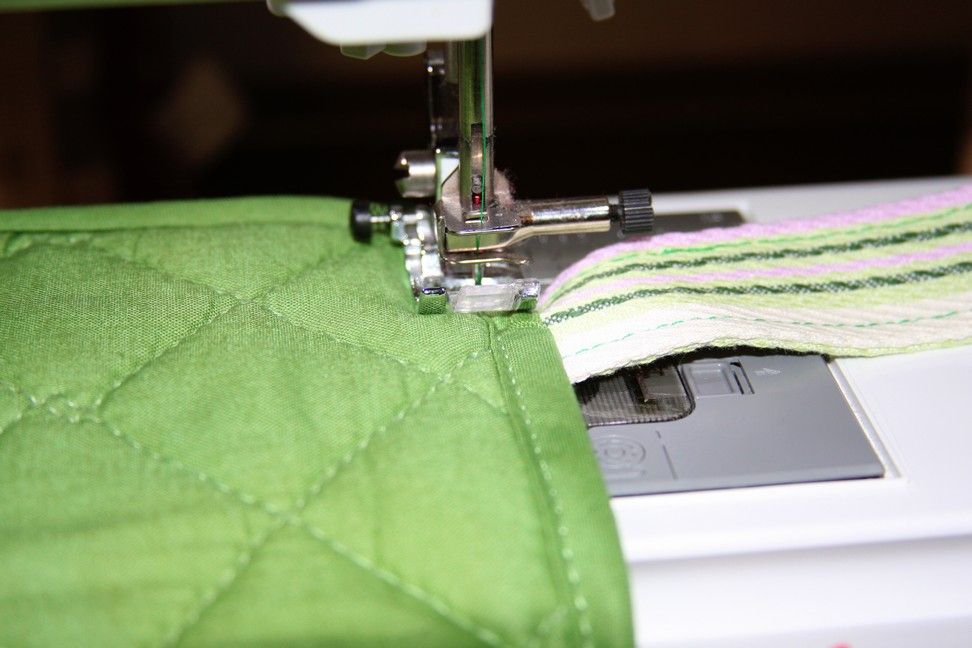
Flip the apron over so you're looking at the wrong side.
Put the potholder, with the right side down in the center of the gathered part of the apron (eyeball it) - the loop needs to be pointing down.
Make sure the bottom of the potholder lines up with the bottom of the waistband and pin.
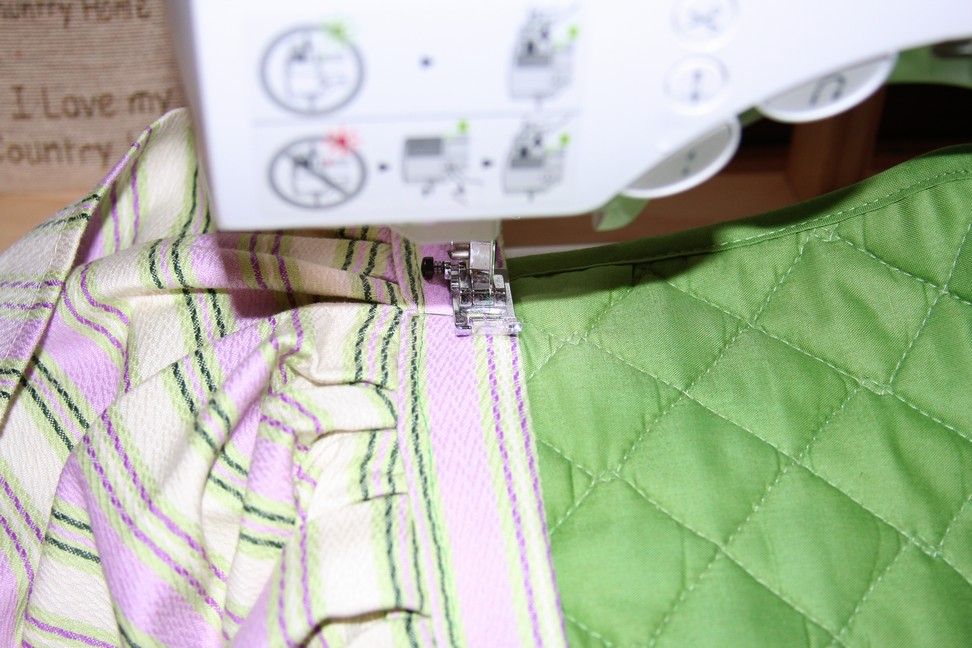
Starting at the edge of the potholder, top-stitch 1/4" from the top edge of the waistband - remember to back-stitch at the beginning and end.
Sew over your stitches once more to make sure it's secure.
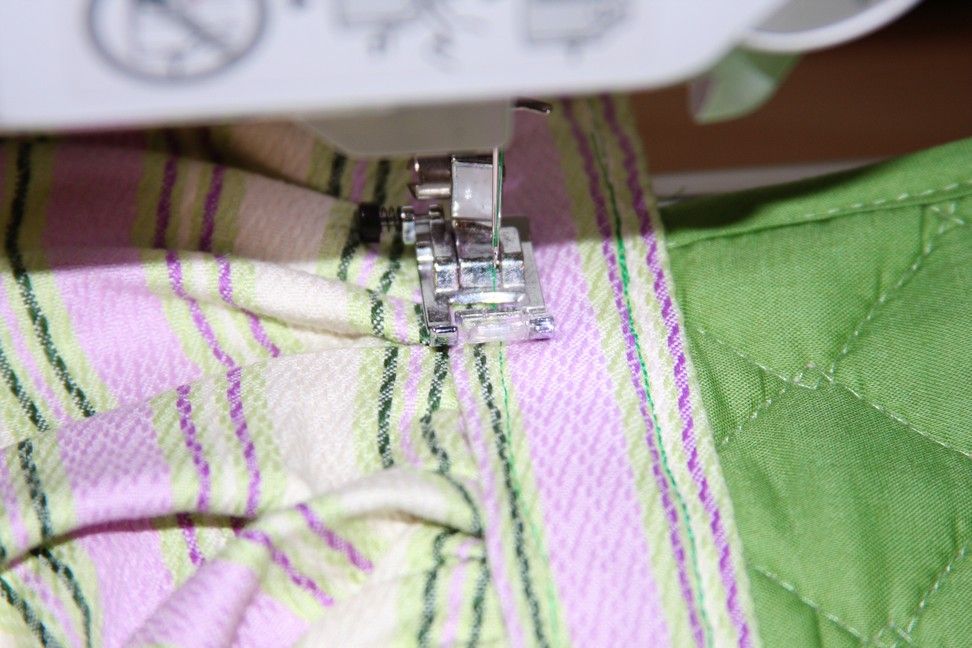
Starting at the edge of the potholder, go over the stitches in the waistband holding the gathers in place - remember to back-stitch at the beginning and end.
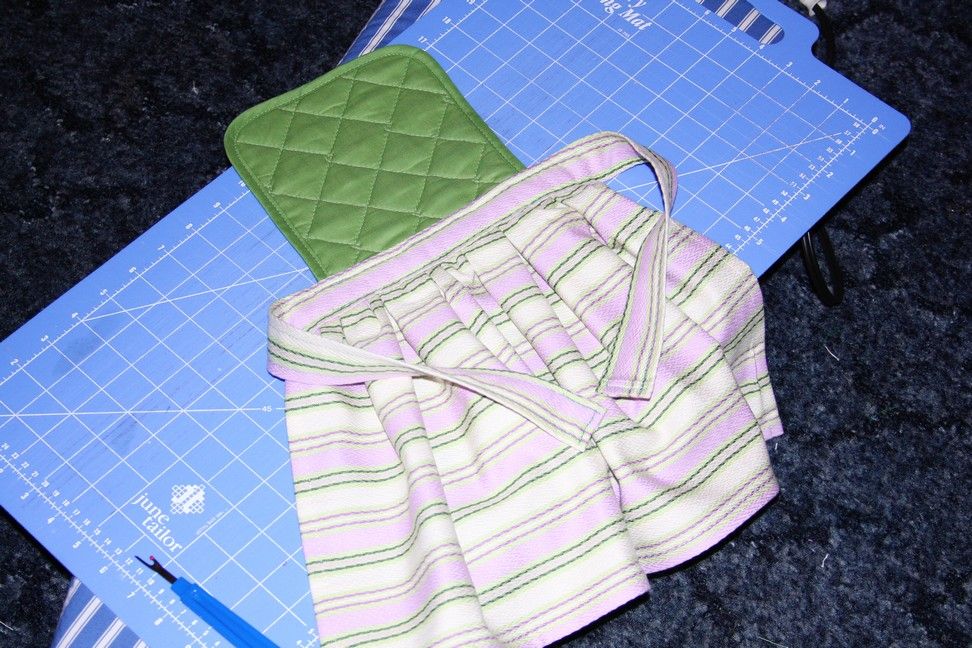
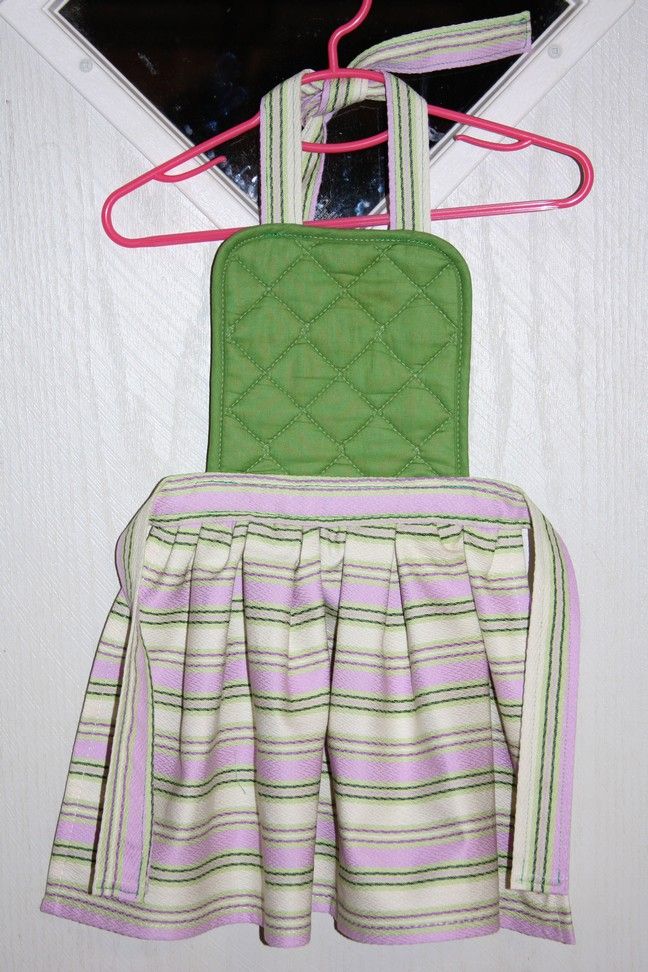
Here's how the apron looks so far!
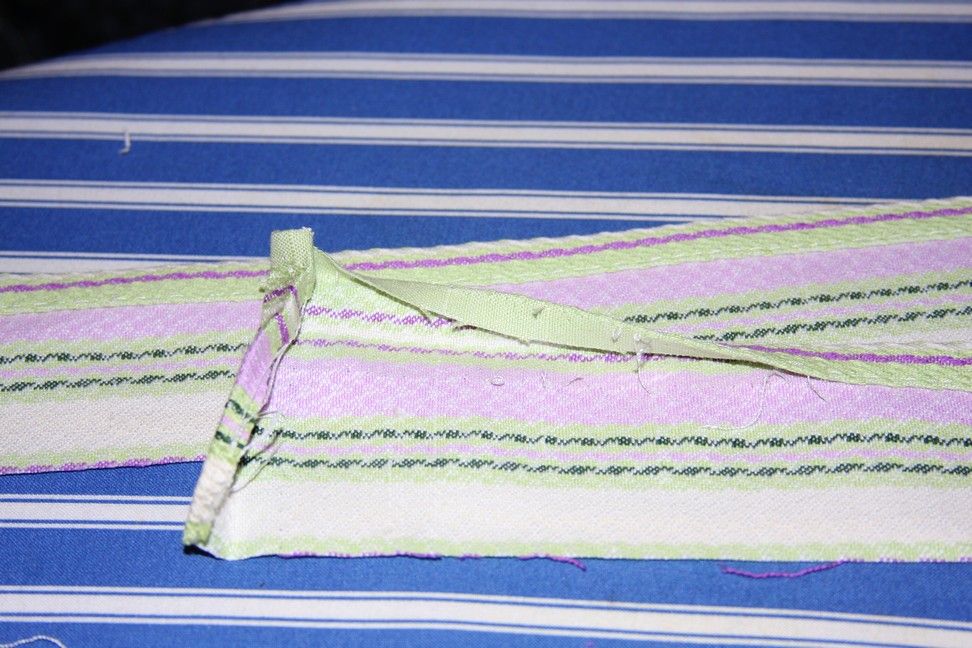
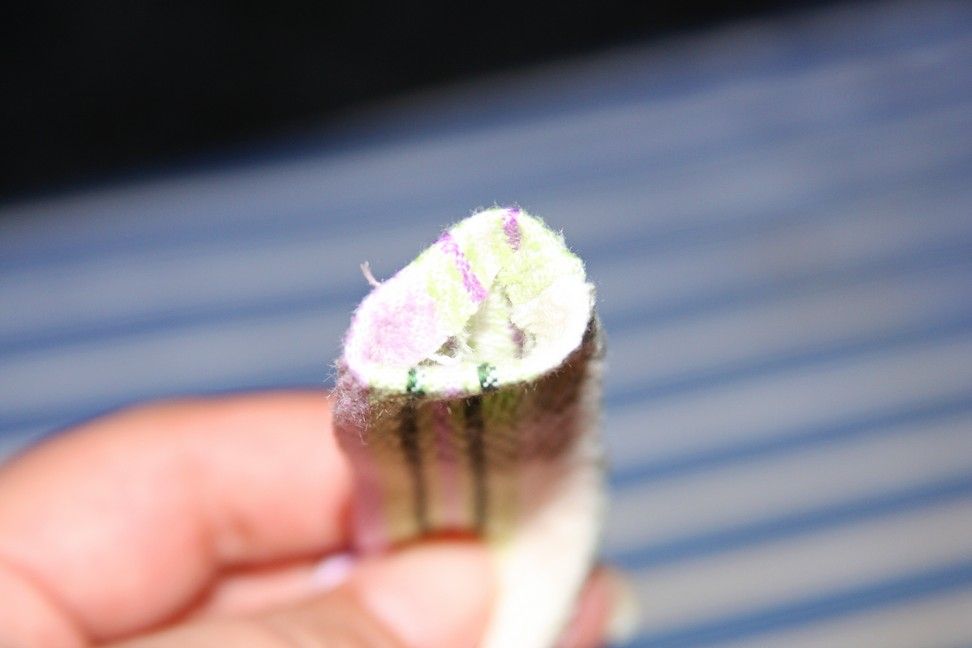
Next step, use your seam ripper to take out all the seams on both of the neck straps.
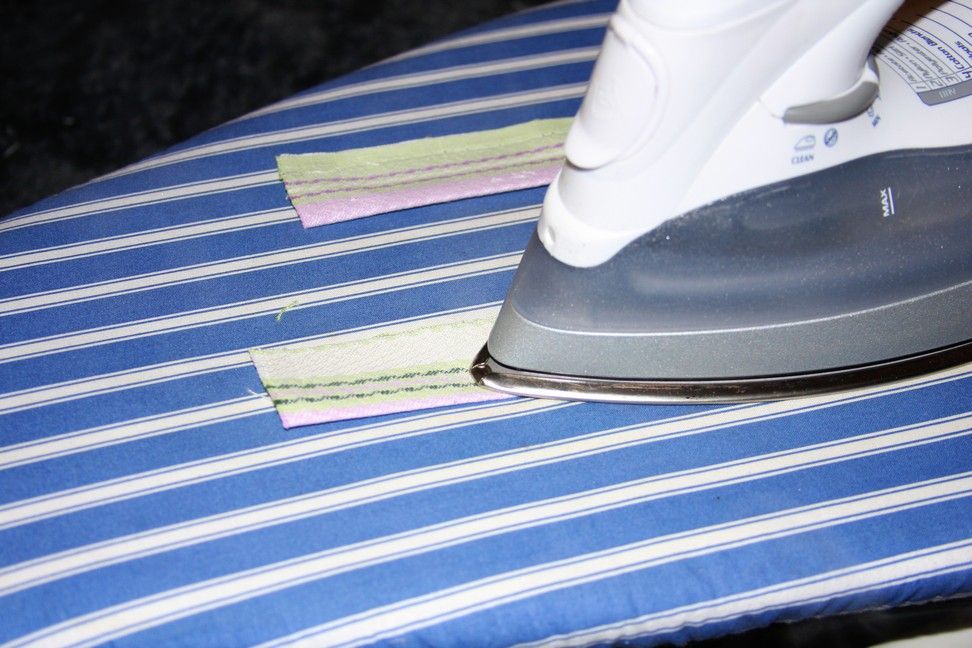
Iron the neck straps flat, then fold them in half (longways with right sides facing), and iron again.
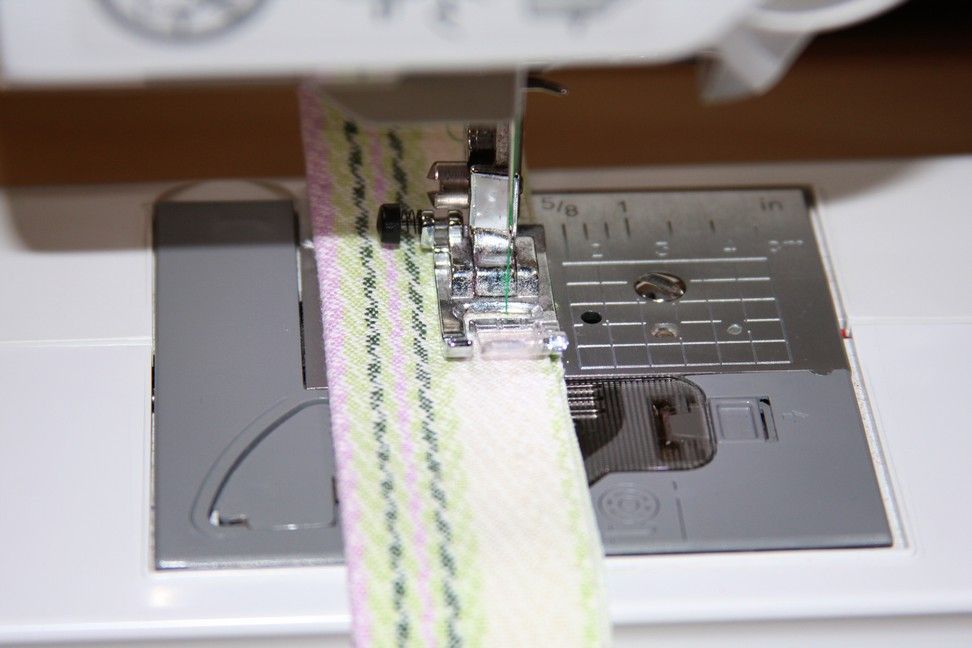
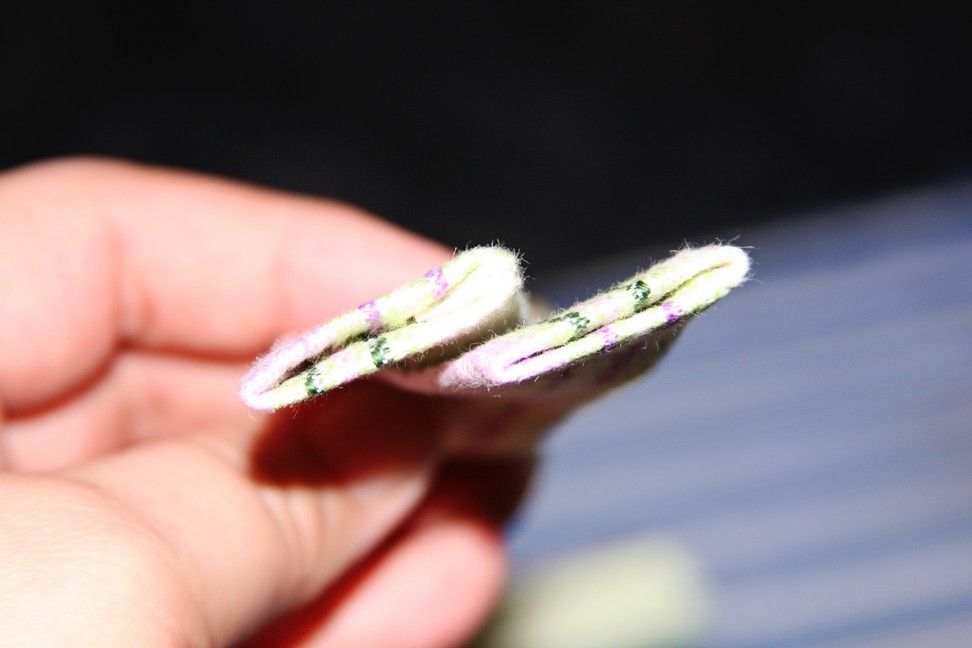
Sew 1/4" on the long sides - leave the shorter sides alone for now.
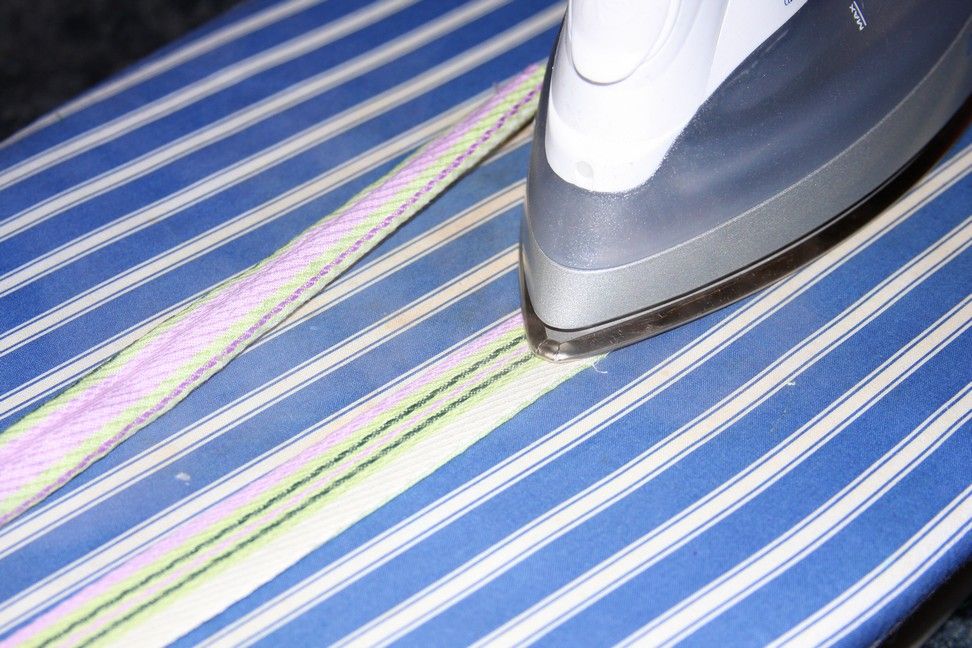
Turn inside out and iron flat.
Tuck about 1/4" fabric inside both ends of the straps.
Iron flat.
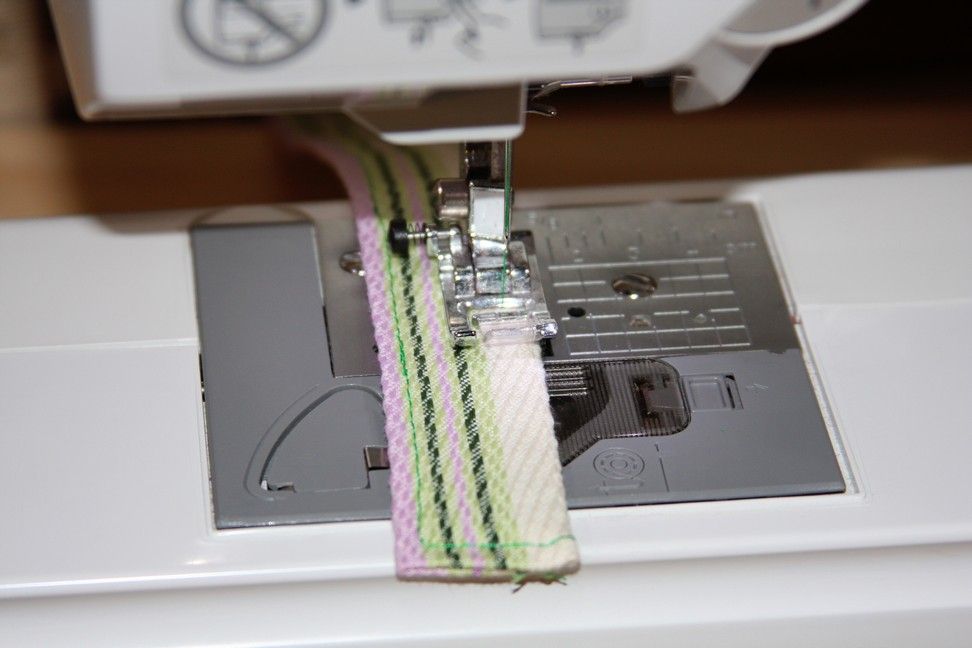
Top-stitch 1/4" from the edge all the way around both straps.
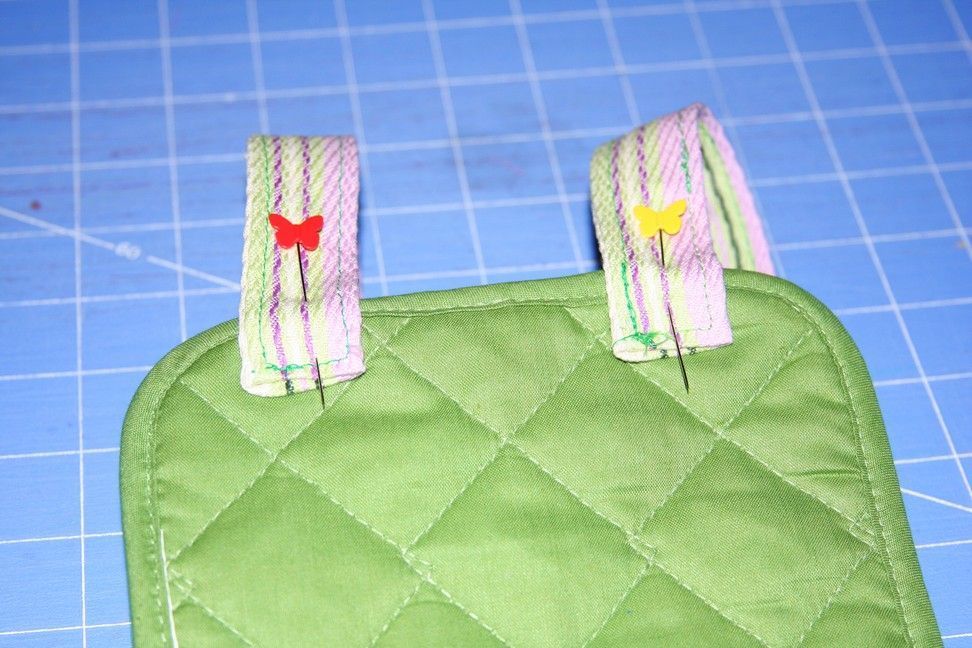
Arrange the straps evenly along the top of the pot holder (on the wrong side).
Again, I just eyeballed it.
Set your machine to a triple stitch.
If you don't have this setting, just sew over your stitches two or three times.
Sew over the potholder's original stitches on the right side.
Do the best you can, if you're using matching thread you won't have to worry about being exact.
All done!
Wouldn't this apron make a wonderful Christmas present?
It only costs $4 to make and a little bit of your time - not bad, huh?!
Hmmm, I'm thinking an applique of Serenity's hand(s) would look cute on the potholder!
Whatcha' think?
To add a little flair, sew on pockets, bows, lace, and/or buttons too!
POST-IT-NOTE 2:
Serenity is still small so I was able to tie the waistband straps into a knot around her waist. But you could add Velcro, snaps, or buttons (and I'll probably add one of those) as your child grows or if you have an older child.
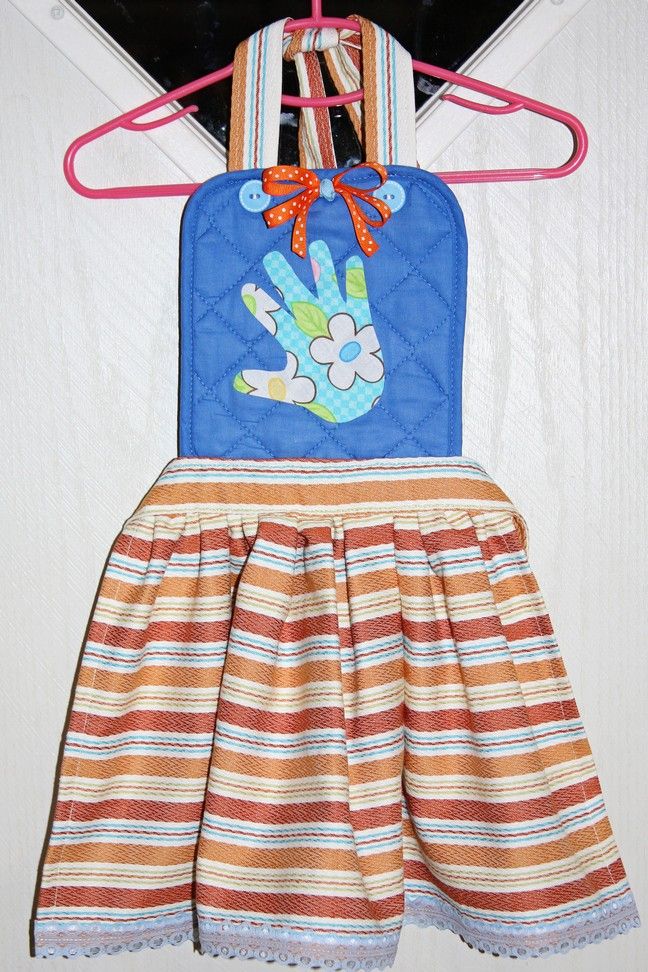
UPDATE:
Here's another apron I made. This time I added lace along the bottom edge, a bow I made using the Mini Bowdabra ('cause I can't make them on my own!), a couple of buttons, and an applique I made by tracing Serenity's hand (like I did here). I used KAMSnaps on the straps so they don't have to be tied when she puts it on.
I didn't add a pocket, but I might later.
The little extras didn't cost me anything extra either - I already had everything I needed!
I love how it came out too - it looks kinda retro, don't ya think?
Have fun!!
Someday Crafts has a really cute version too!
I sewed my apron kinda different though.
Here's how:
Materials Needed:
Dishtowel - 18"w x 28"l ($3.50 @Wal-Mart)
Potholder (2/$1 @Wal-Mart)
pins
hem gauge or sewing gauge (I forgot to add it to the picture!)
seam ripper (I forgot to put it in the picture too!)
Turn the towel sideways, and fold it in half. It'll measure 14"w x 18"l.
Cut off a 2"w strip from the top of the towel.
Then cut a 4"w strip.
Your towel should now measure 28"w x 10"l - unfolded.
Cut your 2" strip in half, then set aside for now - these will be your neck straps.
Lay the 4" piece with the right side down.
Fold over the raw edge 1/2" on both sides (use your hem or sewing gauge), and iron.
Fold the piece in half and iron again.
Fold the piece in half (side to side) to determine the center - mark with a pin.
This will be the waistband.
Set your machine to a gathering stitch, or the longest stitch.
Sew the raw edge of the dishtowel.
Turn the potholder sideways, and gather the dishtowel (by pulling the bobbin thread), until it's the same width as the potholder.
After it's gathered, fold the dishtowel in half to find the center - mark with a pin.
Match up the center pins, open the waistband and pin the center of the pieces together.
Sandwich the rest of the gathers inside the waistband.
Pin down using a LOT of pins!
Starting at one end of the waistband, sew all the way to the other end about 1/4" from the edge.
POST-IT-NOTE:
It's starting to look really cute, and you could stop right here (don't forget to top-stitch the top edge of the waistband) for a quick and easy "barkeeper's apron". Okay, maybe not the right word usage, but I have no clue what the little short kitchen aprons are called!!
Uh, little short cute kitchen aprons?!
Hmmm...
Anyways, add some lace, a pocket or other cutesy stuff to dress it up a bit!
or
Flip the apron over so you're looking at the wrong side.
Put the potholder, with the right side down in the center of the gathered part of the apron (eyeball it) - the loop needs to be pointing down.
Make sure the bottom of the potholder lines up with the bottom of the waistband and pin.
Starting at the edge of the potholder, top-stitch 1/4" from the top edge of the waistband - remember to back-stitch at the beginning and end.
Sew over your stitches once more to make sure it's secure.
Starting at the edge of the potholder, go over the stitches in the waistband holding the gathers in place - remember to back-stitch at the beginning and end.
Here's how the apron looks so far!
Next step, use your seam ripper to take out all the seams on both of the neck straps.
Iron the neck straps flat, then fold them in half (longways with right sides facing), and iron again.
Sew 1/4" on the long sides - leave the shorter sides alone for now.
Turn inside out and iron flat.
Tuck about 1/4" fabric inside both ends of the straps.
Iron flat.
Top-stitch 1/4" from the edge all the way around both straps.
Arrange the straps evenly along the top of the pot holder (on the wrong side).
Again, I just eyeballed it.
Set your machine to a triple stitch.
If you don't have this setting, just sew over your stitches two or three times.
Sew over the potholder's original stitches on the right side.
Do the best you can, if you're using matching thread you won't have to worry about being exact.
All done!
Wouldn't this apron make a wonderful Christmas present?
It only costs $4 to make and a little bit of your time - not bad, huh?!
Hmmm, I'm thinking an applique of Serenity's hand(s) would look cute on the potholder!
Whatcha' think?
To add a little flair, sew on pockets, bows, lace, and/or buttons too!
POST-IT-NOTE 2:
Serenity is still small so I was able to tie the waistband straps into a knot around her waist. But you could add Velcro, snaps, or buttons (and I'll probably add one of those) as your child grows or if you have an older child.
UPDATE:
Here's another apron I made. This time I added lace along the bottom edge, a bow I made using the Mini Bowdabra ('cause I can't make them on my own!), a couple of buttons, and an applique I made by tracing Serenity's hand (like I did here). I used KAMSnaps on the straps so they don't have to be tied when she puts it on.
I didn't add a pocket, but I might later.
The little extras didn't cost me anything extra either - I already had everything I needed!
I love how it came out too - it looks kinda retro, don't ya think?
Have fun!!