Showing posts with label blogs. Show all posts

Sunday, February 12, 2012

Mommy and Daughter Handprints


I'm totally addicted to Pinterest!
Anybody else?

And every time I log on, I get hungry!
Endless photos of delicious foods - I swear I gain 10 pounds each visit!

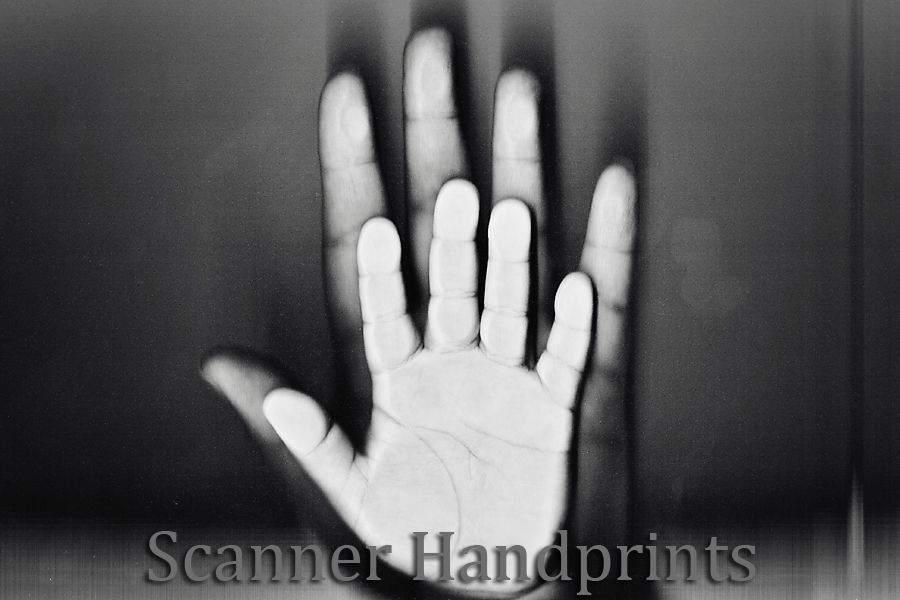
Yesterday I came across a scanned picture of a Mommy and her son's hands together:

She got the idea from a friend who created this scan with her son:

What a cute, creative idea! 

So I had to try it too!

The first time I tried a high-res scan, Serenity and I were touching the scanner and moving our hands until we felt comfortable.
I didn't realize we were putting lots of fingerprints all over that would show up crystal clear in the scan. 
So I wiped the scanner clean (I missed a couple of smudges, but I think that adds character), and we carefully put our hands down the second time.

It came out exactly like I was hoping it would.

Next, I did a little retouching in Photoshop.
First I turned it into a black and white photo.
Then I lightened the picture focusing mostly on our hands, while darkening the background.

I love the results!

Pinterest is the best!
People are so amazingly creative.
I love discovering unique ideas, delicious food and beautiful photography.

Have fun!


StumbleUpon.com

Monday, January 16, 2012

DIY Fabric Organizers


These are super easy to make and won't cost you a dime!


I first saw fabric organizers over at The Cottage Home:

Aren't they great?
But so expensive!
$131.62 for 75 large (10" x 14") organizers!
I have a lot of fabric and I just can't afford to wrap my whole collection.

Then I found a DIY fabric organizers using cardboard from Kandra's Corner.

Nice!

She used rubberbands to secure the fabric, but I really liked the tabs on the expensive ones:

I  wanted to make my own using tabs not rubberbands or pins.
So I grabbed an Amazon box to "upcycle" and started cutting!

I tried out a few ways  to position the tabs that would hold the fabric in place, but I ran into a problem.
You can't cut too many tabs like the expensive organizers because the cardboard becomes weak and floppy. 
So then I tried only two tabs in the center. 
It worked great!

Here's how I made my fabric organizers:

Materials:
fabric
cardboard
X-Acto or sharp knife


Cut out a board 7 1/2" w x 11 1/2" l
Using a X-Acto or a very sharp knife, cut one tab 2" from the top in the center of the board.
Flip the board around and cut out another tab the same way.
Look at the picture for reference:

Start wrapping the fabric around the board:

When you've finished wrapping, pop out the tabs to secure the fabric.

That's it!
It will stack on shelves just as neatly as the fabric organizers too.
It's not as pretty as the expensive ones, but it is free.
You could spray paint the cardboard to match your sewing room - one can of paint would cover a lot of boards.

Here's the front of the organizer:

I read on Kandra's Corner that she's using comic book boards now.
I believe some people were worried the cardboard (she actually used tag board) wasn't acid-free.

So with a little searching, I found 100 magazine boards (8 1/2" x 11") for only $12.45 on Amazon - plus free shipping!
The boards on Amazon have only one preview - from a lady that is using them as fabric organizers!

I'm hoping I can cut tabs on them without the board becoming weak.
Maybe narrower tabs?
The tabs on the expensive boards appears to be more narrow than the ones I made. 
I'll be sure to update with pictures when I've tried the magazine boards!

Have fun!

StumbleUpon.com

Friday, November 5, 2010

Problems Fixed!

For the past few days I know y'all have been getting the above image on most of my pictures.

What happened is that I have so much more traffic coming through every day than I ever expected!

Well my blog ended up burning through all the free bandwidth allowed by Photobucket in only a couple of days this month.

I now have over 23,000 people visiting my little blog on a regular basis every month!

Wow!

Thank y'all so much for visiting!!

The problem is fixed now - I went Pro.

I'm very sorry about the inconvenience and I hope y'all keep stopping by!!

Have fun!


StumbleUpon.com

Monday, April 26, 2010

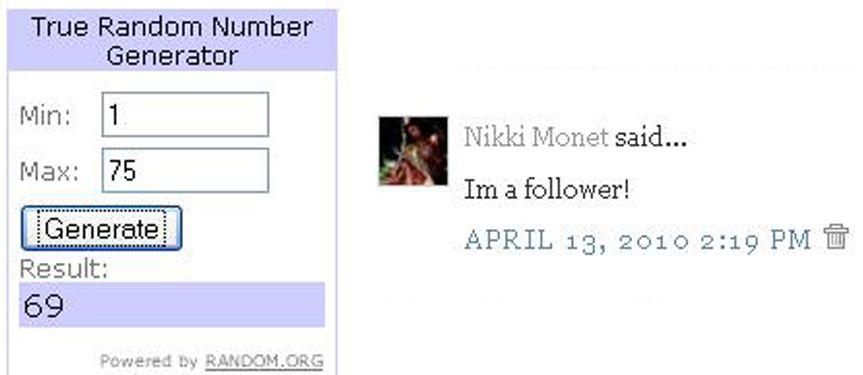
And the WINNER is...


Nikki!

Congratulations!


I just sent you a Twitter comment since I couldn't find your email address - I hope you get it!


Please send me your address so I can mail off your new Curly Q sampler!


I would like to apologize to all my blog readers about the delay in picking the winner of the Curly Q GIVEAWAY. I've had so many things happen at once that I got behind with my blog.

First off I went to visit friends and family in Mississippi for 5 days, when I got home my husband came home for a week after 8 weeks at work so I've been spending a lot of time with him and Serenity, and then on top of all that I got a weird error (bX-4wpugp) on my Curly Q blog when I tried to see the post or comments!

Busy couple of weeks!

So I would like to send the winner, Nikki some of my clippies as part of the Curly Q GIVEWAY to help make-up for the long wait!

The following clippies will be added to your prize:


I hope your little girl likes them!


A HUGE thank you to everyone who entered!


Please stay tuned for a NEW giveaway this week!

Have fun!

StumbleUpon.com

Tuesday, March 23, 2010

How to Create a Watermark Action in Photoshop

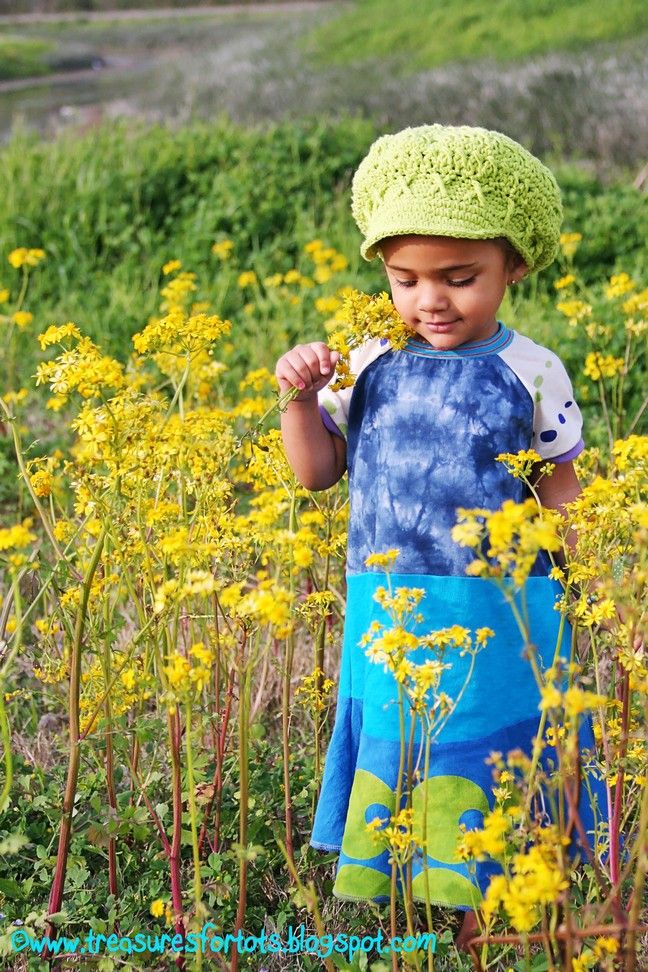
Serenity's crochet Apple Cap was designed and handmade by NuxieMade, her dress was designed
and hand-sewn by courtneycourtney, and the photography was done by ME!


This is so incredibly easy to do! I like to make sure I put a watermark on Serenity's pictures partly for safety reasons, but it also lets people know that the picture is protected and can't be used without my permission. I started doing it well over a year ago, and even though people can (and have) cropped it off, having a watermark does help.

I don't mind Serenity's picture up, but it needs to have my watermark on the photo before it travels to another blog or website. Especially if it's a picture that's being used to promote a someone's business or something along those lines. I've had a few issues with that already, and it really doesn't matter how small the picture may be, or how insufficient someone else might think it is - it's important to me that my child's picture has a watermark on it, and of course not being used somewhere I wouldn't approve.

Most people, especially parents, are very understanding!


A watermark also helps to advertise your blog and/or Etsy store. If someone likes your photography, clothes you've made or your pretty model, having a watermark is a good way for them to contact you.

People can get really creative with their watermarks too, and try to make them as uniquely their own and artful as their clothing line, photography, or whatever they happen to be selling!

Like your blog banner and buttons, usually a watermark is a personal distinct brand, something that will advertise to potential buyers who you are as an artist, designer, or crafter. They can be quite clever and require a healthy imagination to design. But sadly, as it is it with some things that have become so popular, I've seen even the personal style of an especially ingenious watermark being copied and claimed as someone else's inspiration! Of course not everybody does it, but some out there do.

Ah well, whatcha' gonna do? Create another one even MORE unique!

Okay here's the step-by-step how to create the plain old watermark like I use. For a more visual tutorial, you can play the video I made below.

  • 1. Open a picture in Photoshop.
  • 2. On your Actions sidebar, turn the Button Mode off.
  • 3. Click the "Create New Action" button at the bottom.
  • 4. When the "New Action" window pops up, name it whatever you like. I'm calling mine, "New Watermark". I also clicked to make the color red. All this does is make the action red in the Button Mode. Then click "Record".
  • 5. Now you want to make sure your horizontal type tool is selected. It's the capital "T" button.
  • 6. Left-click and drag your mouse until your box is around the width and height you want it. You can always fine-tune the size of the box later.
  • 7. Before you type in your watermark, make sure to choose the color, font, and size of your watermark first. You can always adjust it later too.
  • 8. I like using the copyright symbol "©" before my blog site. To type the symbol, I hold down the ALT key and type 0169 and it pops right up!
  • 9. This is the step you can make any adjustments you like to the watermark.Moving, resizing, changing the color, font, etc. You can also adjust the opacity to make it more transparent.
  • 10. Now click the "Stop" button on the Actions sidebar.
  • 11. Turn Button Mode back on.
  • 12. You'll see your New Watermark button (mine is red)! Let's try it out.
  • 13. Open a new photo.
  • 14. Click your New Watermark button.
  • 15. It works! All done!


You can made the video bigger by clicking on the directional arrows before the word "vimeo".
I hope this tutorial has been helpful!


UPDATE:
Kelly has asked how to do this for the non-Photoshop people and what would be the best free program. My friend Kira told me she uses GIMP and it's totally free. And from I've been reading, is supposed to be as powerful as Photoshop! It's supposed to even open Photoshop files.

Gotta love free!

So right now I'm trying it out, seeing how it works, and hopefully learn how to make a watermark quick and easy. Once I do, I'll either update this post or create a new one just for GIMP users!

While you're here, check out my other tutorials too!


Have fun!


 http://www.thethriftyhome.comShow and Tell Green

StumbleUpon.com

Tuesday, March 2, 2010

CC with a Belt!


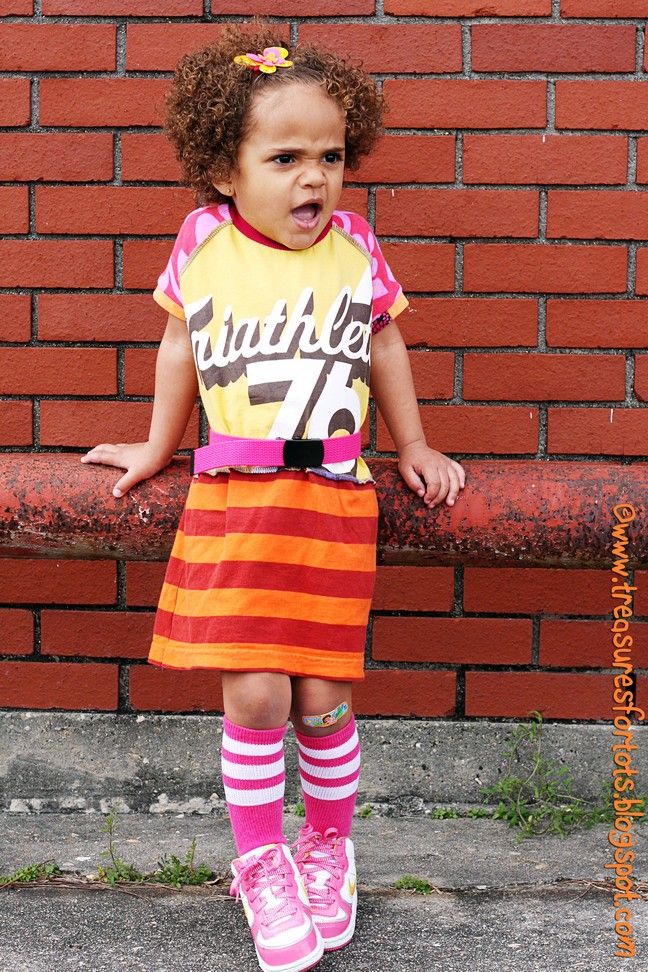
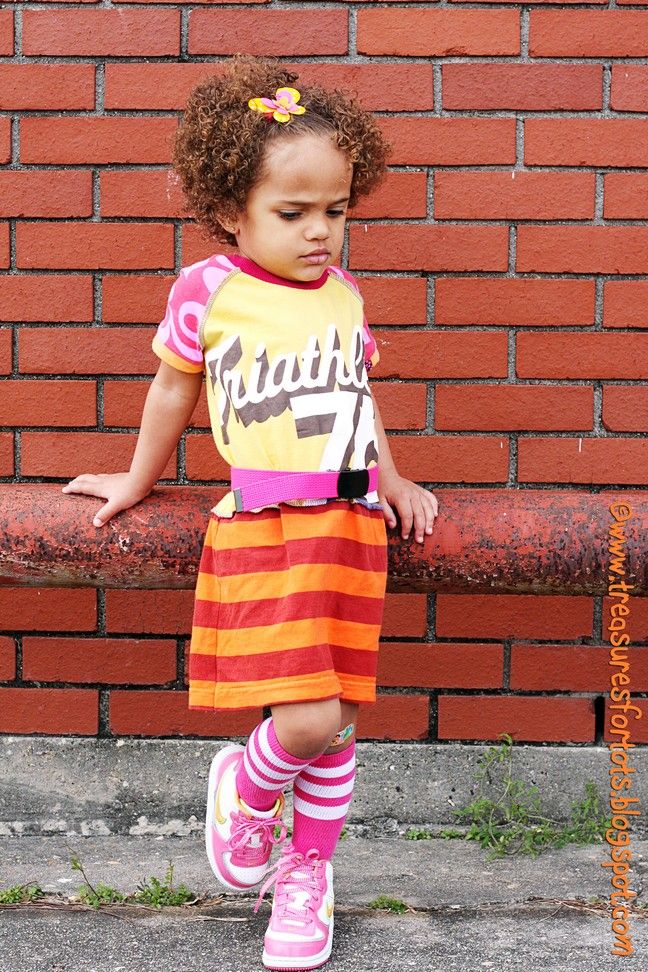
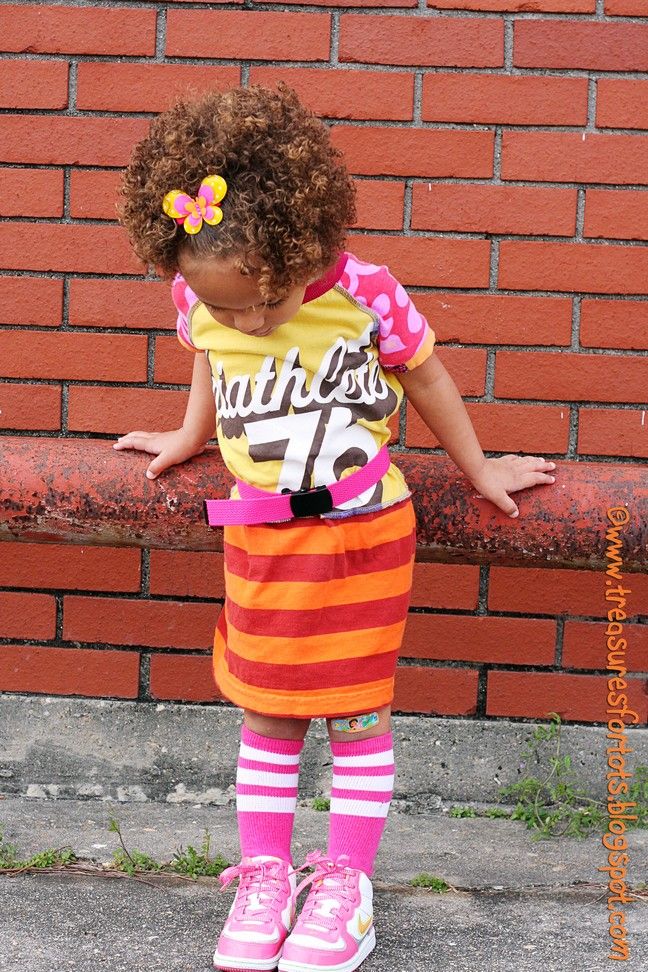
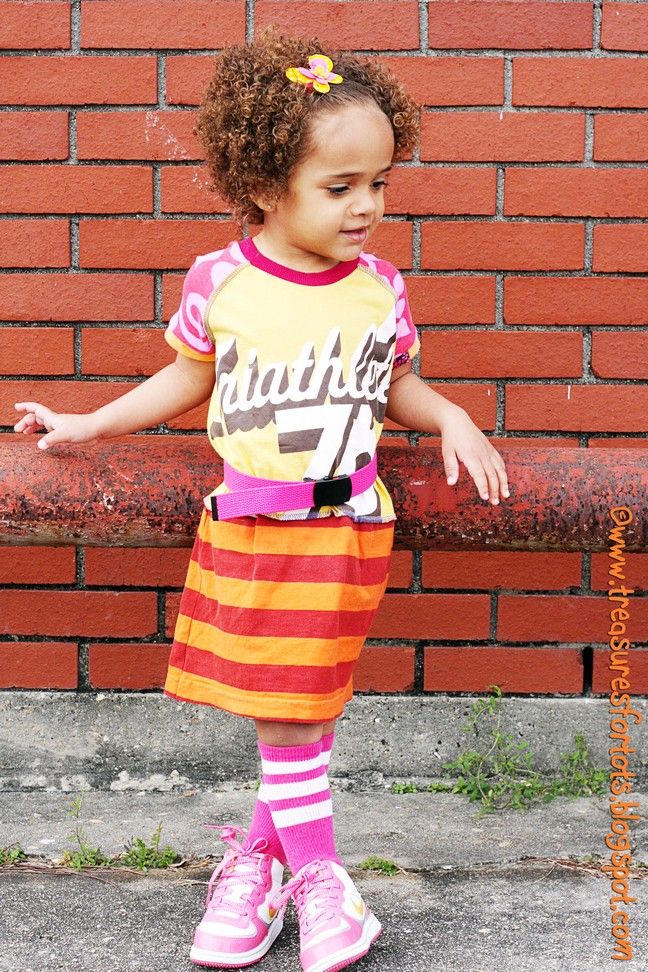
Serenity's posing in her newest courtneycourtney dress. The accessories for this Triathlete dress was so fun to put together!

Courtney gave me the link to American Apparel for the adorable knee high socks Serenity's wearing, and after looking around a bit on their website I found a funky pink belt too. The pink and orange Nikes were on sale months ago for only $19.97 at the Finish Line - they matched perfectly. I made Serenity's pretty butterfly clippie using the colors in the Triathlete dress, and you can find another one like it in my Etsy Store.

I just love how this outfit came together! It's so retro-looking and I think it looks too cute on Serenity!


While surfing my crafts blogs, I came across a great belt tutorial from Handmade Mommy. I think next time I'll make a belt for Serenity instead of buying it - Kari makes it look so easy!


Have fun!
StumbleUpon.com

Sunday, February 28, 2010

Beautiful Mia Modeling the Jelly Roll Skirt


I sent Katie a Jelly Roll skirt and she got some very pretty pictures of her daughter Mia modeling it for me!

Not only does Katie take beautiful family pictures (check out her blog Katie Hatch Photography), she also does amazing shots of Puerto Rico's beautiful landscapes!

Katie is an uber-talented Mom who does it all! At her MiaMoo Designs blog - she sews, posts fun felt food tutorials, is always uploading wonderful pictures of her beautiful children, and even sells her pretty Swarovski hair clips like the one she make for Serenity!

Here's one more picture of lovely Mia!


Have fun!
StumbleUpon.com

Monday, February 22, 2010

Jelly Roll Sundress!

Katie from MiaMoo Designs took my Jelly Roll skirt tutorial and turned it into the most adorable sundress for her lovely daughter Mia!!

How beautiful!! I just absolutely love how it turned out - and now I want to make one for Serenity!


Above is a picture of Serenity wearing her beautiful Swarovski flower clip Katie made to match Serenity's Jelly Roll skirt!


Here's pretty little Bri from Grow With Me Gifts showing off her pretty Jelly Roll Skirt I made, and her darling initial tee from Julie at ZozoBugBaby!

So Sweet!


I'll have the Jelly Roll skirt Serenity's modeling in this picture for sale soon!


Have fun!
StumbleUpon.com

Thursday, January 14, 2010

I Got The Sunshire Award!


I'm like to give a BIG thank you to Get Your Craft On for giving me the Sunshine Award!
What a cool way to show your love for your most favorite blogs!

The rules for accepting this award are:

* Put the logo on your blog.
* Pass the award on to 10 bloggers (but I'm listing 12).
* Link the nominees within your post.
* Let the nominees know that they have received this award by commenting on their blog.
* Share the love and link to the person from whom you received this award.

Here's my list of blogs I love visiting almost every day!
I'd like to pass the Sunshine award on to them for making my world sunny!

{1} ZooBugBaby
{2} courtneycourtney
{3} Mia Bella
{4} Mommysteffen's Blog
{5} MiaMoo Designs
{6} Fireflies and Jellybeans
{7} Home Sweet Home
{8} Helping Little Hands
{9} 5 Orange Potatoes
{10} Bobbityboo
{11} Cole's Corner and Creations
{12} I am only 1 Woman

Have fun!
StumbleUpon.com

Monday, December 28, 2009

Fleece Hat and Sock Mittens


I found the cutest
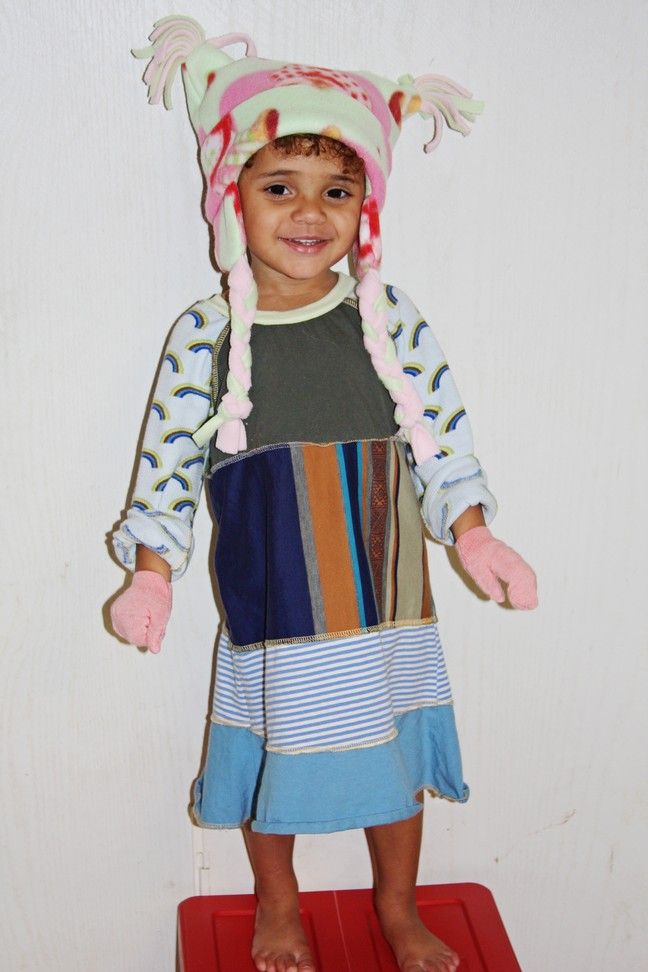
free fleece hat (w/flaps) tutorial at Kitschy Coo and finally got around to make one for Serenity.

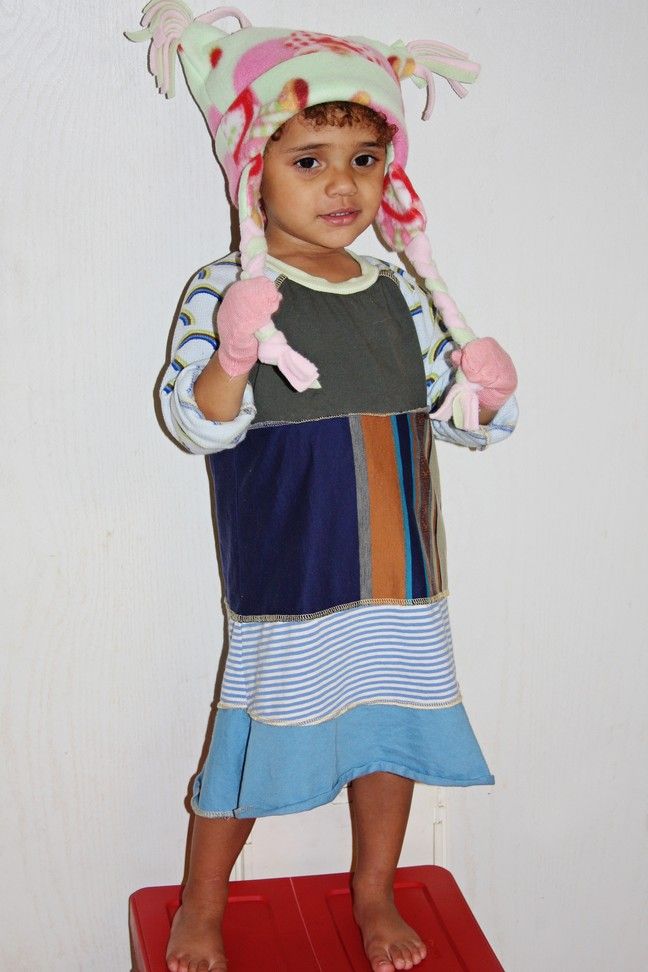
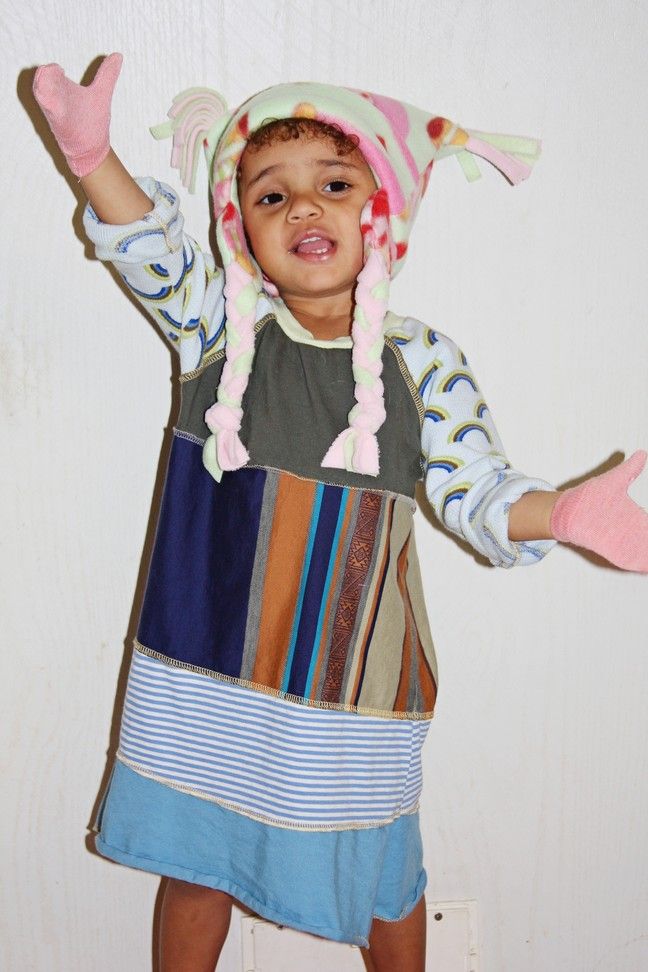
The tutorial was very easy to follow and Serenity's Strawberry Shortcake hat came together fast. The only thing I did differently was add the braided ties on the ends of the flaps. I measured 6 strips 1"w x 10"l to make the braids and applied the same technique as the pom-poms on top of the hat. Very simple.


Then I made some little sock mittens. I wanted some mittens for Serenity that didn't limit her mobility too much. It doesn't get so cold down here that she really needs thick mittens everyday (although you could put thick mittens over these for extra warmth). So, I made these using a pair of long socks I got on sale at Target last week. You can use old socks, thrift store finds, or even mismatched ones. Since I wanted Serenity to wear these mitts mostly for play, it doesn't really matter if they don't match!

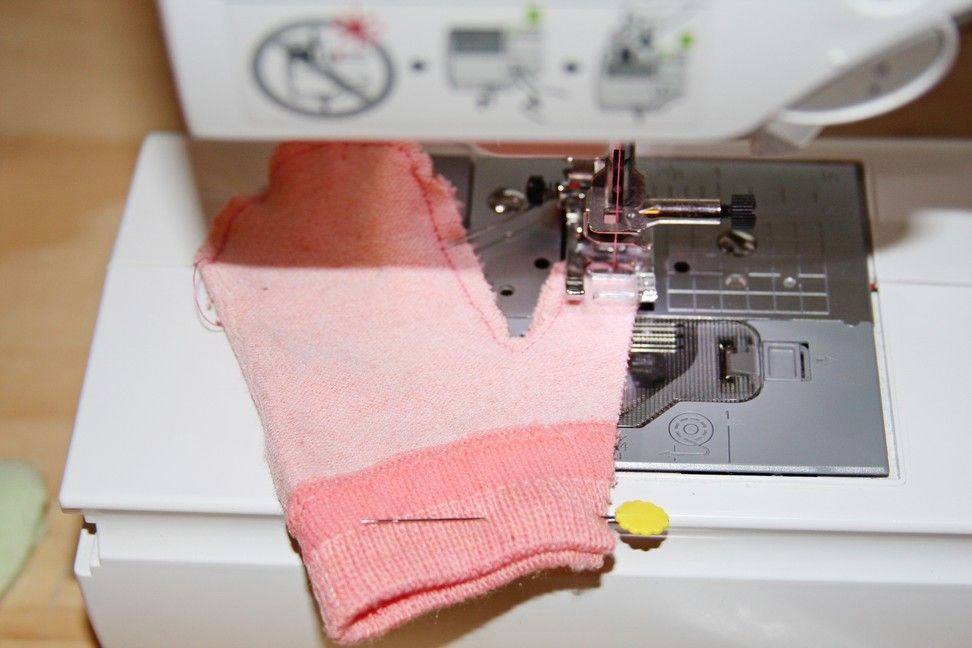
The mittens were quick to put together, but knits can be hard to work with - I still need lots of practice! I made plenty of mistakes sewing these tiny mitts together, but in the end, they are what I had in mind and I like how they turned out.


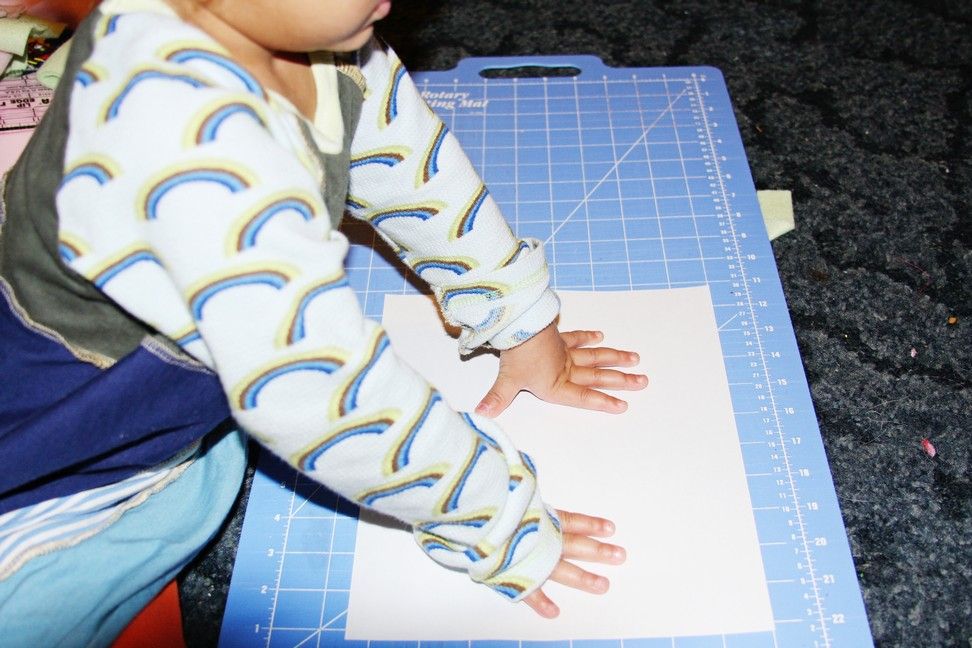
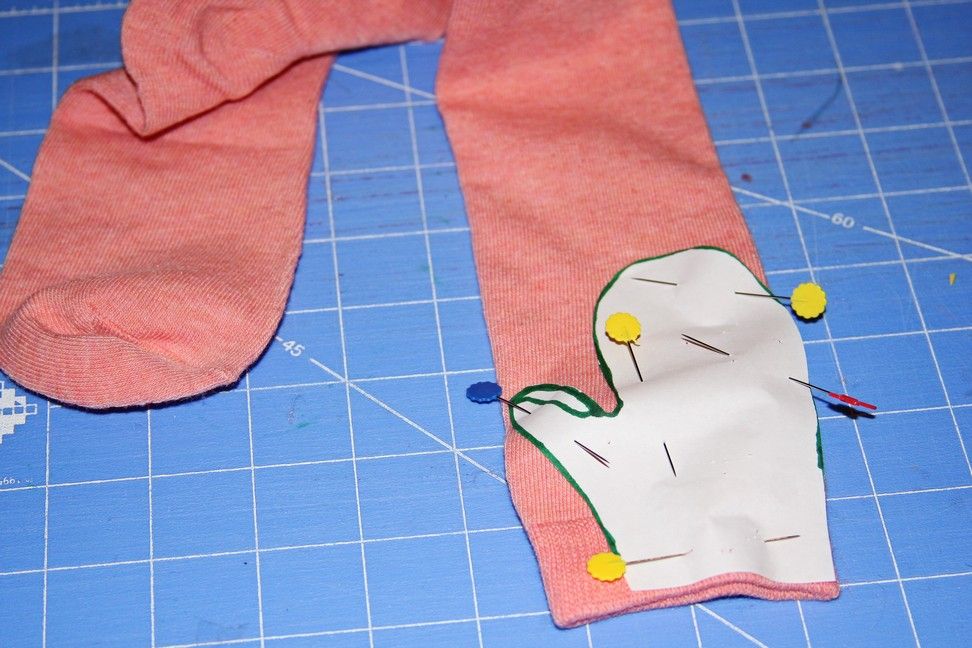
1. Basically I just traced Serenity's hand to make a pattern. Don't add seam allowances to the pattern.
2. Then I pinned the pattern to the top of a pair of socks - I stretched the sock to get it to fit the pattern, I wanted the mittens to fit snug. It's okay if one side of the pattern is on a fold - you'll have less to sew!
3. Next I sewed it along the edge - you can used a zig-zag stitch or a straight stitch. Use a long stitch since it makes it easier to sew knit, and sew slowly.


I think I got the hang of it - the next pair will be much easier!
Now I wonder what I'm going to do with the rest of the sock?


I love her cute fleece hat too!
Head over to Kitschy Coo to see how I made it!


Happy Holidays!


The Girl CreativeDIY Day @ ASPTL

StumbleUpon.com

Tuesday, December 15, 2009

GROSGRAIN Muff Tutorial and Storybook Reversable Cape Pattern!!!!


How pretty!

Go download your FREE pattern at Grosgrain: GROSGRAIN Muff Tutorial and Storybook Reversable Cape Pattern!!!!

Scroll down for the Muff Tutorial.

Happy Holidays!


StumbleUpon.com

Sunday, December 13, 2009

Sweater Softie Giveaway!


How cuddly!

To win a Sweater Softie from 5 orange potatoes just leave a comment HERE, telling her which sofie is your favorite
!

There are pictures of 5 different adorable sofies to choose from!

If you're a follower, you can enter twice!

Spread the news about the Giveaway and earn another entry!

I like Gretchen Gremlin the best!

Hurry and enter

NOW!

The Giveaway ends on the 16th!


Happy Holidays!


StumbleUpon.com

Monday, December 7, 2009

WIN a Grow With Me Gift kit!


Here's how:

1. Become a Fan of GWMG on Facebook.

2. Go HERE and guess how Brianna will answer this question:

Who do you think needs a GWMG kit for a Christmas gift?
a. Santa
b. Frosty the Snowman
c. Cinderella
d. Tinker Bell

3. Refer a Fan to earn extra entries!
(so let me know if you become her Fan so I can get an extra entry!)

Giveaway ends on December 11th at 5pm (EST)

HURRY and enter today for your chance to win!!

Check out Kim's blog for more details!


Happy Holidays!

StumbleUpon.com

Saturday, December 5, 2009

Dijon Chicken


I found a very simple Dijon Chicken recipe over at one of my favorite blogs, Little Birdie Secrets.
It sounded so good, I just had to try it!

Delicious!

I added just a little extra - I couldn't resist!
A few dashes of Tony C's and about a 1/2 cup of "Holy Trinity" - perfect.

This yummy dish was easy, quick and cheap to cook up.
What could be better?!
If you already have the Dijon mustard, then it'll only cost about $8 and serve 4-5 people.

Not too shabby, huh?!

And it's been kid-tested too!
Bethany and Serenity liked it!
WooHoo!!


Thank you Little Birdie Secrets!

Happy Holidays!


StumbleUpon.com

Friday, December 4, 2009

Princess Tiana Bracelet


I made these Princess Tiana bracelets for Serenity and her BFF, Cobee Lynn today.
Once upon a time, I used to make children's bracelets, but I stopped because I wasn't selling all that many - there is so much competition out there!
{sigh}
Anyways, it's been a few years since I've made one, but I'm really satisfied with how these turned out.

Time to make more?
Hmmm...

Aren't the Princess Tiana beads and the little frogs the sweetest?! I custom ordered them from threemoonbabies over at Etsy.
Marjorie is an awesome artist and this is the second order I've made with her - and I plan to make more!
My first order was this pretty castle switch plate for Serenity's room.


I also custom ordered a pretty Saints cheerleader bead with my Princess Tiana order too.
You can see a picture of it on threemoonbabies Flickr photostream here.
I plan to make another bracelet for Serenity with it.
While you're at Flickr, check out Marjorie's other beads and creations!

You can custom order a cheerleader bead for your little one over at her Etsy store too.
Marjorie welcomes custom orders and her customer service is the best!
She's so helpful and affordable!

Don't forget to have a look at threemoonbabies' blog too!
Right now she has a post up with some of her cool beads on necklaces - her pretty little Darling Stinker is modeling them - awww!!

SIX more days until The Princess and the Frog hits the theaters!!

Happy Holidays!

StumbleUpon.com

Wednesday, December 2, 2009

Ruffles & Stuff


I recently stumbled across the cutest blog called Ruffles & Stuff owned by the very talented Disney. She shares a ton of ideas, links to awesome blogs and wonderful pictures - especially the ones of her adorable little girl!

Today Disney featured my Child's Apron Using a Dishtowel & Potholder tute. I love how she put it in her sidebar - I wonder if it would be okay if I borrowed that idea?! You can check out all of her previously featured ideas and tutorials here too.

Disney's newest post is of a pink and brown Christmas tree made from felt and cotton fabric for her daughter to decorate. She made ornaments for the tree out of ribbon and felt. It's so creative and a great way for your little one to decorate their very own Christmas tree - over and over!

Just the other day Serenity was asking me for a Christmas tree to put in her room (has your child asked you for one too?) - a felt & fabric tree like over at Ruffles & Stuff would be perfect for her!

Happy Holidays!

StumbleUpon.com

Tuesday, July 7, 2009

Southern Bella's Green Toy GIVEAWAY

Southern Bella's Ways To Save is having an awesome Green Toys Tea Set GIVEAWAY! Green Toys are made from recycled milk cartons and come in environmental packaging. Neat! The toys are tough and durable and safe for you child - no lead paint!


Check out Amazon.com's Green Toys Tea Set review - it has a full 5 star rating!

----------
Here's How to Enter:
  • Go to Green Toys and find the Green Toy you would like to have then come back here and leave a comment telling me what that product is. PLEASE Make sure to leave your name and email address so I can get in touch with you if you win.
Extra Entries (for EVERY extra entry leave another comment) :
  • Subscribe to Southern Bella's Ways To Save
  • Grab my button and link back to me.
  • Blog about this contest and link back to me
  • Follow me (twitter or blogger)
  • Tweet about this contest: RT @waystosave NEW Giveaway! Green Toys Tea Set http://tinyurl.com/mprswr
  • Post this contest on your facebook
Rules:
  • Begins today July 6, 2009 and ends on July 13th, 2009! Winner will be announced July 14th. Open to 18+ USA. You must leave your email so I can contact you if you win. You will have 48 hours to respond or I will choose a new winner. Winners will be chosen using random.org.
----------
Go enter today!

StumbleUpon.com
Related Posts with Thumbnails