Saturday, October 31, 2009

Happy Birthday Serenity!!

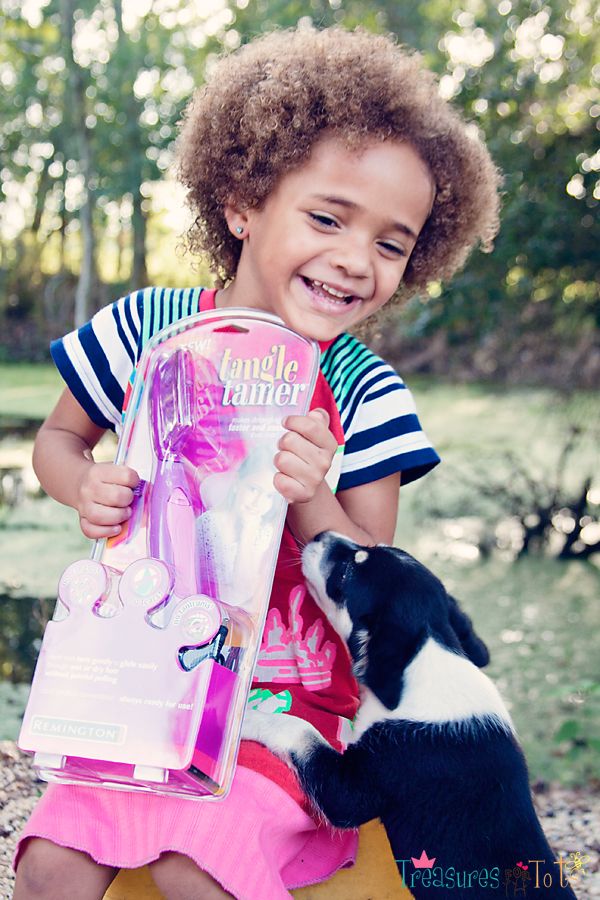
My baby girl is 3 today!!

Yep, she's a Halloween baby!

Here she is on her 1st birthday. We had a Halloween themed party on Halloween day.
I won't ever do that again - we barely had time to go Trick or Treating!


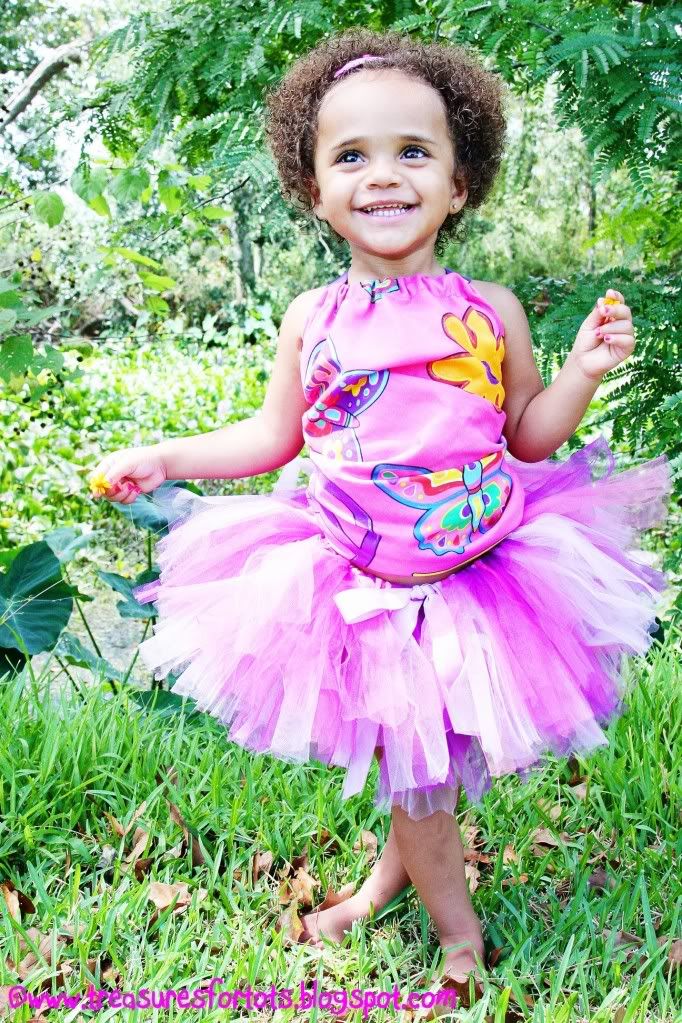
And here she is for her 2nd birthday.
That one was an Ariel themed party. She was all about Ariel last year!
This time we had her birthday party a week before her actual birthday.


My husband works offshore, so we'll be having Serenity's 3rd birthday party in 2 more weeks when he gets home!
Serenity asks about her birthday party every day without fail! She has to ask everybody she talks to, "You coming to my birthday party?" - it doesn't matter if she's already asked them a dozen times either!
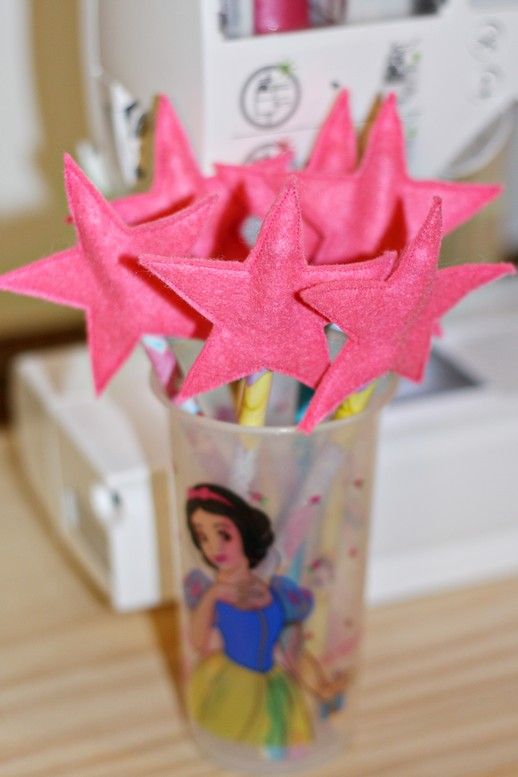
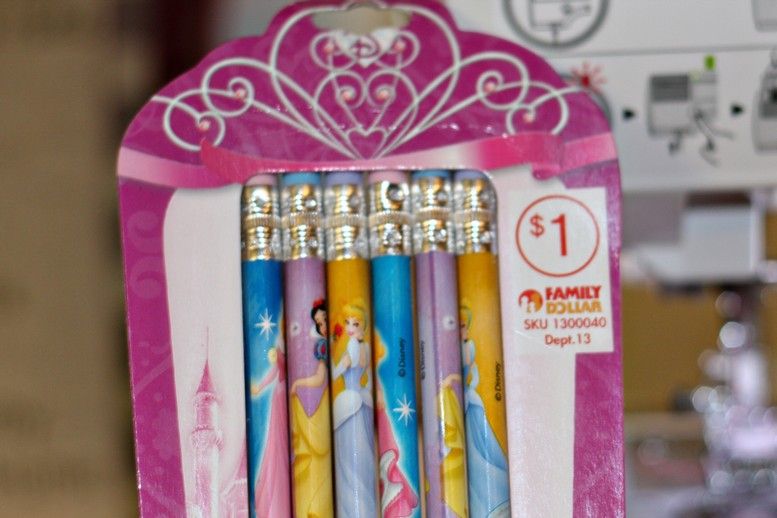
This year her party will have a Princess/castle theme - and that's all I hear her talking about - she even wants a castle cake!
She's totally excited!

Actually, I am too!


HAPPY HALLOWEEN!!

Hope y'all have a great day!

Have fun Trick or Treating!!

StumbleUpon.com

Friday, October 30, 2009

My New Banner & Buttons!


I got a new banner!! I'm so excited! I have new buttons too! I've been wanted to have a banner done, but I really couldn't find anything I liked. I wanted something kiddie - something whimsical! It had to match my blog name and keep in mind that most of the stuff I put on here is kid-orientated.

The other night, I was checking how (once again) to make blog buttons, when I came across Musings of a Housewife. She owns DCR Desgin too - she designs all those pretty blog banners and buttons that I've been eying for a while now!
On her post, How to Design a Blog Button, was a link to Steven Novak's website novakillustion.com. She said Steven was affordable and would create something no one else had - something totally unique! Well I certainly wanted to check him out!


Steven specializes in children's illustrations and they are so cool - I love his artwork! He captures childhood wonderfully.

Check out his Bio - he's written three novels, a graphic novel and a picture book too! Wow! This guy is talented!!

I contacted Steven and told him my idea for a banner.
He was willing to draw one up along with two button-size illustrations for a very affordable price.
He did everything he could to make sure I was totally happy with my illustrations too!


Steven started off with a pencil sketch of what I had in mind.

Then he moved on to the color composition.

Before the final illustration, Steven added special touches to the artwork too, like Serenity's lavender muumuu (the blankie that she drags everywhere), her Blabla mermaid she named Lily, a flower in cartoon Serenity's hand, and I even sewed the top and tutu she's wearing!

I'm more than satisfied to be able to get a wonderful banner that is so personal, just totally cute and a beautiful piece of art!
Serenity loves it too - she got so excited when she saw her cartoon self - and her Lily doll, her muumuu, the dinosaur and all the rest of the toys!
She kept pointing everything out - "that's MY flower, that's MY shoes, that's MY Lily", and on and on!!
She such a character!


If you're looking around for something very unique and fun for your banner and buttons - go check out Steven Novak's awesome illustrations!! You'll be very happy you did!

Now that I had my awesome button-sized illustrations, I headed over to A Heart For Home and grabbed the HTML button code I needed to created my buttons so I could share with y'all!
Allyson has done all the hard work of creating the HTML button code for you - all you have to do is copy and paste!!
How easy!

Don't forget to grab one of my buttons before you leave!


Have fun!

StumbleUpon.com

Wednesday, October 28, 2009

Pencil Wands (Star Pencil Toppers)


Roots and Wings Co. posted the cutest Pumpkin Pencil Topper tutorial a few weeks ago.

Anjeanette's little boy has EE and can't have candy. She came up with these felt pumpkin pencil toppers so he could have something besides candy to share with his classmates!


How creative!

You can make Turkey toppers, Christmas tree toppers, Mardi Gras mask toppers, Valentine heart toppers, Easter egg toppers... well you get the point!

And they would be great Birthday party favors too!
So I shopped around looking for Disney Princess pencils, and I found 6 pencils at Family Dollar for only $1!


Then I created a star template page in Powerpoint (download the PDF file here), and got to work.


I didn't have E-6000 glue, but Aleene's Fast Grab Tacky Glue worked just as good.


These came together very quickly, even if you're a beginner sewer you won't have any trouble with this project!

But remember - if you're working with craft felt (like I am) be careful removing the template. Because craft felt isn't as durable as 100% wool felt, it's easier to mess it up.

I used 1 1/2 pieces of craft felt (4/$1) to make all 6 pencils ($1) - so that's around 25¢ a pencil!

Cute and cheap!

I want to give a BIG Thank You to
Anjeanette and Roots and Wings Co. for sharing their awesome Pumpkin Pencil Topper tutorial!

Have fun!


StumbleUpon.com

Monday, October 26, 2009

Superhero or Knight's Cape

I think she's summoning lightning!


Serenity is having a Princess-themed birthday party this year, but little boys will be coming too.

I've been getting stuff together so they can dress up as Knights. I'm looking for materials that are fairly low-cost and very simple to make and/or sew.
Two things I definitely wanted to make for the Knights are the capes and shields.

I might end up doing armor, but I don't know yet.
I thought about making the swords too, but I found some really cool-looking ones at Wal-Mart for only $4.

A couple of days ago I saw some Greige cloth at Hobby Lobby on sale for $2/yard.
They were very bright boyie colors too - orange, blue, and green.
The first thing I thought of was: Knight's capes! I'm not even sure what kind of material it is - but it's shiny!
Shiny is perfect for a Knight's cape!

So tonight I'm looking over some of the Superhero cape tutorials I have bookmarked and they're all really cute, but not quite what I'm looking for - I want to be able to sew it
quick, ya know?

So taking stock of everything I've read, I whipped up a cape that is extremely simple to sew and can be used for whatever your child can imagine!

Materials needed:
1/2 yard of fabric
45" of bias tape
thread
scissors
cape pattern (download here)

1) Print and cut out the pattern.
Be sure to your printer is set to: Page scaling:
NONE and CHECK the little box next to: Choose paper source by PDF page size.
Tape the pages together.
Don't overlap them!
You'll need to extend the pattern lines out just a little with a pen or marker.
Here's the pattern all taped and cut out:


2) Pin the pattern on the fold of the material, and cut out the cape.

3) Roll-hem all the edges with a serger. If you don't have a serger, you can do a double-turn hem, or zig-zag stitch on the raw edges.
You could put bias tape around the entire cape too, but that can get expensive if you're making more than one.
Or if you're using knit, fleece or some other cloth that doesn't fray much, don't worry about sewing around the edges.

4) Fold the bias tape in half to determine the center, then pin it to the center of the neckline on the cape, now finish pinning the rest of the tape to the cape.
You're gonna have two long pieces that extend out past the cape - they will be your ties.

5) Sew the bias tape, make sure to back stitch at the beginning and end.

All done! See how easy that was?! And the total cost? Around $1!

Wow!

If you're making them for party favors, like I am, use a several colors of bias tape to create a different color combo for each cape.
That way the boys will know exactly which cape is his!


Look at my Darling Stinker go! She was really getting into her Superhero mode!
She was saying, "I have ZOOM power!"
Funny!


POST-IT-NOTE: Here's a list of some great cape tutorials:

Reversible Girl's Superhero Cape

StumbleUpon.com

Sunday, October 25, 2009

Grow With Me Gift: A Week Later


This is the Grow With Me Gift kit after a week. If you missed my first post about the GWMG kit - click here to check it out!

I kept it in our spare bedroom until the roots started to develop - it's dark and cool in that room. Kim put that advice on her Facebook Grow With Me Gift page for those of us who live in the South and are still experiencing cool/warm (sometimes hot) weather.

Now it's in my kitchen and doing really good.


Serenity is having fun with this project too. Look how interested and excited she is taking care of her plant!


I have to be careful not to give Serenity too much water to put in the vase, only the roots should be covered. Too much water on the bulbs could make them rot!


I had to take the sticks out 'cause she wanted to dig in the gravel with them. So this is the face she's giving me - da brat!


POST-IT-NOTE: Serenity's wearing a necklace she made all by herself today. I want to set up a necklace-making table at her Birthday party and this one was for practice - she had fun making it so I think the other little girls will too! It'll look cute with their Princess dresses dontcha think?! Isn't her face crazy-looking? I was practicing face-painting! I'm awful, huh?! Serenity didn't care though! I think this would be another entertaining activity to have at Serenity Bparty - something the older girls could do for the younger kids. I think they would all have fun!

Don't forget to get your Grow With Me Gift kit today!

And yes, Serenity's charming and bright dress is by courtneycourtney!

Have fun!

StumbleUpon.com

Saturday, October 24, 2009

Pumpkin Patch 2009


Serenity and I had a great time at The Pumpkin Patch in Thibodaux. It was held at the First United Methodist Church. They hold it every year, but I just learned about it yesterday from my Mother-in-Law!

I only found out about all the details today so we were late getting there, but Serenity still had lots of playtime and fun!

Next year we'll get there earlier!

There was face painting:


Pumpkin painting:


Tattoos and a water gun game:


Plinko and duck fishing:


And posing for Mommy in her courtneycourtney hoodie dress!


It was a good day!

Happy Halloween!!

POST-IT-NOTE: Serenity is wearing a "Fairy Catcher" necklace (modeled after these fun Bug Catcher necklaces) that Bethany made for her and inside is a tiny fairy I made! I'm thinking about selling them in my Etsy store soon. Serenity also has on a pair of squeaky shoes I found on Ebay. She had so much FUN making those shoes squeak! But sometimes she walked on her toes so they wouldn't squeak! She's such a Silly Stinker! Everywhere we went today, people smiled and told me how adorable she looked!

Have fun!!!

StumbleUpon.com

Friday, October 23, 2009

Twirly Tee Tutu Skirt Tute


Here's the tutorial for the cute t-shirt twirl skirt that I promised y'all! Did you notice the little silly name I gave the skirt? Is that the most ridiculous name or what?!

This would be a cute skirt for any occasion or holiday! Serenity's pink skirt makes me think of Valentine's Day!

Okay, putting this tutorial together took
MUCH longer than I thought it would - there were more steps than I imagined! But don't let that intimidate you, it really isn't that hard to sew together. If you have any questions or notice any mistakes, please email me! Thank you!

Here's a picture of Serenity wearing the original Crazy 8 skirt:


POST-IT-NOTE:
I changed the elastic waistband to a knit waistband. The main reason is because it's just easier - and has a neater look. This is the very first time I ever sewed this type of waistband, so to learn how to do it I read this tutorial and this tutorial, try this one, and these helpful tips too. I probably should've cut a little more off the width of the waistband before sewing it, because mine came out a little bigger than I wanted, but I guess that just means Serenity has a extra growing room!

Remember to click on any picture to
ZOOM in!


Materials needed:
3/4 yard jersey knit material
6" spool of tulle
7"w x 15"l piece of cardboard
2 rubber bands
small piece of cardboard (size of an index card)
fabric pen
sewing gauge
scissors
pins
thread
scotch tape
PDF skirt pattern (download here)


Print out two copies of the pattern, be sure to your printer is set to: Page scaling:
NONE and CHECK the little box next to: Choose paper source by PDF page size. You'll end up with 4 sheets of paper.


On the pages labeled "2" - you'll need to extend the marks out just a little with a pen. I don't know why the printer didn't print it - putting a pattern on a PDF is something I had to learn tonight! I tried to do it once before, but it didn't work out. I still don't know all the tricks yet, but this pattern is correct except for those marks. Cut out all the patterns.


Tape together the "2" pattern piece to the "1" pattern piece -
twice. Don't overlap the pages! You'll end up with two sets. Flip one set over and tape it to the other set - making one big pattern. Look at the pictures to see what I mean:


Lay the pattern on top of the fabric. Make sure the fabric is two-layers thick. You'll be cutting out two pieces of fabric at one time. Pin - I used a lot of pins! Cut around the pattern.

POST-IT-NOTE 2: You could use a large t-shirt you found on sale or recycle an old t-shirt - try using more than one t-shirt for a really unique look!


Place right sides together, then sew 1/2" seam down both sides of the skirt (I used a serger and just followed the edges, but if you don't have one that's okay!) . You'll end up with a large circle that has a "hole" in the middle. It looks just like a big pink donut, huh? Or am I just hungry?


Now you're going to make a 1/2" hem around the edges of the skirt. I normally use a Dritz Ezy-Hem gauge, but it's kinda hard to hem a curve with a straight edge, or one that doesn't curve enough. So what I did was to cut out a small piece of cardboard, traced around the curve of the skirt, and cut the cardboard along that curve. Then I measured 1/2" up with a sewing gauge, and marked the line using a fabric pencil.


Ta-da! Quickie hem gauge all done! It worked great too. I used it to iron a 1/2" hem all the way around the skirt and I'm very satisfied with the results.


Next sew a double stitch around the skirt. Here's how: I sewed about 1/2" from the bottom edge of the skirt, then I adjusted the position of my needle to sew another stitch around the bottom edge of the skirt about
1/4" up from the first one. You don't have to do the double stitch hem, I just think it gives the skirt a nicer look.


Here's how it looks so far:


This next step is measuring and cutting the tulle. You're going to do it the same way I did in my post: Cut Tulle QUICK and EASY!

I used some pink tulle I found online at Nashville Wraps. It matched perfectly with the fabric!


Use the 7" x 15" cardboard to measure and cut out 20 pieces of tulle. Check out my post: Cut Tulle QUICK and EASY for more details.


Set your machine to a long stitch (or a gathering stitch), and sew about 1/2" from the top edge of a the first piece of tulle. {Make sure you're working on the 6"
width of the tulle and not the 15" length!} Before coming to the end of the tulle, overlap another piece and keep sewing until all the pieces have been sewed together using the gathering stitch.


Once that's done, you going to carefully pull on the long gathering thread until you've got the tulle the same width as the waist on the skirt - just like you'd gather a ruffle. Sorry I don't have a picture of this, but my camera was having a hard time focusing on the tulle! Now using lots of pins, pin the tulle to the
right side of the skirt.


Sew right over your gathering stitch. Go very slowly and be sure to keep your tulle as straight as possible making as many adjustments as you need to. Look at the pictures to see what the skirt looks like once the tulle has been sewn on. Normally you'd remove the gathering stitch after sewing a ruffle on - but that is way too hard to do with tulle! I didn't even
try since it's really not going to matter.


Next cut out your waistband. Cut two 3"l x 10"w pieces. Sew a 1/2" seam on one side. Wrap it around your little one's waist, and if it's too big cut about an inch off the width, and try it on her again. Keep doing that until it fits her waist nice 'n snug, then sew a 1/2" seam on the other side. Now iron open the seams, fold the waistband in half, and iron again.


With right sides together, attach the waistband to the skirt. Match up the seams and pin them first, then pin the rest of the waistband to the skirt (use lots of pins!). The waistband will be smaller than the skirt, so you'll have to pull the waistband slightly as you pin it to the skirt.


Carefully turn the skirt inside out, and following the stitch you made putting on the tulle, sew the waistband to the skirt. Serge the edges or use scissors to cut off the excess material - but be careful not to cut your stitches! If you do use scissors, I recommend sewing a zig-zag stitch on your raw edges.


Time for the last part! Lay your skirt down and make sure the tulle is as straight as possible. Following the curve of the skirt, cut the tulle about 1" past the edge of the skirt. This part really depends on you. You can leave it long or any length in-between!


All done! Wouldn't this be adorable to wear to a Birthday party?! Or just because!


Here's a neat sewing tip I learned while sewing knit: set your machine to a longer stitch - I use a 3.5 length. The material will slide through the machine much easier if you use a longer stitch. It does make a difference!

I created the pattern for this skirt by basically tracing around the one I purchased from Crazy 8 and adding a little bit to the length and width to account for seam allowances. It's a size 2T, but I think it'll fit Serenity for a while - it has plenty of room for growing. But if you'd like to make it bigger (or smaller), just add (or subtract) length to the bottom, and if you need to, on the sides (but be very careful making too many adjustments at the waist). Make small adjustments and hold up the pattern to your little one to get an idea of how it'll fit her before making any more adjustments.

I used the 6" spool of tulle because that's what I already had. You could use the tulle that you can buy by the yard too. Your piece would have to be about 120" wide to equal the width I used. Gather it the same way - by sewing a long gathering stitch. You don't have to cut the length 15" either - again I was working with what I already had and I just used my tulle template from making tutus.

How to Clean:
Hand wash or machine wash on
gentle using "Green" laundry soap (okay, optional, but much better!) then hang dry. Or you can put it in the dryer on very low heat for about 10 minutes, then hang dry.

Y'all have got to go take a look-see at this absolute darling layered circle twirl skirt! It's made with tulle too and it's SO girly! I want to make one for Serenity - she will LOVE it!

Head over to Lusco Land to see the skirt she made for her daughter using my tutorial! She used black striped knit and pink tulle - a very striking & pretty combination!

I would like give a HUGE thank you to One Pretty Thing and Ucreate and The Crafter's File Box and Someday Crafts for linking this tutorial!

Have fun!

monogramPhotobucket


 http://www.thethriftyhome.comDIY Day @ ASPTLMake it Yours @ My Backyard EdengiveawaysPhotobucketCreations by KaraThe Girl Creative BCD Show and tellGet your craft on Thurs.Creative Crafts by FloralShowers  IamOnly1Woman Bird Crafts Party

StumbleUpon.com
Related Posts with Thumbnails