Friday, December 9, 2011

Sophie & Lili AND courtneycourtney!


Serenity's sweet Sophie and Lili doll wearing her look-a-like courtneycourtney dress arrived!

It took a minute for Serenity to realize the doll was wearing the same 5th Birthday dress as hers.

"She looks just like me!"

Then a minute or so later...

"Hey! She's wearing a courtneycourtney dress like MINE!"

She's so silly!

---------------
Sophie and Lili and courtneycourtney have TWO dolls you can WIN!

You can enter to win the doll below by clicking HERE, liking Sophie and Lili's page, and then leave a comment.

You can also enter to win this next doll by clicking HERE, liking courtneycourtney's page, and then leave a comment.

I entered both Giveaways!!


AND....


Courtneycourtney will have an upload of dress using Sophie and Lili fabric today!


Fabulous dresses like this one:

Check out more dress previews on her FB fan page!


Make sure you're signed up to get courtneycourtney email alerts so you can grab a one-of-a-kind collaboration between courtneycourtney and Sohpie and Lili!
---------------

Here's another pictures of Serenity with her new doll.
She's named her Princess Ally.
Last year for Christmas she got Sophie and Lili's sweet Clare doll.
She was happy that Clare now has a sister doll to play with and share secrets!


Have fun!!

StumbleUpon.com

Wednesday, December 7, 2011

Welcome Noel Nichole!

Yesterday my friend Brandy's third baby girl was born!
She arrived a couple of weeks early - she was originally due close to Christmas which is why they decided to call her Noel.
For the very first time ever, I got to see a baby being born!
Serenity came to our family when she was two months old so I wasn't lucky enough to witness her birth.
Noel Nichole's birth was the most amazing thing I'd ever seen and I cried the whole time she was entering this world.
Brandy was wonderful and Noel's birth was very short.
Afterwards I started snapping pictures and bragging non-stop about how beautiful she is to anybody who would listen!

Here's a few pictures I took yesterday, and the last one is from today once she arrived home.

"I wish you could've taken a picture of how the doctor got the baby out so I could see." - Serenity
---------------

Dr. Sanders delivers Noel and you can see Mommy Brandy in the mirror smiling at her new baby girl.

Daddy Coby cuts the umbilical cord.

Noel was covered with vernix.
It's a white cheesy-looking substance that does a lot of things including protecting the baby's skin.
I sound all knowledgeable, but I actually had to look that up!

Noel's birth was relatively easy and she didn't give Brandy any problems whatsoever!

She was in the birth canal for a very short period, so her beautiful head was perfectly round.

Here's the RN Kim stamping her tiny footprints.

She weighed in at 6 pounds and 5 ounces!

So perfect and beautiful!

Oh look at that pout!

Am I wrong to find this picture hilarious?!

She looks so wore out!
They are almost finished with her before swaddling and bringing her to Mommy.

She looks like she's saying, "No more, I'm done!"

All snuggled up next to Mommy.
Brandy's Mama was taking pictures throughout the delivery with her iPad 2.
The doctor thought we were very high tech!

Happy and home with her adoring Mommy, Daddy and two big Sisters.

Have fun!!

StumbleUpon.com

Thursday, November 24, 2011

Happy Thanksgiving!!

!

Happy Thanksgiving!

Hope y'all had a wonderful day!

You can find my tutorials for Serenity's Thanksgiving Day outfit by clicking the links below:


Serenity's lovey matching headband is from Giella on Etsy
Shyloe's work is beautiful - such sweet personal touches!

 
Have fun!

StumbleUpon.com

Friday, November 18, 2011

Twirly Skirt Tutorial - sort of!


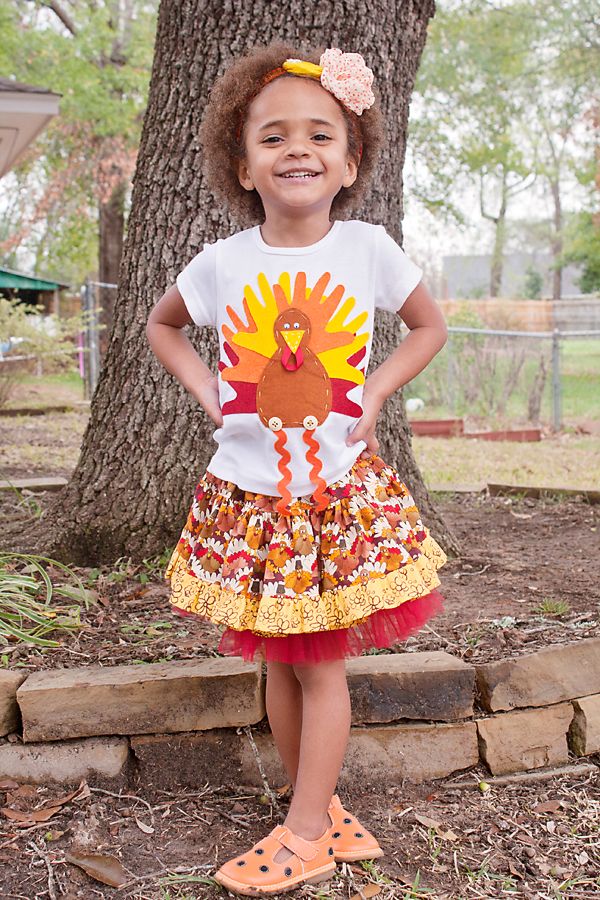
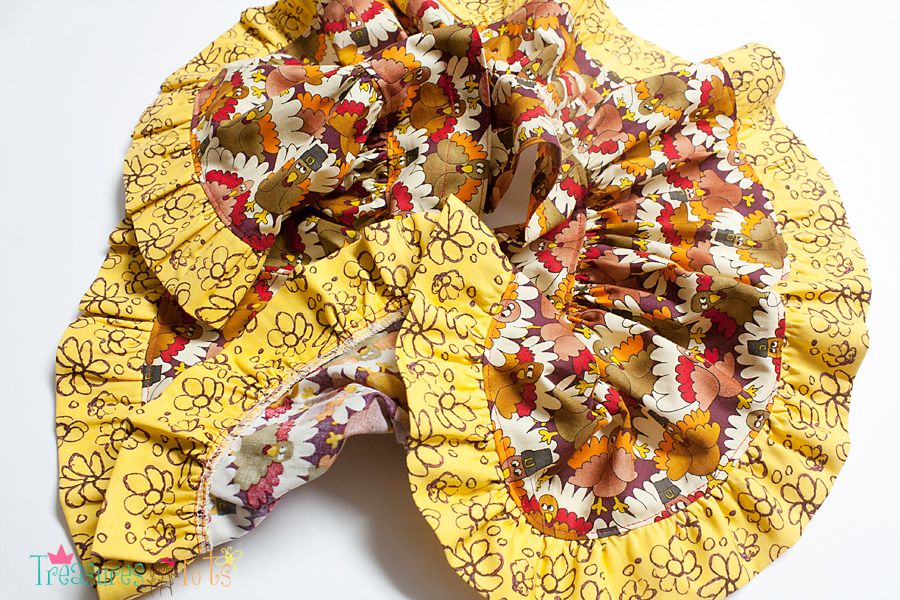
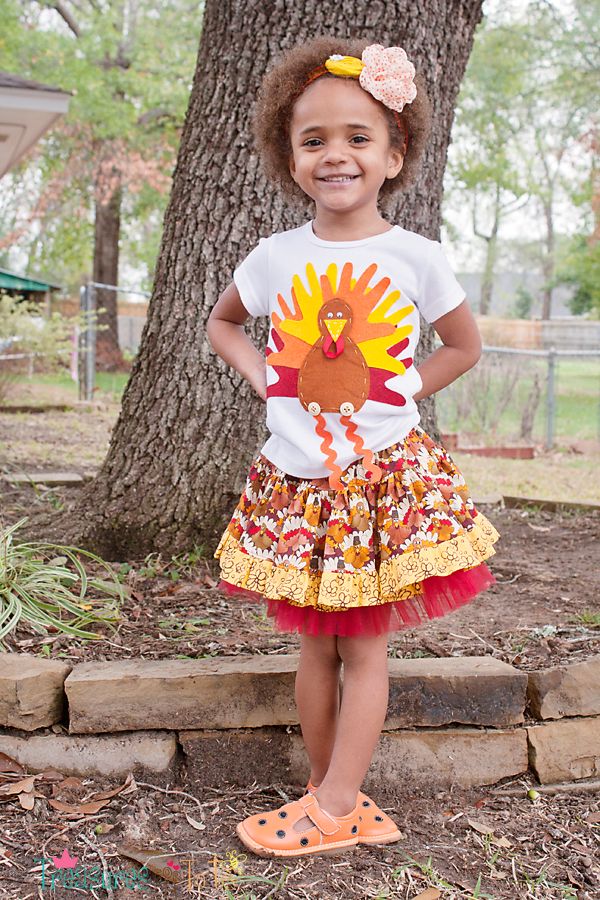
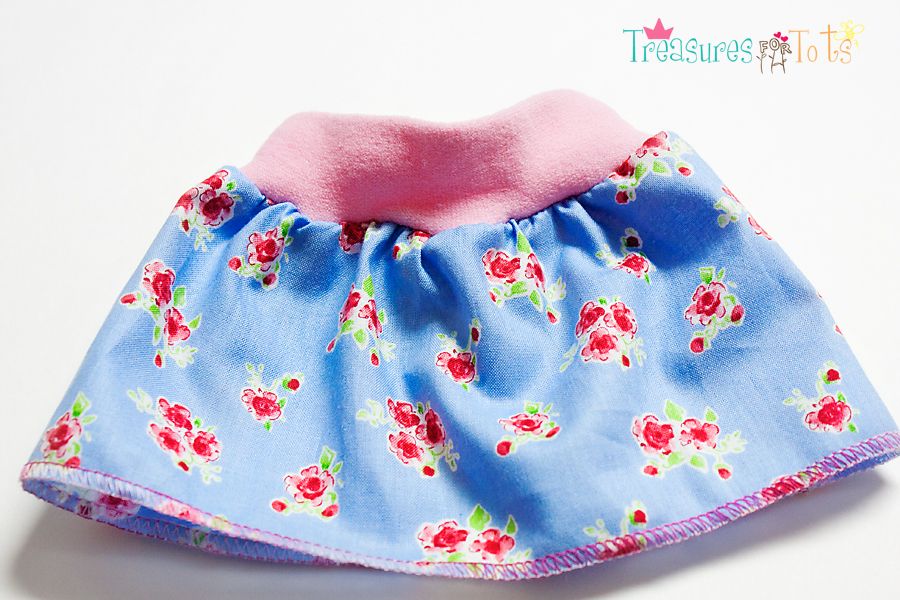
I made this cute twirly skirt for Serenity to wear on Thanksgiving Day.
You can find the tutorial for the little faux petti underneath the skirt, HERE.
I made a tiny hand felt applique tee to match the outfit too.
You can find that tutorial HERE.
---------------
As I was making the skirt, I was completely oblivious to the fact I was actually putting the skirt together wrong.
I know better - you assemble a skirt like this from the bottom up.
But I was watching TV, taking pictures, talking to Serenity and sewing and I had a complete brain freeze!

I decided to go ahead and post the tutorial.
Even though I messed up, it wasn't a total loss and I can show the mistake I made and what I did to correct it!
---------------
The measurements below are for Serenity.
She's a very small 3T, plus I was putting it over the faux petti, and I made it shorter than normal so the tulle ruffles would show.
To determine your daughter's size, try this:

Yoke:
1.5 x your child's waist measurement divided by 2.
Add 1" for the seam allowances.
For example: 1.5 x 18" = 27" / 2 = 13.5" + 1" = 14.5"
So you're going to cut 2 pieces of fabric that are 14 1/2" wide.
As far as the length of the yoke, 4" or 5" is usually good for toddlers and little girls.
You can decide if this length works best for you.

Main Body:
The length is whatever you need really.
Just cut 2 pieces selvage to selvage (usually 45" wide) to make a really twirly skirt.

Ruffle:
The length of the ruffle is again as long as you like.
The width is at least three times the width of the skirt.
---------------


Materials:
2 pieces 4"l x 14 1/2"w - yoke
2 pieces 5" l x 45"w - main body
3 pieces 4"l x 45"w - ruffle
bobbin with upholstery thread
straight pins and safety pins
3/4" elastic
scissors

Seam allowances are 1/2" throughout.
---------------
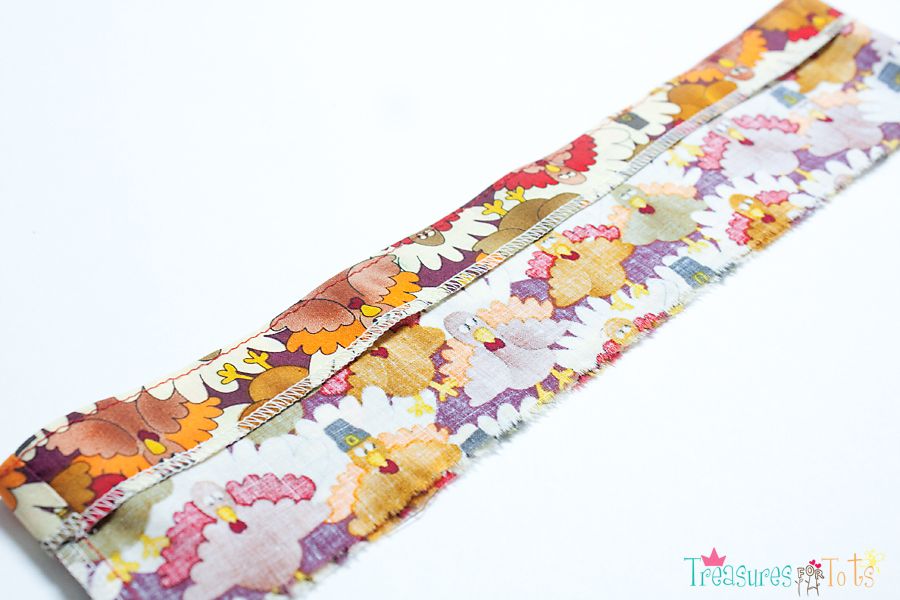
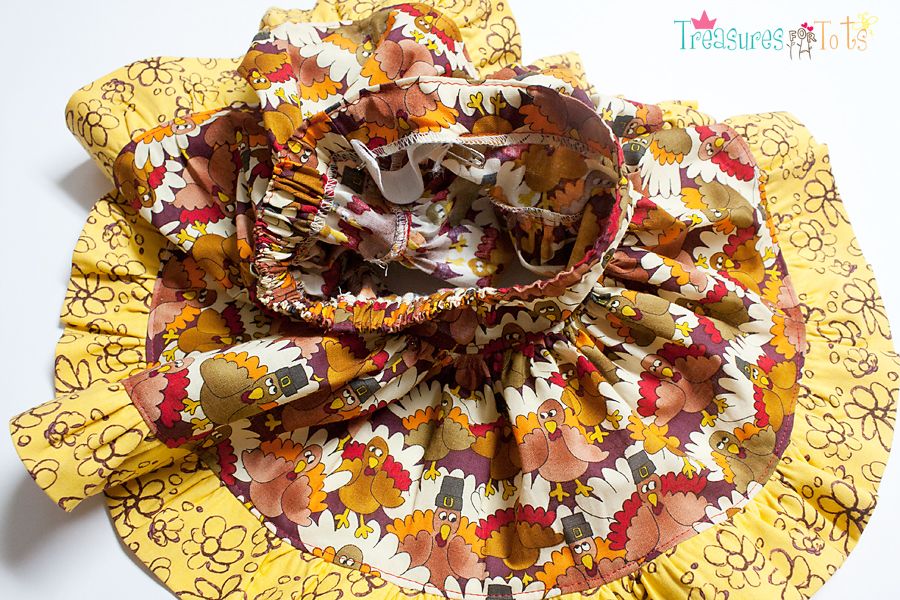
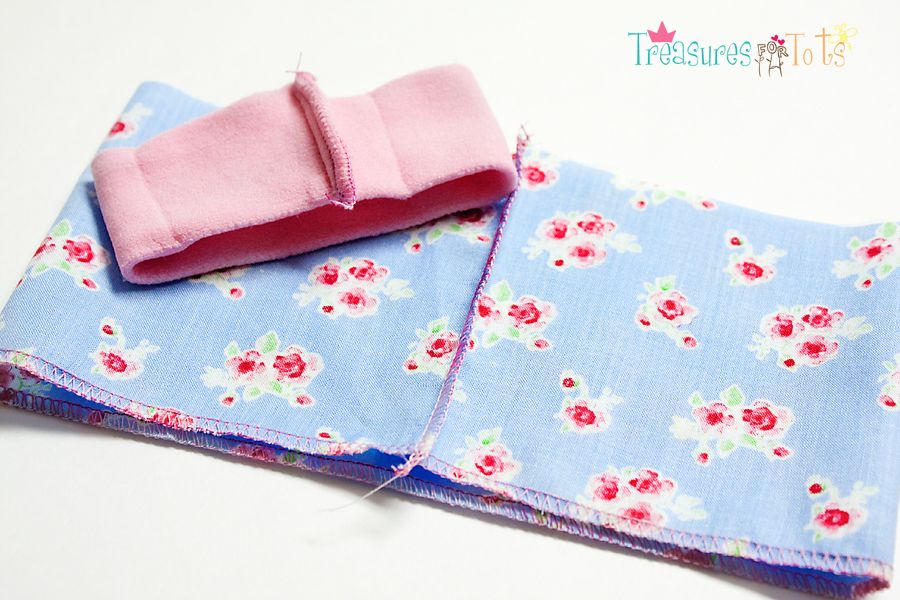
For the yoke, serge the tops of both pieces.
Place them right sides together, sew the sides and serge the seams.
Make a 1" hem at the top.

Top stitch 1/4" from the edge.
Then top stitch 1" from the edge, leaving a 2" opening for the elastic.
Set aside.

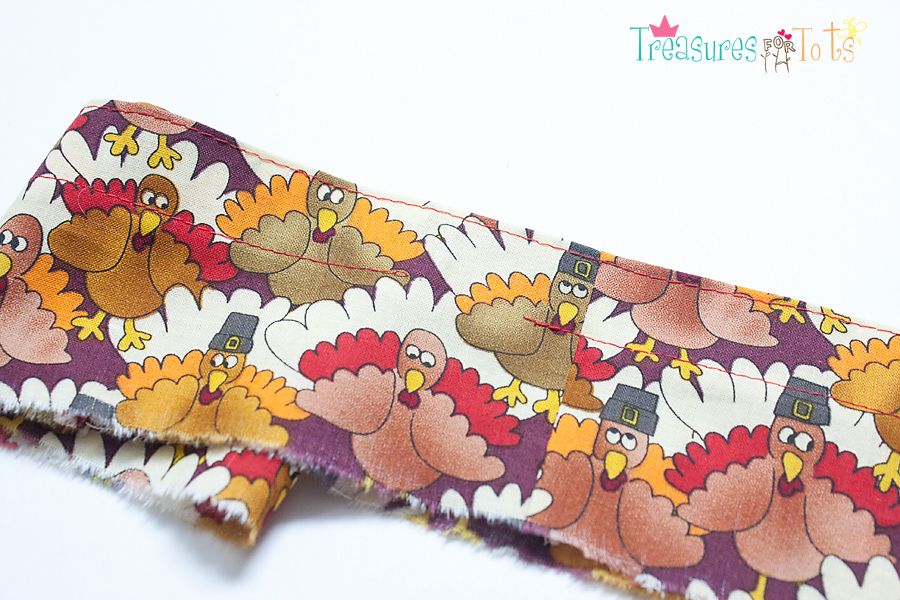
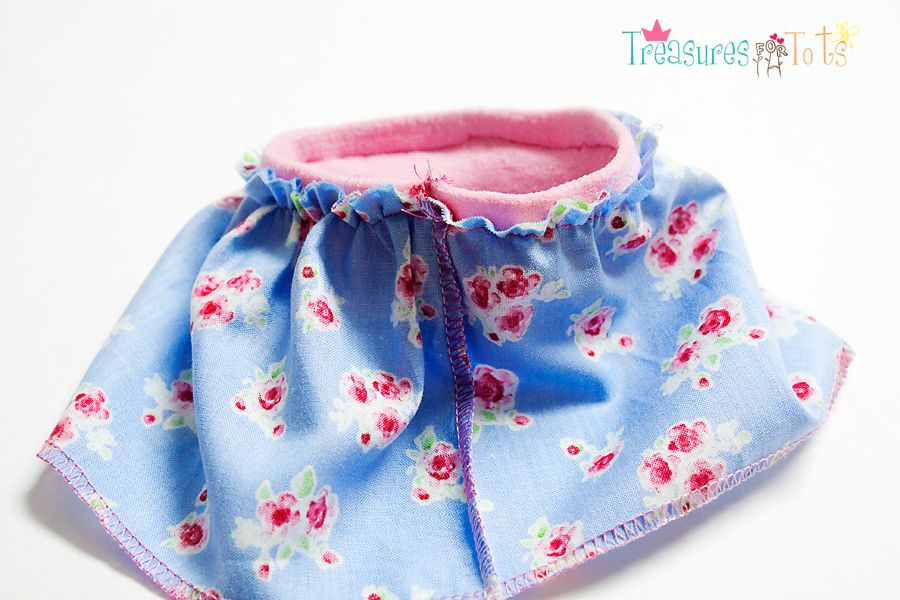
Now for the main body.
Place right sides together, sew the sides, then serge the seams.
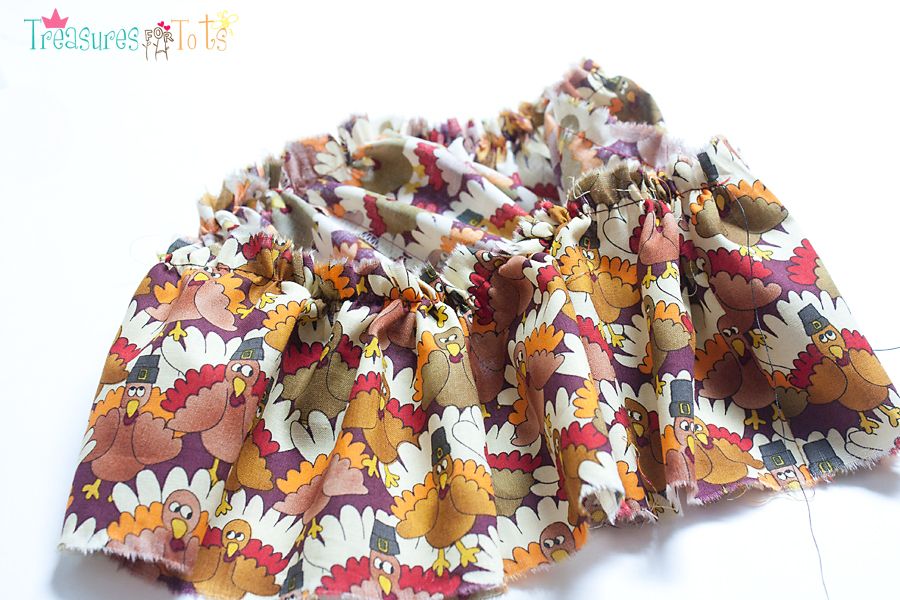
Using the bobbin of upholstery thread, sew a gather stitch 3/4" from the top of the main skirt body.

Gather the main body of the skirt until it's the same width as the yoke.

With right sides together, line up the side seams, and pin the main body to the yoke.

Sew the two pieces together.
Serge the seam.
Iron the seam UP, and then top stitch.

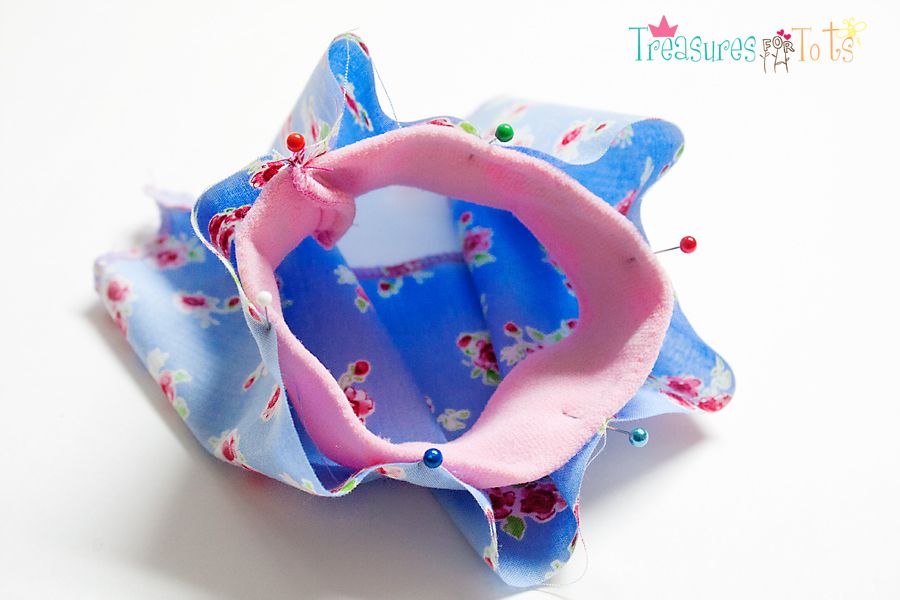
I was feeling very good about the skirt at this point.
UNTIL I realized I didn't attach the ruffle first!
I should have done that BEFORE I attached the main body to the yoke!


Geez!!

Okay so I could keep going from here without yanking out all that hard work.
It's just going to take more than twice as long to get that ruffle on right.
But it can be done - just with loads of patience!
----------------
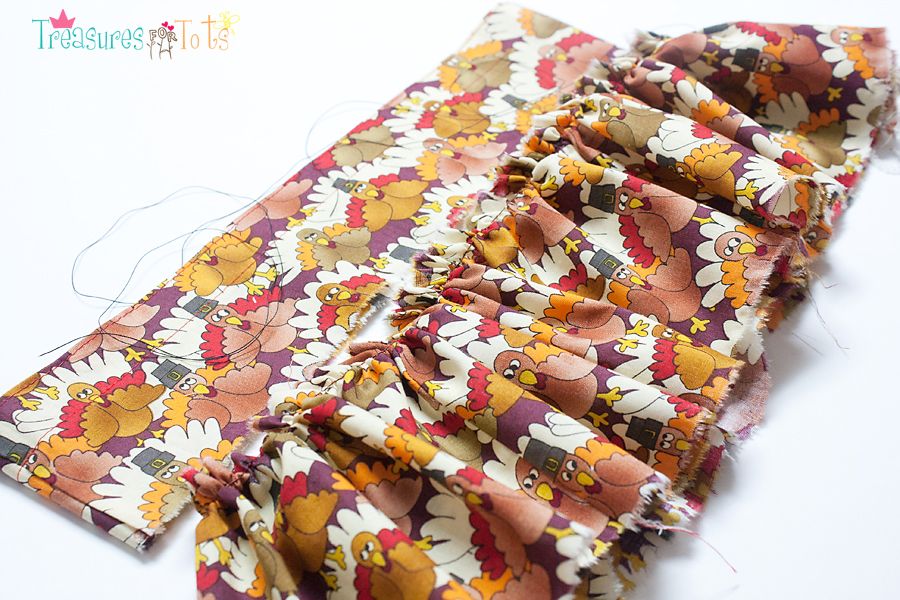
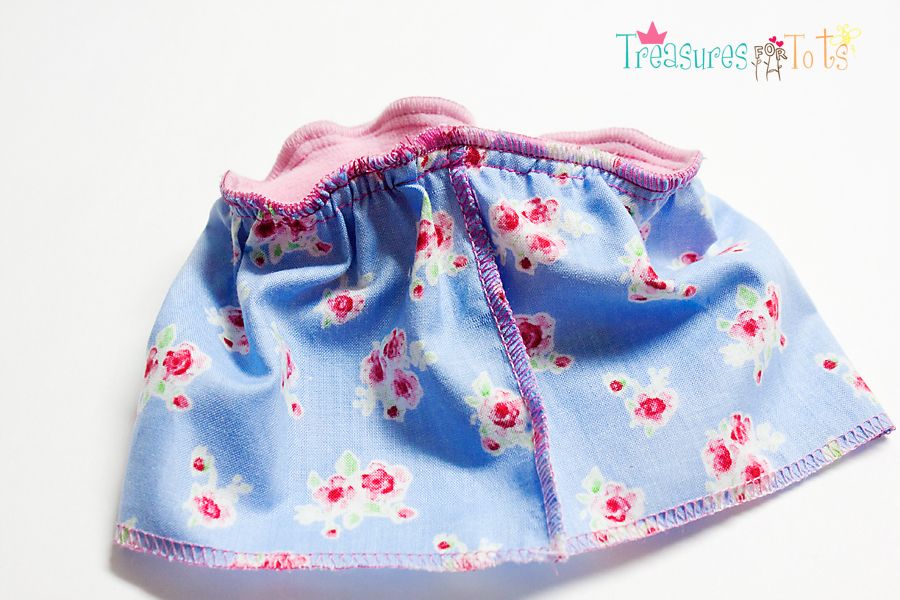
On to the ruffle....
Attach all the pieces together until you form a large circle.
Serge the seams, iron flat.
Fold the entire piece in half, raw edges together, and iron.
Using the upholstery thread, run a gather stitch 3/4" from the raw edges of the ruffle.
The upholstery thread makes gathering that ruffle so much easier!

Now this is the time consuming, pain-in-the-neck part.
Because the main body is very twirly, it's going to take forever to determine how much I'll need to gather the ruffle.
But - still much easier than pulling out all my previous hard work or starting completely over!
---------------
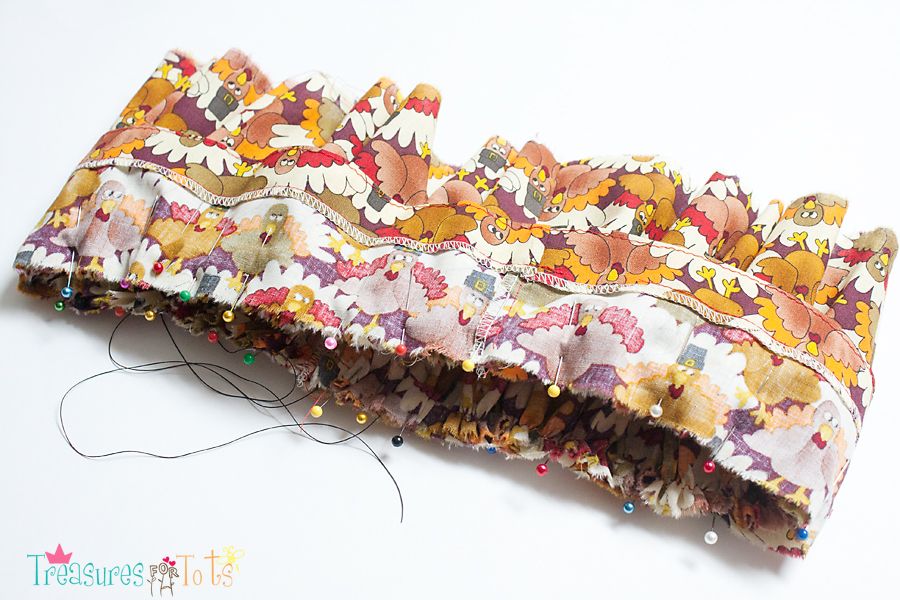
Gather the ruffle until it's the same width as the main body.
Pin together.

Sew the pieces together, serge the seams.
Iron the seam UP, then top stitch.

Whew!
Gotta remember to never forget the ruffle again!

Almost done now...

Cut the elastic 1" longer than your child's waist.
Attach to a safety pin (or bodkin), and pass it through the waistband.
Overlap the ends about 1", sew a triple stitch to secure.
Tuck into the waistband and close the opening with a triple stitch.
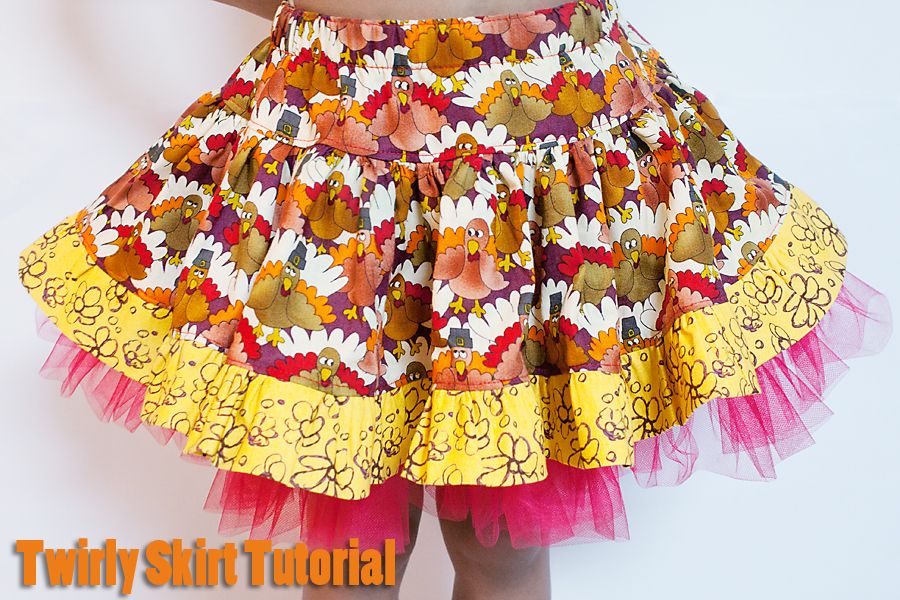
All done!
Very twirly turkey skirt!


Have Fun!!

StumbleUpon.com

Thursday, November 17, 2011

Thank you Brianna!


I mentioned before that my Facebook and blog friend Kim (Grow With Me Gifts) and I send our kids back and forth fun things in the mail.

The girls are the same age - Brianna is older by only 4 months.
They feel like they "know" each other because of the all mail correspondence for the last couple of years - and they see each other on Facebook a lot too!
And while I love this digital age more than anything, I think it's very important to keep some things - like old fashion pen pals - except with a modern twist.
Who doesn't like to get things in the mail?!

Serenity send little Brianna the pillow she sewed the other day.
Along with a sewing kit, wand and a picture she drew of herself and Brianna holding hands.

Brinna's surprise came in today and Serenity was beyond thrilled!

She got an adorable little pink castle that grows when you put it in water.
The first thing Serenity did was to fill a "glass" (it's actually plastic) of water and plop that castle in!
She'll probably check it a thousand times every day!

The next thing was a little purse filled with Smacker's lip gloss, cheek gel and nail polish!
And everything GLITTERS!
The fastest way to a 5 year old girl's heart is to give her something that glitters.
But to give her makeup that glitters?
She'll love you FOREVER!!
She looks so serious - concentrating hard to get that lip gloss on just right.

Brianna also sent over a little coloring pad and a cool dolphin hologram bookmark.
Serenity was like, "Look Mommy! They are dancing!"
There was a pack of sour candy in the goodie box too - but she's going to save that for her Daddy when he comes home.
BTW, that's glitter and brownie crumbs all over her face!

Thank you very much Brianna and Kim for the wonderful surprise in the mail!!
Oh and please ignore my child's crazy hair!
It's so hard to keep those pretty little ringlets in her hair after she's been playing all day!


Have Fun!!

StumbleUpon.com

Wednesday, November 16, 2011

Easy Waldorf Doll Skirt Tutorial


I was cleaning and organizing my sewing room today when I came across a bunch of child-sized soft stretchy headbands.

I bought them months ago and never got around to doing anything with them.

I had scrap fabric on one side of me... and the headbands on the other side...

It was a light bulb moment!

This is super easy to sew and only takes about 15 minutes or less to complete!
Materials:
6" long baby/toddler stretchy headband
4 1/2" l x 18" w scrap fabric
pins

Hem, serge or roll hem the bottom of the fabric.
With right sides together, sew a 1/2 seam down the raw edges.
Serge or zig-zag the seam of the skirt.
--------------
Starting at the seam, cut a 1 1/2" piece off the headband.
Sew a new 1/2" seam so that it now measures 4" long.
Serge or zig-zag the seam.
This piece is now the waistband!

With right sides together, stretch and pin the headband to the skirt.

Carefully stretch the waistband while sewing a 1/2" seam around.
---------------
If you're having difficulty, try sewing a quick gathering stitch 3/4" from the top.
Gather the skirt piece until it's the same width as the waistband.
Pin the waistband to the skirt, right sides facing, then sew a 1/2" seam around.

Serge the raw edges or zig-zag the edges.

All done!
See how quick that was?!
The skirt fits Serenity's Bamboletta, American Girl and other dolls that are around the same size.

Have Fun!

IhookedupwithHoHlamespiceWhat I'm Making Monday

StumbleUpon.com
Related Posts with Thumbnails