Thursday, October 28, 2010

Shabby Rolled Fabric Flower


You've seen these everywhere right? They are so popular right now - and can sorta get expensive to buy.

They aren't exactly
hard to make either - a lot of time goes into the more elaborate pieces, but you can make a couple of simple flowers pretty quick once you get the hang of the rolling process.

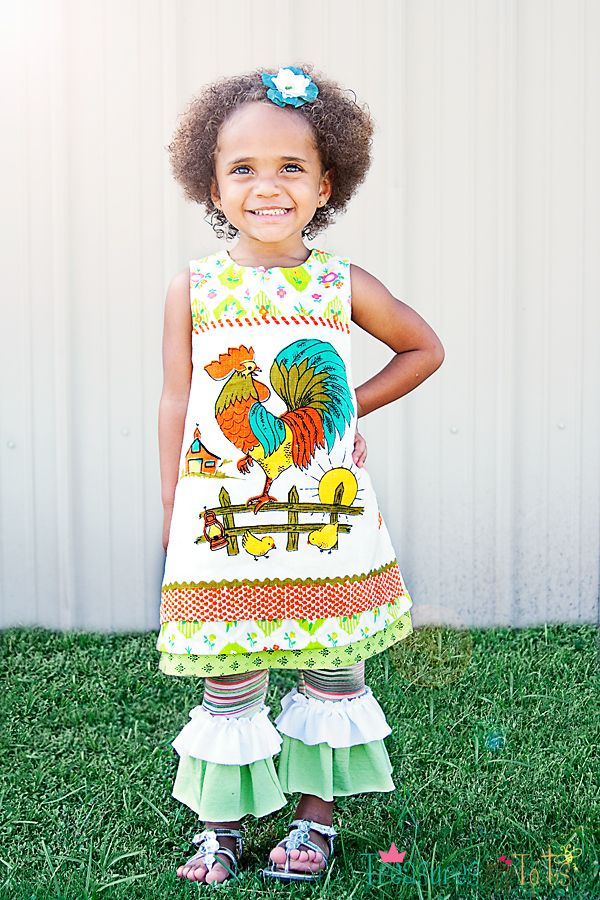
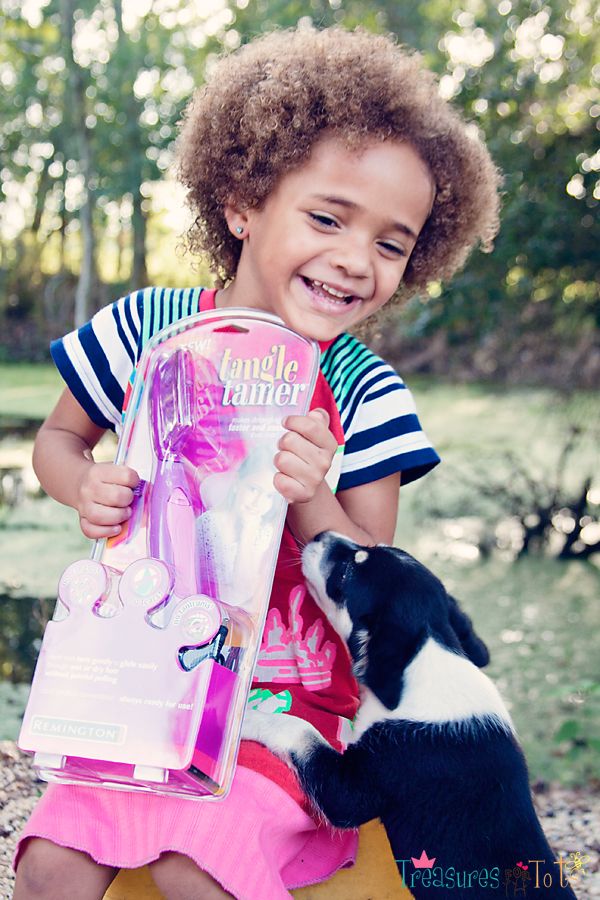
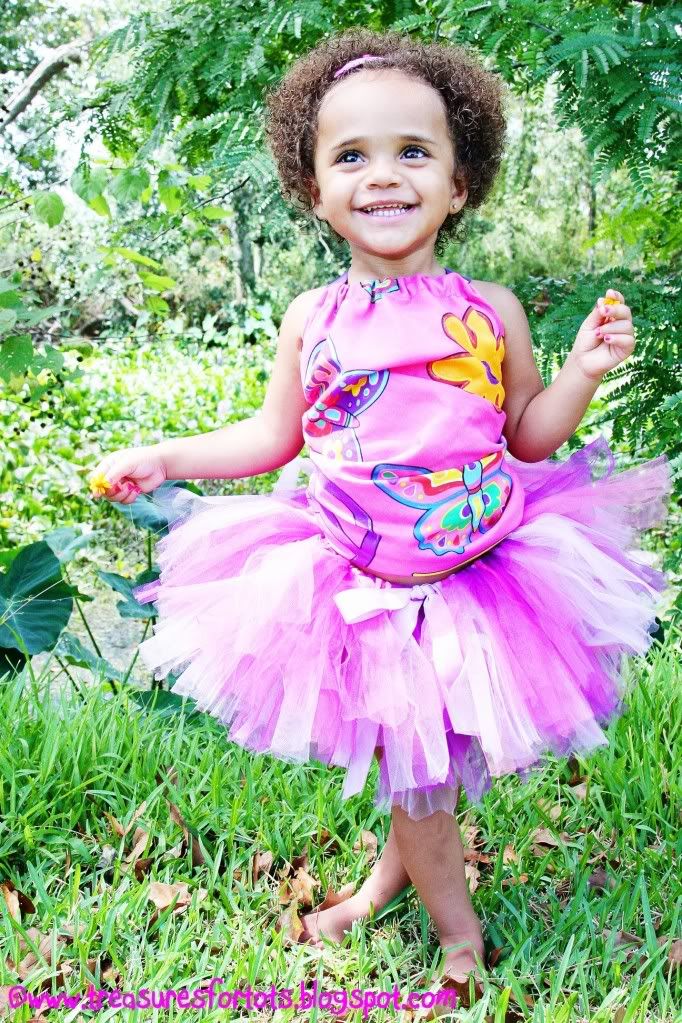
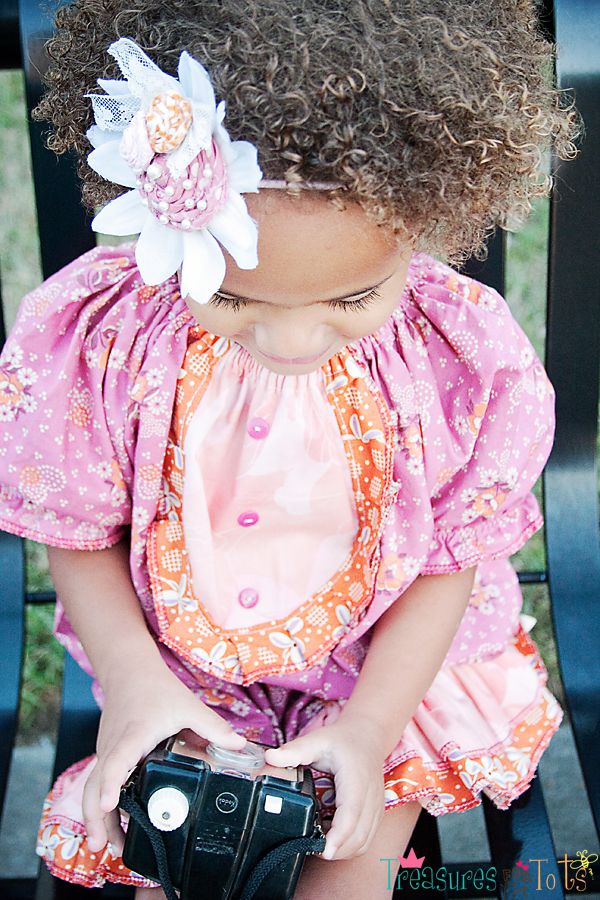
I made the two Shabby Flowers Serenity is wearing in the pictures, and as you can see I definitely wanted to try to create something more than a couple of simple rolled flowers.

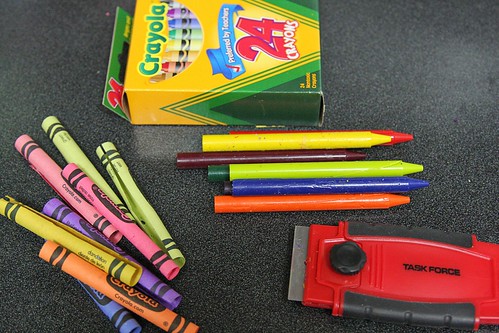
These are all the materials I used to create both flowers:

Michael Miller Fairy frost fabric
Designer fabric
Silk flowers
Felt
Ivory vintage lace
Pink lace
Lt. blue tulle
Silk leaves
Swarovski ivory pearls
Stretchy headbands
Glue gun and glue sticks

I found the easiest and most comfortable way for me to roll the fabric was by combining the written and video instructions I found over at Alayne Studio.

1. Cut out a strip of fabric about 1" long x 45" wide (cut selvage to selvage*).
2. Iron the strip in half.
3. Tie a knot at one end.
4. Trim the piece hanging out of the knot.
5. Start rolling the strip snugly over the knot a couple of times.
6. Then holding the piece sideways - like a "wheel" as it says in the video - twist the strip, then roll the "wheel" around in your hand, twist, roll, twist, roll.
7. Stop every inch or so and hot glue (or fabric glue) the bit you've just twisted and rolled.
8. Attach to a stretchy headband using hot glue and a piece of felt.

Here's a very quick video I put together on my iPhone to give you an idea of how I rolled the flowers for Serenity's headbands:


Pretty easy!

You can cut a strip of fabric out however wide you want really - it depends on the look you're trying to achieve.

Try different rolling techniques for different looks too.

It can be fun to get funky and creative with these accessories - so many possibilities! And you can be sure if you make it, no one else will have one quite like it!


*POST-IT-NOTE:
Selvage - When a length of fabric is woven and printed or dyed at the factory it has two finished lengthwise edges. These edges are usually a little stiffer and fimer than the crosswise cut edge of the fabric and these edges will not ravel. When fabric is cut at the fabric store it is cut from selvage to selvage.

Have fun!


monogramPhotobucketPhotobucketPunkin Seed Productionsmake it wear it http://www.thethriftyhome.comMakingSumo Sweet Stuff


StumbleUpon.com

Tuesday, October 19, 2010

Pressure Cooked Creole White Beans

Photobucket

Ingredients:
1lb of dry white beans
1 small pack of salt meat
2 tbsp. olive oil
1-2 tbsp. Tony C's (or other "season all" seasoning)
1/2 tsp. fresh ground pepper
1 large onion
1/3 cup of Zatarian's dehydrated sweet bell peppers (optional)
1 tbsp. Worcestershire sauce
1 bay leaf
1 clove of garlic
1/2 cup chicken broth
5 cups water

Start by allowing the white beans to soak until you're ready to put them in the pot.
Sort and drain before adding them to the pressure cooker.


Next, chop the salt meat into smallish squares and season with Tony's:
Photobucket


Add the oil to the pressure cooker:
Photobucket


Add the salt meat and cook on medium heat until browned (the bone adds flavor!):
Photobucket


Chop the onion and garlic.
Here's the Zatarian's sweet bell pepper - I forgot to add it in the picture with the ingredients:

Photobucket


Add the chopped onions, garlic, dehydrated peppers, and 1 cup of water to a chopper or blender and purée:
Photobucket


Add the puréed mixture and the rest of the ingredients to the pressure cooker:
Photobucket


Put the lid on your pressure cooker, make sure the pressure cooker is sealed correctly (refer to your owner's manual), and then turn the burner on High:
Photobucket


Once your pot has become pressurized (refer to your owner's manual) lower the burner to Med/High (generally 6 on your dial) and cook for 35 minutes.

I have a little yellow piece that pops up once my cooker is pressurized:

Photobucket


Start the rice:
Photobucket


After 35 minutes turn the burner off and allow the cooker to depressurize naturally.
Stir, then serve over rice.
All done!
Enjoy!
Photobucket


Have fun!


StumbleUpon.com

Friday, October 15, 2010

New Etsy Stores to Discover!


I'd like to share a couple of great Etsy stores I've found over the last few months.

I found the first store through Choosy Chu. Choosy Chu is a wonderful collection of clothes, toys, shoes, and more that was discovered all over the web by courtneycourtney!

I've managed to nab a few pretty outfits for Serenity by following Choosy Chu on Facebook!

Serenity's adorable ruffle leggings came from tag you "r" it! I first discovered it on Choosy Chu. Tari's lovely creations are made from completely up-cycled and salvaged materials. She's an excellent seller, offers customs, and ships super fast! I plan to buy more ruffled leggings (and Sam Pants) from her in the future!

The second store I found at the beginning of Summer while looking through the children's clothes section on Etsy.

Am I the only one who can look for hours at all the beautiful clothes?!

reCollection Clothing also uses up-cycled and salvaged textiles and trims to create some very unique OOAK pieces. Serenity's A-line rooster dress was made from a vintage tea towel, trims, and cotton prints from the 1960's!

Both pieces are extremely well-made and will last for years and years!

I think it's great how these two pieces came together so wonderfully. I bought them months apart, and from ladies who live on opposites sides of the US!

Don't you just love the internet?!

Have fun!

StumbleUpon.com

Thursday, October 7, 2010

And the WINNER is...


Eisley Rae Clothing!

Congratulations!


I tried to send you an email, but I couldn't find it on your blog or profile.

So I sent you a message over at your Etsy store.
Please contact Julie at zozobugbaby@gmail.com to have your patterns email to you!

In the spirit of fairness and since I did ask that everyone leave their email address in their comments if it wasn't available through your blog or profile, I'll wait until tomorrow noon for your rely before choosing another winner.

A HUGE thank you to everyone who entered!

Have fun!


StumbleUpon.com

Monday, October 4, 2010

ZozoBugBaby Patterns GIVEAWAY!

Serenity is wearing an outfit I made using ZozoBugBaby's The Rosey Tilt-a-Twirl Skirt and Tee pattern.


Julie from ZozoBugBaby is offering my readers a chance to win all 8 of her awesome PDF patterns!

That's $96 worth of patterns!
WOW!
What a deal!

To enter just head over to Facebook and "Like" ZozoBugBaby's Fan Page, then come back here and leave a comment telling me you did!


For extra entries:
1. Suggest ZozoBugBaby to a friend and leave a comment telling me who!
2. Leave a comment if you're a Treasures for Tots Fan (either on FB or my blog)


Don't forget to leave a separate comment for EACH entry (up to 3 entries per person)!

Make sure to leave your email address in your comment if it isn't available through your blog or profile! I need to be able to contact you if you win!

The contest will be opened until Thursday at 12AM.

A winner will be picked randomly using "Random.org".


I made Serenity's Halloween outfit using ZozoBugBaby's The Candy Shoppe Skirt and Tee pattern.


Good Luck and Have Fun!

StumbleUpon.com

Wednesday, September 29, 2010

Photographing Serenity

Photobucket

I love taking pictures of my baby! I know I have tons, but I'm a late Mommy so now it's my turn to share pictures of my beautiful sweetheart!

I can't deny it's also cause I can practice my photography too. Not only is it fun to dress Serenity in all her cute and funky dresses and outfits, it's also a way to showcase my work to people who might want pictures of their sweeties!

I'm always trying to learn how to do better too. But for the most part I'm self-taught. Even though it's been a dream/goal of mine, I've never actually taken a photography class before last week.

After seeing Julie's (from ZozoBugBaby - don't you just LOVE her clothes?!) photography improved by leaps and bounds this Summer, I wanted to learn how she learned so much in such a small amount of time!

So taking her advice, I recently took two classes from MCP Actions to learn how to really make my pictures POP - like Julie's!

I took the "Learn to Use Curves" class first and the following week took "Color Fixing" workshops.

Now when I look at all the pictures I've
ever taken I see a TON of color problems, because not only can I recognize the problems - I can fix them!!

I want to go back and correct every picture I have!!

Of course I need a lot more practice, but I learned so much.

Taking a live class like that is so helpful, much more than reading a book or watching video tutorials online. Don't get me wrong, both video and books are great and have of course helped me enormously, but knowing that I have an extremely knowledgeable person like Jodi
right there (so to speak) ready to answer any questions I have about something she's showing me, well that goes a long way helping me to step up my game!

If you're thinking about taking an online workshop -
DO IT!!

Don't hesitate!

I would recommend Jodi from MCP Actions because she made everything so understandable - no high tech terms that I would be scratching my head trying to figure what in the world they meant. It was very easy to take everything she taught me in class and apply that to my own pictures later.

Okay how do y'all like Serenity's outfit?
Funky, huh?!
Like flashback to the 70's! I love it!! Let me tell you a little bit about it.

Courtneycourtney created Serenity's up-cycled pants. These are some of her very first bell bottom ones (she created a different style last year). I hope more bell bottoms are on the way!

Wren Willow created Serenity's lovely 100% organic shirt. It's been hand-dyed and then silk-screened using Marla's own unique illustrations.

BTW: Keep a sharp eye out for some of courtneycourtney latest creations - Wren Willow's beautiful designs have been spotted on sleeves and more!

Serenity's wonderful vintage jacket (look at that cool blue stitching!) and red and white umbrella barrettes are from 3 Ring Circus. Be sure to check that store daily - Heather is always posting beautiful vintage clothes and even toys! You can be sure anything you buy from her will be in excellent condition!

Have fun!

StumbleUpon.com

Monday, September 13, 2010

Party Favors: Dinosaur Crayons

I was so excited to find the cutest silicone dinosaur mold at Amazon.co.uk!
It's made from 100% food grade silicone, microwavable, and heat resistant up to 446°F.

It's actually for making chocolates, but I think it's perfect for making dinosaur crayons!

It arrived last week, and I finally got the chance to try it out tonight.

I followed the same formula I did in my DIY Crayon tutorial.

I broke up the crayons and filled the tray.
This tray smaller than the number 4 tray I used in my tutorial, so it only took about 1 crayon, cut into little pieces, to fill up each cavity.


Then I stuck the tray in the oven at 200°.
I took the tray out after the crayons were all melted - it took 25 minutes.


I put the tray into the freezer for 40 minutes - it takes about 1 hour or more for the crayons to harden if you leave the tray on the counter.
Next I carefully turned the tray inside-out and popped the crayons out.


Very cute and lots of details.
I think they will be a big hit at Serenity's birthday party!


Have fun!


StumbleUpon.com

Sunday, September 12, 2010

Wheatgrass Critter Head - Sarah the Frog


Kim over at Grow With Me Gifts has put together the little wheatgrass critter kits that your child will love!

Recently Kim had a fun contest on her blog to name the critter heads.
The frog is Sarah and the pig is Penny - how cute!

Serenity is adamant that hers is Prince Naveen though, how funny she thinks the frog is a boy and not a girl!

Also, Kim followed my "How To Make A Tiny Fairy" tutorial to create her own adorable Fairy Catcher necklaces in her Etsy store!

She has the sweetest collection of fairies to choose from too.

Here's a picture I took of Serenity with my iPhone wearing her Fairy necklace from GWMG.
Serenity calls her Zoe and loves bringing her places with us!


Below are some pictures of Serenity assembling her froggy grass critter.


All done!

The kit is wonderful for small children since they can put it together all by themselves and that will help boost their confidence too!

Click on over to Grow With Me Gifts on Etsy to order your critter head today!

Don't forget to share your child's progress on GWMG FB Fan page!


Have fun!

StumbleUpon.com

Saturday, September 4, 2010

DIY Crayons (4th Birthday Party Favors)

Materials Needed:
Crayons (new or used)
Razor blade or X-Acto knife
Silicone or metal baking tray

Preheat your oven to 200
°.


Peel the labels off all the crayons.
IMG_9874

Break the crayons into pieces.
IMG_9886

Arrange them in a baking tray.
I used a number "4" silicone tray.

IMG_9807

Put in the tray in the oven for 25 minutes.
IMG_9846

Allow the crayons to cool for about a hour.
I stuck mine in the ice box to cool 'em off faster!

IMG_9866

If you used a silicone tray, try turning it inside-out (be careful!) before popping the crayons off.
IMG_9900

All done!
IMG_9845

I made these for Serenity's upcoming 4th birthday party!


POST-IT-NOTE: This formula worked perfectly for me, but ovens vary so you might need to tweak it a bit.

BTW, the crayons I used for this project are the crayons I bought last year for only 25¢ a box!

POST-IT-NOTE 2: For those of you looking for inexpensive silicone trays to make crayons, here's a pretty pink heart tray for only $6.95 & FREE shipping!

Check out other silicone molds on Ebay by clicking HERE.

Have fun!

StumbleUpon.com

Thursday, September 2, 2010

DIY Dinosaur Activity Books

My sweet little girly girl wants a dinosaur themed birthday party.
It all started last year when we stopped at the bakery to order a castle cake for her 3rd birthday.
She saw the most amazing dinosaur cake and wanted it.

Bad.

I reminded her that we were here to get the castle cake.
She thought about it for a couple of minutes then said,

"Okay, but next year I want the dinosaur cake!"

The girl wasn't even 3 yet!

So for the next 10 months, at least once a month, she brought up her dinosaur birthday party!

Talk about tenacious!

IMG_3734

She's always loved dinosaurs though so I'm not really too surprised she wants a dino birthday party.

With her party coming up in about a month, I've been hunting around trying to figure out what kind of inexpensive party favors I can put together this year.

I decided to include little dinosaur activity books I made as part of the party favors.


Materials needed:
Dinosaur Activity Book
Scanner
Printer
Mod Podge
Paint brush
PowerPoint or Openoffice Impress
4 sheets of 8 1/2" x 14" paper per book

IMG_9643

1. I found a dinosaur activity book with perforated pages for ages 3-6 (like Teachers use in their classrooms) on Amazon.
2. Then I scanned and saved all the pages.
3. I opened PowerPoint, changed my paper size to 8 1/2" x 14", and then re-sized each picture (7.5"H x 6.42"W) so they would fit side-by-side.
4. I put together a total of 8 pages, including the cover page.
I made sure to save each page so I'd have them for future projects.
5. Next I printed each page on both sides of a 8 1/2" x 14" sheet of paper.
6. After I printed enough pages to create 6 books, I folded each sheet in half.

IMG_9645

7. Using the paint brush, I applied Mod Podge down the center crease of each page, and then glued all four pages together.
8. Make sure to let the glue dry before folding the entire book in half.

All done!

IMG_9652

Totally kid-approved!
Serenity had fun completing the test activity book before she went to bed.
She told me that she wants to do another book tomorrow.
I guess that means she likes it!

Stay tuned for more DIY dinosaur themed birthday party favors!

Have fun!!


Show and Tell Green

StumbleUpon.com
Related Posts with Thumbnails