
You wouldn't believe how incredibly easy it is to make your own!
It really is - I promise!
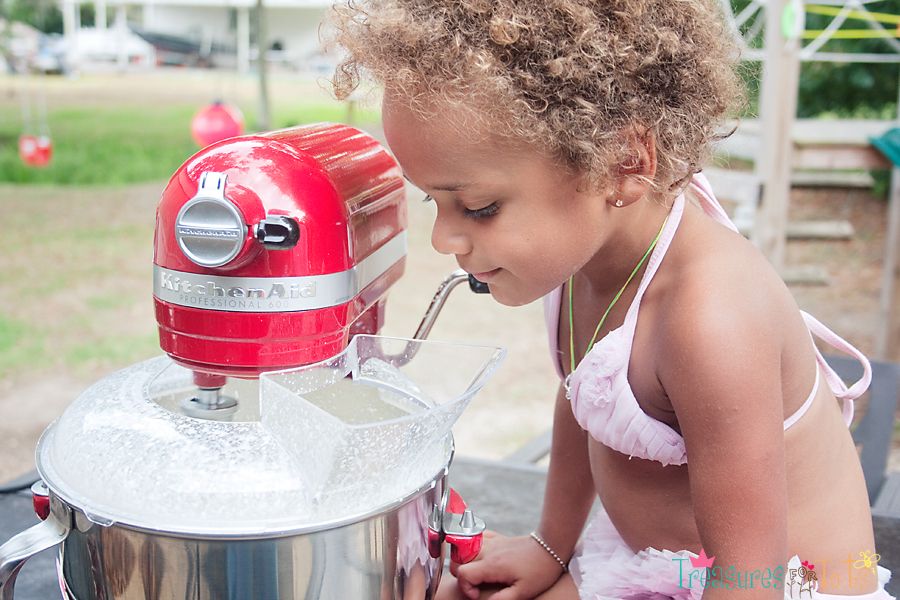
All you need is 1 quart heavy whipping cream, a mixer and 15 minutes of your time.
I used my KitchenAid, but any mixer will do really, like a hand mixer or a blender.
It really is - I promise!
All you need is 1 quart heavy whipping cream, a mixer and 15 minutes of your time.
I used my KitchenAid, but any mixer will do really, like a hand mixer or a blender.
You can even make butter in a jar!
You just have to shake or roll it around for 30 minutes or so.
This takes a lot of energy, so it would be a fun thing that kids can do!
For little kids, use a plastic jar instead of a glass one.
Here's a fun butter in a jar tutorial from 2 Little Hooligans.
I think Serenity would get a kick out of making butter by herself!
4-year olds - they want to do everything "by themselves"!
Any brand of heavy whipping cream will work too - yes, even the cheap Wallyworld brand.
The first time I made homemade butter, I bought Borden's ($6) and the result was a creamy, very pale yellow butter.
For my second time, I bought the Wallyworld brand Great Value ($4), and the result was a creamy, light yellow butter.
Both tasted delicious!
Here we go:
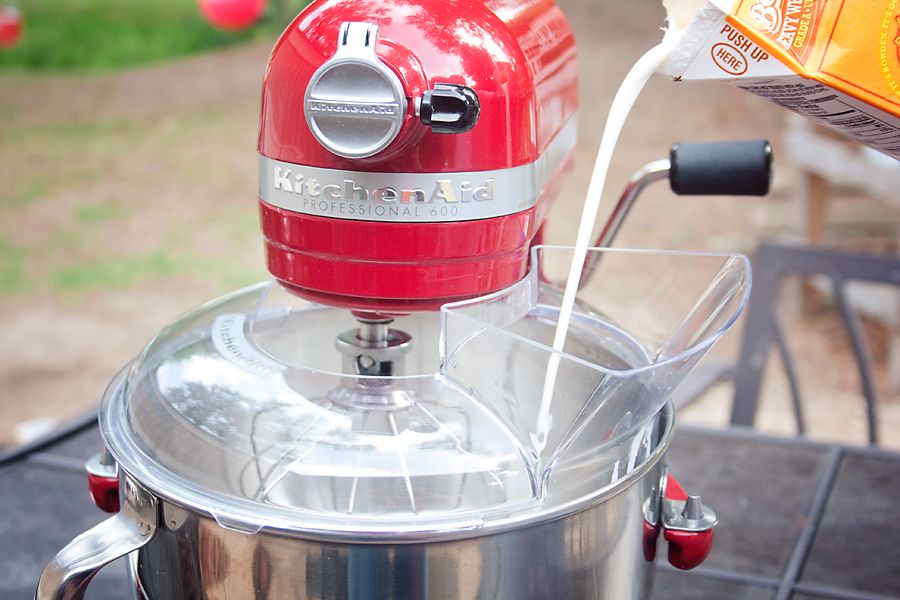
Pour the entire quart of cold heavy whipping cream into your mixer.
Turn it on the highest setting.
Try to get the freshest cream you can find.
I think that's probably more important than spending the extra money for a brand-name cream.

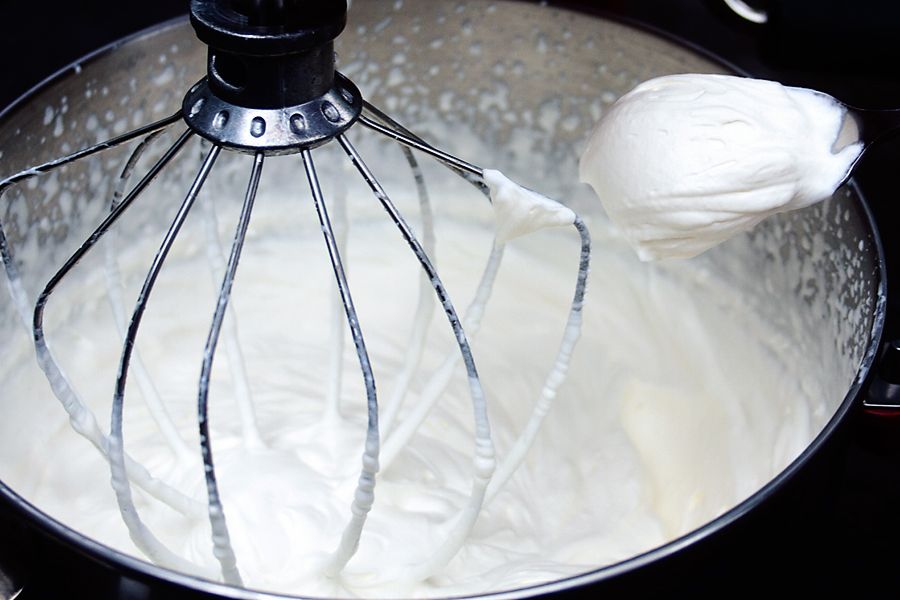
After a couple of minutes or so, you'll get a heavenly whipped cream.
I could lick the whole bowl by myself!

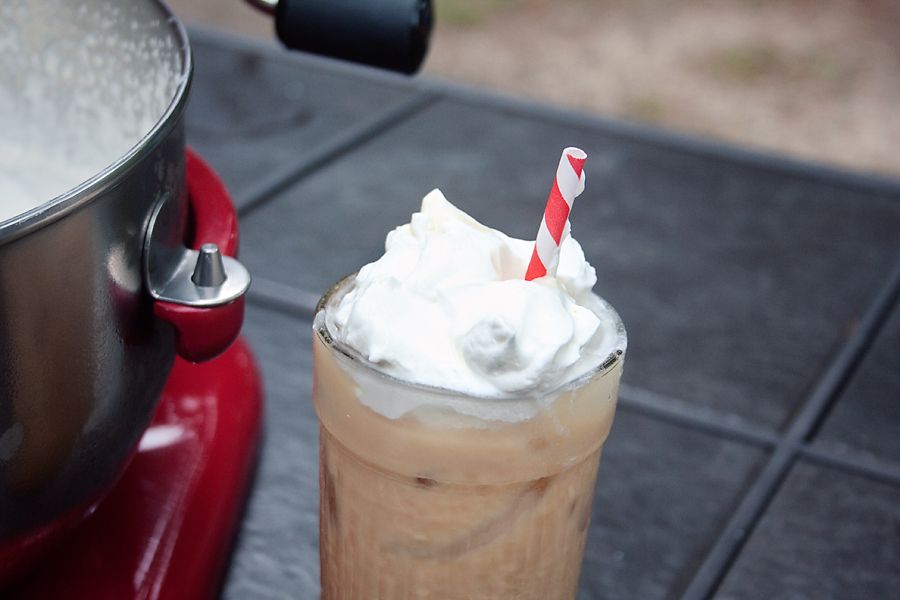
Perfect for a delicious homemade iced coffee!
Iced Coffee:
2 ounces CoolBrew (or your own coffee concentrate)
1 tablespoon fine grain raw sugar
1 glass cold low-fat milk
1 glass of ice
1 dollop of fresh whipped cream
Mmmmm.....

Okay, after scooping out a little bit (just a little!) of fresh cream, turn your machine back on.
After a few more minutes, it'll lose that fluffy, whipped texture.
It will start to look creamy and darken slightly.
I didn't try it when it got to this stage (maybe next time), but I bet it would be scrumptious on fresh baked bread!

Let's keep going!
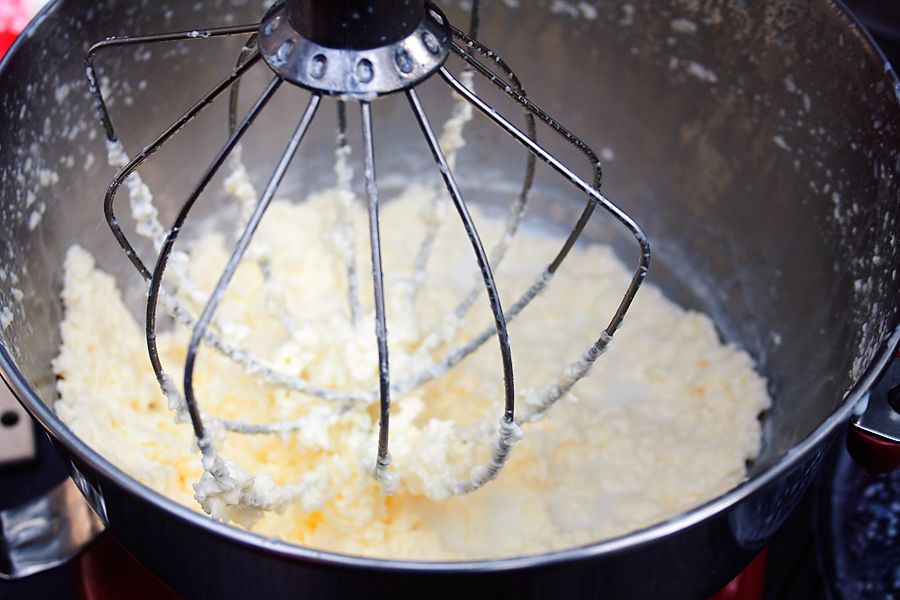
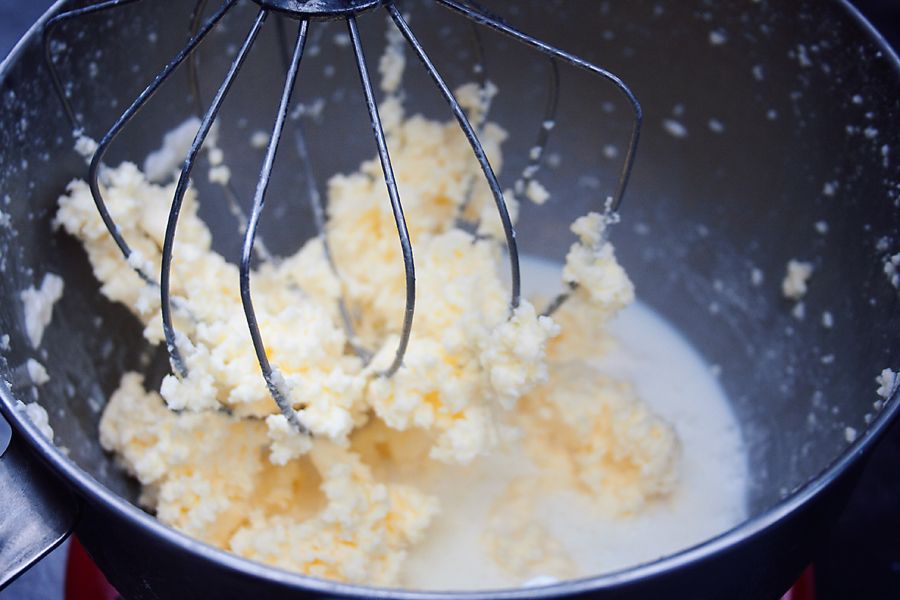
After a few more minutes, you'll come to the part where the butter is just about to separate from the buttermilk.
At this point it will turn a light yummy yellow color.
You're almost done!

Once the buttermilk separates from the butter, it will splash everywhere!
Be sure to have the guard on your mixer.
You can use plastic wrap or a dishcloth too.
Or let your child sit next to the mixer with their mouth open to catch the flying buttermilk!

As you can see, the buttermilk has completely separated from the butter.
All done!

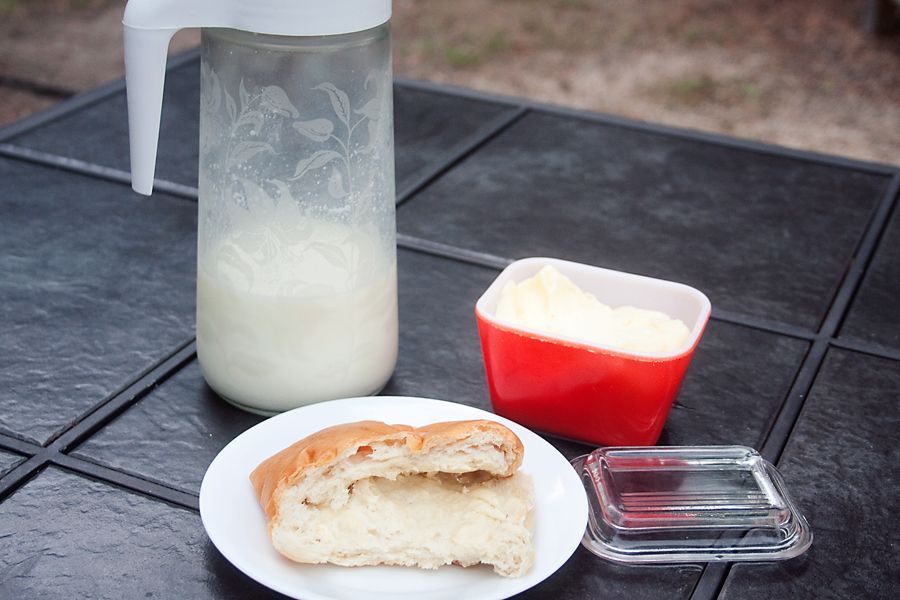
The next step is to strain the butter and collect the buttermilk in a bowl.
I recommend using a very fine mesh strainer or a cheesecloth.
If you like your butter salted, you can add it during this step.
I didn't take pictures of how I separated the butter through a mesh strainer, hand-squeezed the excess buttermilk out, and then rinsed the butter.
Sorry about that!
But you can find the most excellent step-by-step picture tutorial that I followed at The Hungry Mouse.
Click HERE for the tutorial!!
Allrecipes.com has the exact same method for homemade butter, but without all the beautiful pictures.
Still, I loved reading the helpful reviews about how much people enjoyed making their own fresh homemade butter.
So many were amazed how easy it is to make your own!
I know I was when I first learned the whole process took less than 15 minutes!
Rhinestone Beagle has a nice tutorial up too, and she uses a very fine cheesecloth to strain her newly made butter.
I ended up with around 1 1/2 cups of fresh buttermilk and a little under a pound of unsalted butter from 1 quart of heavy whipping cream.
It would've been a tad more - but I had to snag some of that delicious whipped cream for my coffee.
Try using the buttermilk to make yummy pancakes and biscuits!

Have Fun!!

Try to get the freshest cream you can find.
I think that's probably more important than spending the extra money for a brand-name cream.
After a couple of minutes or so, you'll get a heavenly whipped cream.
I could lick the whole bowl by myself!
Perfect for a delicious homemade iced coffee!
Iced Coffee:
2 ounces CoolBrew (or your own coffee concentrate)
1 tablespoon fine grain raw sugar
1 glass cold low-fat milk
1 glass of ice
1 dollop of fresh whipped cream
Mmmmm.....
Okay, after scooping out a little bit (just a little!) of fresh cream, turn your machine back on.
After a few more minutes, it'll lose that fluffy, whipped texture.
It will start to look creamy and darken slightly.
I didn't try it when it got to this stage (maybe next time), but I bet it would be scrumptious on fresh baked bread!

Let's keep going!
After a few more minutes, you'll come to the part where the butter is just about to separate from the buttermilk.
At this point it will turn a light yummy yellow color.
You're almost done!
Once the buttermilk separates from the butter, it will splash everywhere!
Be sure to have the guard on your mixer.
You can use plastic wrap or a dishcloth too.
Or let your child sit next to the mixer with their mouth open to catch the flying buttermilk!
As you can see, the buttermilk has completely separated from the butter.
All done!
The next step is to strain the butter and collect the buttermilk in a bowl.
I recommend using a very fine mesh strainer or a cheesecloth.
If you like your butter salted, you can add it during this step.
I didn't take pictures of how I separated the butter through a mesh strainer, hand-squeezed the excess buttermilk out, and then rinsed the butter.
Sorry about that!
But you can find the most excellent step-by-step picture tutorial that I followed at The Hungry Mouse.
Click HERE for the tutorial!!
Allrecipes.com has the exact same method for homemade butter, but without all the beautiful pictures.
Still, I loved reading the helpful reviews about how much people enjoyed making their own fresh homemade butter.
So many were amazed how easy it is to make your own!
I know I was when I first learned the whole process took less than 15 minutes!
Rhinestone Beagle has a nice tutorial up too, and she uses a very fine cheesecloth to strain her newly made butter.
I ended up with around 1 1/2 cups of fresh buttermilk and a little under a pound of unsalted butter from 1 quart of heavy whipping cream.
It would've been a tad more - but I had to snag some of that delicious whipped cream for my coffee.
Try using the buttermilk to make yummy pancakes and biscuits!
Have Fun!!


2 comments:
love love love for so many reasons! first, you get buttermilk! how awesome! AND I have that same red epicurean!
We love making homemade butter! My kids like shaking the cream in baby food jars with a marble. When the marble doesn't clank against the sides of the jar, the butter has thickened enough to be done!
Brandy
Gluesticks
www.brandyscrafts.blogspot.com
Post a Comment