Showing posts with label coffee. Show all posts

Wednesday, June 22, 2011

Fresh Homemade Butter!

You wouldn't believe how incredibly easy it is to make your own!

It really is - I promise!

All you need is 1 quart heavy whipping cream, a mixer and 15 minutes of your time.
I used my KitchenAid, but any mixer will do really, like a hand mixer or a blender.

You can even make butter in a jar!
You just have to shake or roll it around for 30 minutes or so.
This takes a lot of energy, so it would be a fun thing that kids can do!
For little kids, use a plastic jar instead of a glass one.
I think Serenity would get a kick out of making butter by herself!
4-year olds - they want to do everything "by themselves"!

Any brand of heavy whipping cream will work too - yes, even the cheap Wallyworld brand.

The first time I made homemade butter, I bought Borden's ($6) and the result was a creamy, very pale yellow butter.
For my second time, I bought the Wallyworld brand Great Value ($4), and the result was a creamy, light yellow butter.

Both tasted delicious!


Here we go:

Pour the entire quart of cold heavy whipping cream into your mixer.
Turn it on the highest setting.
Try to get the freshest cream you can find.
I think that's probably more important than spending the extra money for a brand-name cream.
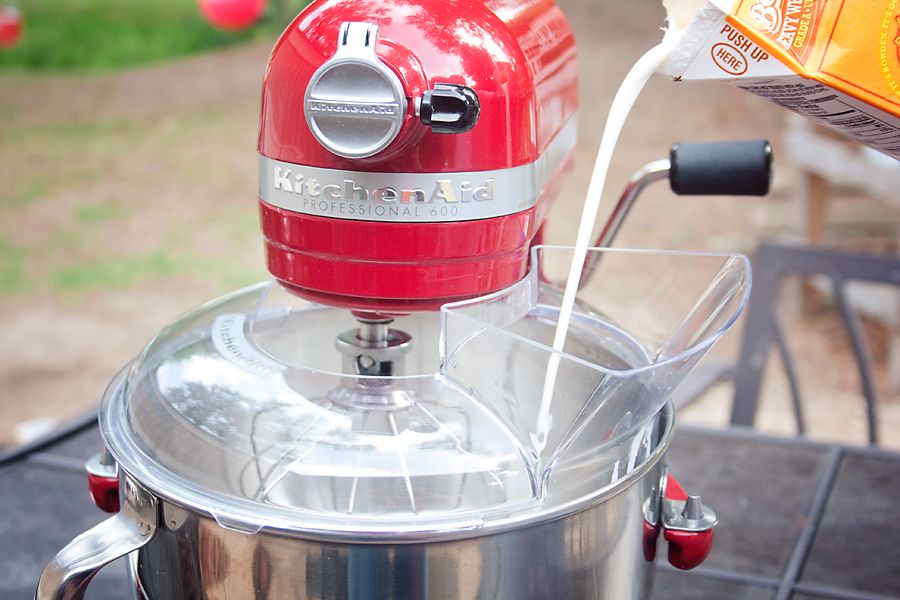


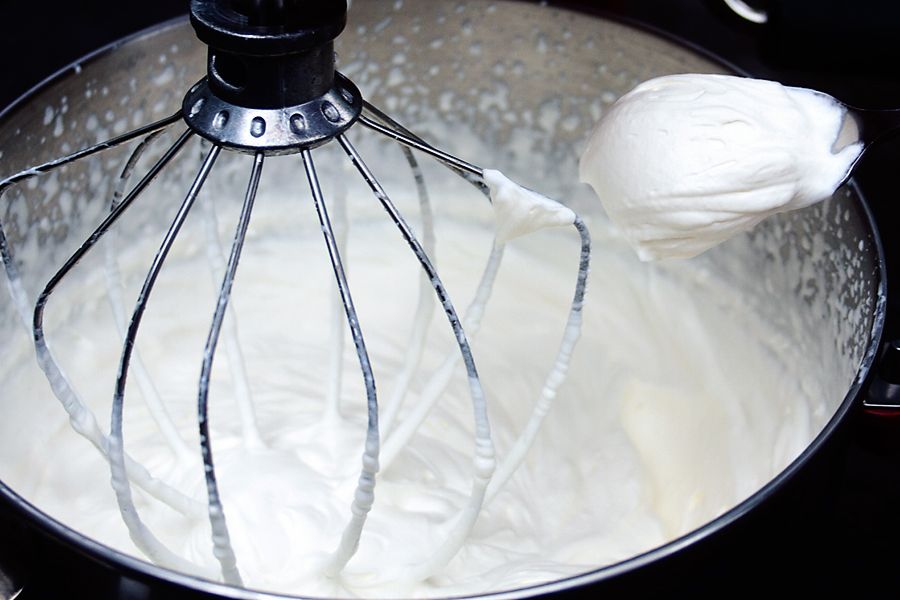
After a couple of minutes or so, you'll get a heavenly whipped cream.
I could lick the whole bowl by myself!


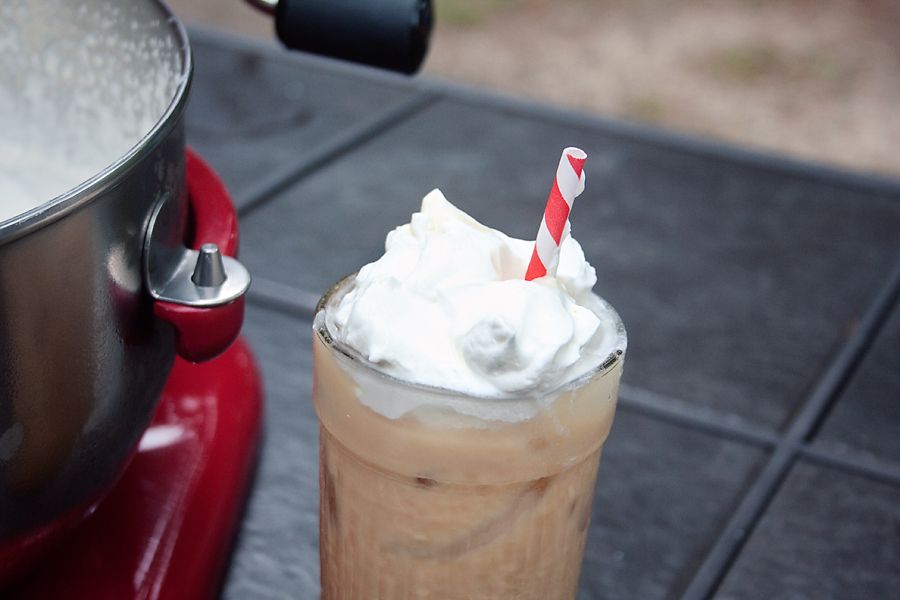
Perfect for a delicious homemade iced coffee!

Iced Coffee:
2 ounces CoolBrew (or your own coffee concentrate)
1 tablespoon fine grain raw sugar
1 glass cold low-fat milk
1 glass of ice
1 dollop of fresh whipped cream

Mmmmm.....


Okay, after scooping out a little bit (just a little!) of fresh cream, turn your machine back on.
After a few more minutes, it'll lose that fluffy, whipped texture.
It will start to look creamy and darken slightly.
I didn't try it when it got to this stage (maybe next time), but I bet it would be scrumptious on fresh baked bread!
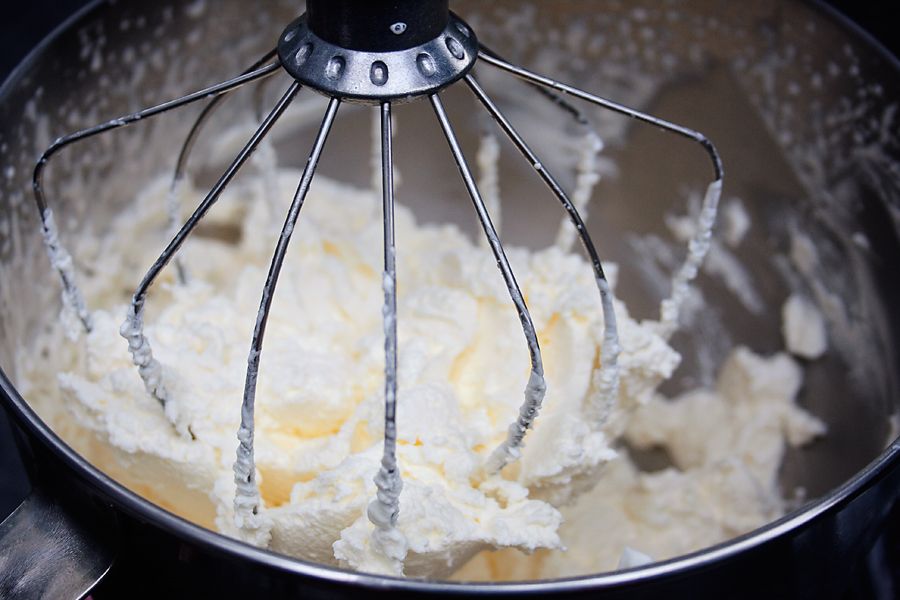


Let's keep going!
After a few more minutes, you'll come to the part where the butter is just about to separate from the buttermilk.
At this point it will turn a light yummy yellow color.
You're almost done!
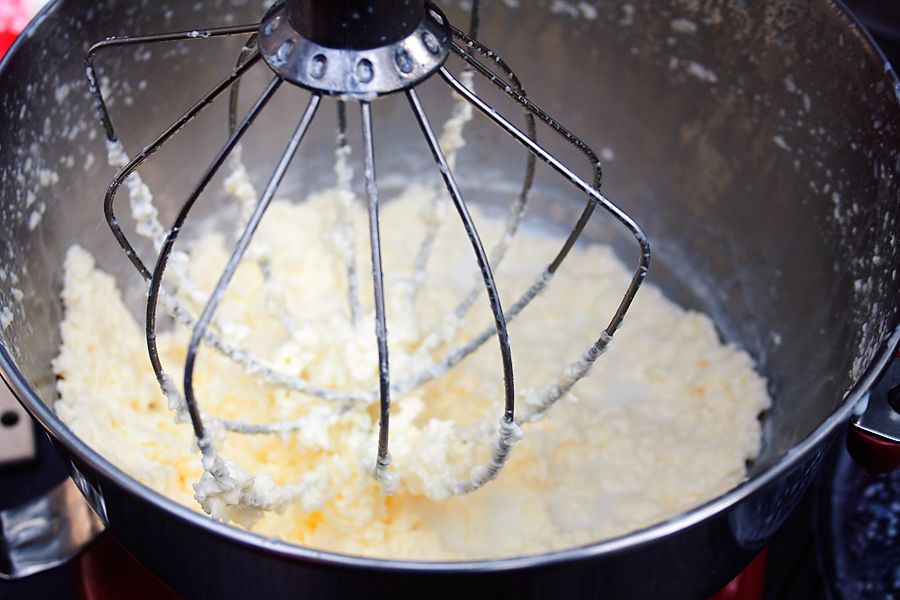


Once the buttermilk separates from the butter, it will splash everywhere!
Be sure to have the guard on your mixer.
You can use plastic wrap or a dishcloth too.
Or let your child sit next to the mixer with their mouth open to catch the flying buttermilk!
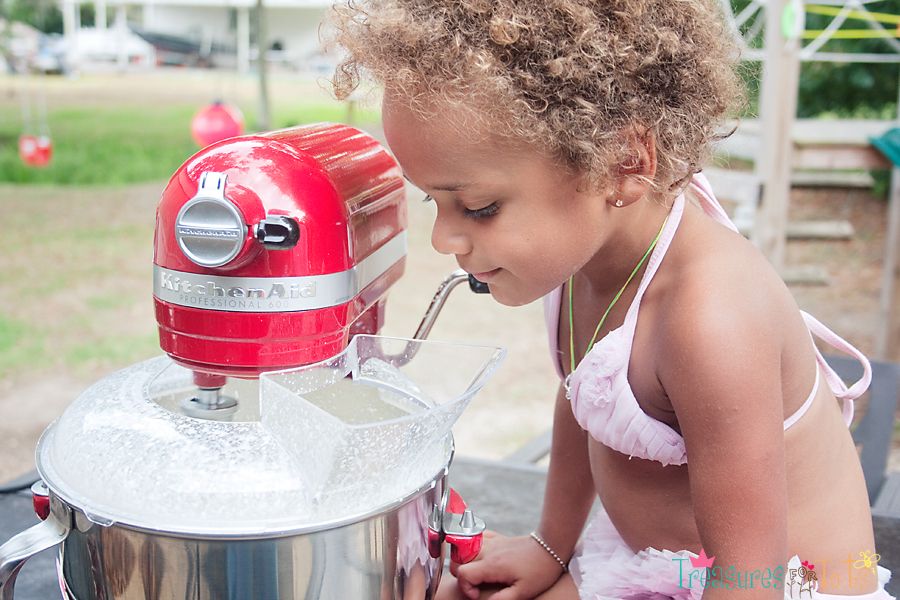


As you can see, the buttermilk has completely separated from the butter.
All done!
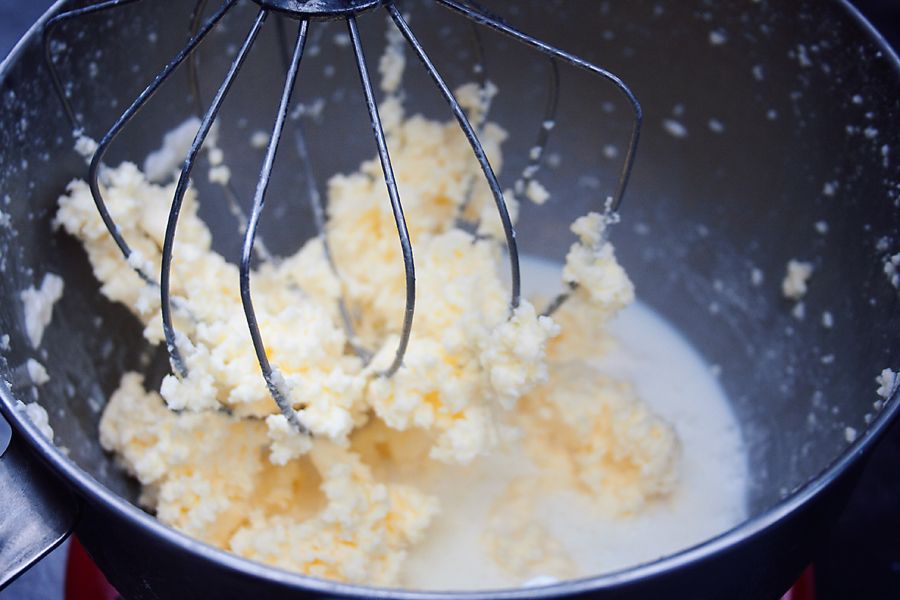


The next step is to strain the butter and collect the buttermilk in a bowl.
I recommend using a very fine mesh strainer or a cheesecloth.
If you like your butter salted, you can add it during this step.
I didn't take pictures of how I separated the butter through a mesh strainer, hand-squeezed the excess buttermilk out, and then rinsed the butter.
Sorry about that!

But you can find the most excellent step-by-step picture tutorial that I followed at The Hungry Mouse.

Click HERE for the tutorial!!

Allrecipes.com has the exact same method for homemade butter, but without all the beautiful pictures.
Still, I loved reading the helpful reviews about how much people enjoyed making their own fresh homemade butter.
So many were amazed how easy it is to make your own!
I know I was when I first learned the whole process took less than 15 minutes!

Rhinestone Beagle has a nice tutorial up too, and she uses a very fine cheesecloth to strain her newly made butter.


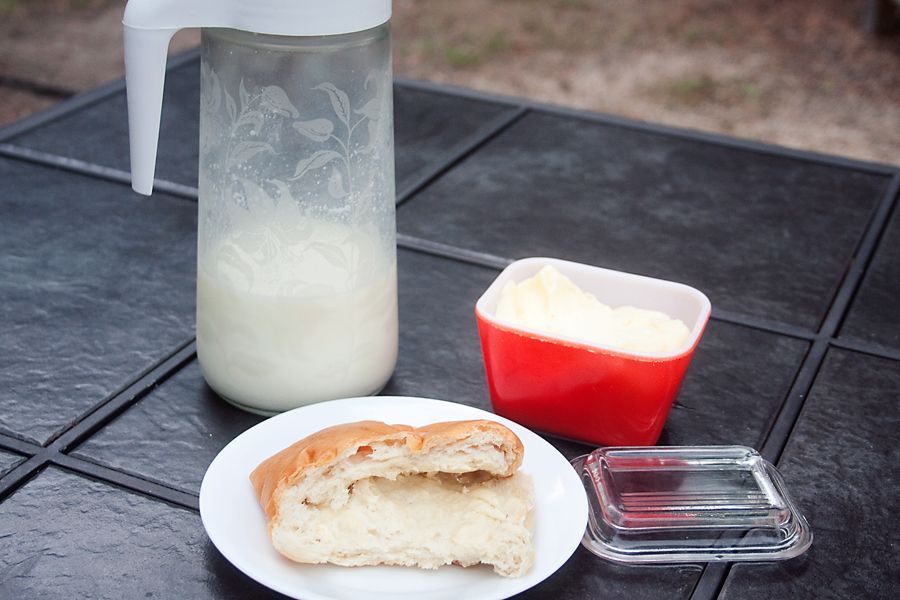
I ended up with around 1 1/2 cups of fresh buttermilk and a little under a pound of unsalted butter from 1 quart of heavy whipping cream.
It would've been a tad more - but I had to snag some of that delicious whipped cream for my coffee.
Try using the buttermilk to make yummy pancakes and biscuits!


Have Fun!!


StumbleUpon.com

Tuesday, June 16, 2009

Caramel Iced Coffee


Caramel Iced Coffee:

2 ounces coffee concentrate
1 cup milk
Smucker's Caramel (or Chocolate) Sundae Syrup
Ice

Mix the concentrate and milk together, then stir in a couple/few squirts of caramel syrup and add some ice cubes.

Enjoy!

-------------------------------------

I've made a second batch of cold-brew coffee concentrate and I think I got the water/coffee ratio right this time.

I used Community Coffee's Kenya whole bean coffee (12oz); it's a medium-dark roast from their Private Reserve collection, but it's only available for a limited time. I used
Rouses grinder, on the "coarse" setting, to grind the beans so I didn't have to do it at home - a good tip I found from a reviewer on Amazon.com. Rouses doesn't charge you extra to grind the beans either - nice. Only grind your beans at the grocery store if you're planning on using the coffee grounds right away! Fresh is better!

I also tried another tip from a reviewer on Amazon.com and reused the coffee grounds.

Okay, so here's what I did this go 'round:

1. Insert the plug to the outside bottom of the plastic container.
2. Make sure the filter is very wet, then put it in the inside bottom of the plastic container.
3. Pour 2 cups water into plastic container.
4. Add all 12 ounces of the coarse ground coffee beans.
5. In a gentle circular motion pour 2 cups of water.
6. Wait 5 minutes and pour 2 more cups of water. Press any grounds down with the back of a spoon - try not to stir.
8. Wait 14 hours.
9. Pull the plug while holding the plastic container over the glass decanter.
10. Put the plug back into the plastic container.
11. Add 4 more cups of water - don't stir! Use your spoon to tap the grounds down.
12. Wait 10 hours.
13. Pull the plug while holding the plastic container over the glass decanter.
14. It fills the glass decanter almost to the top - about 7 cups (56 ounces). The rest of the water is soaked up by the grounds. Don't squeeze the water out of the grounds!

The result is a much stronger coffee concentrate, but it's still very smooth and not bitter. I use 2 ounces coffee concentrate to make an 8 ounce cup of coffee, it tastes delicious and smells wonderful!

It makes a delicious iced coffee too.


Have fun!

StumbleUpon.com

Sunday, May 31, 2009

My Toddy Cold Brew System

I love coffee - doesn't most everybody? Starbucks is my Achille's heel and I stop practically every time I'm anywhere near the place. Pricey - but soooo good!

I'm the only one at my house who drinks coffee so when I brew a pot it usually goes to waste.

I've tried the pod coffee machines. I had a Black & Decker Home Café Coffeemaker, but I didn't really like it. Not only was the coffee fraking (I watch a lot of Battlestar Galactica) expensive, but what would I do when I had company?

So I bought the Hamilton Beach BrewStation Deluxe. It's a pretty nice machine - I guess. I like it, but I still end up wasting most of the coffee 'cause I don't normally drink more than one cup.

One day, while I was at Rouses (our local grocery store), I happened to come across Cool Brew® Fresh Coffee Concentrate. I almost bought it, but then I wondered how good could that be? Coffee concentrate? Yuck! But after reading the label, I thought it did sound kinda delicious - if it really worked! Here's a description of coolbrewing from their website:

"CoolBrewing is a process by which the most flavorful essence is extracted from freshly roasted coffee using absolutely NO HEAT. The coffee is brewed very slowly using only cold water. With cold water brewing, the most flavorful oils are extracted leaving behind the bitter acids. This ensures the richest possible flavor with the least bitter taste. The essence is 100% natural. CoolBrew® has no preservatives, so it must be kept refrigerated to preserve the flavor. This explains why it's "Always Fresh!"


I didn't buy it, but when I got home I started doing some research. Don't cha just love the net?! I read the reviews about it on Amazon.com and what'da know? It really does makes a good cup of coffee! I wouldn't be wasting a whole pot of coffee anymore.

But then...

While I was researching Cool Brew®, I came across the Toddy Cold Brew System ($30 w/free shipping if you have Amazon Prime). Even better! I could make the concentrate myself with any coffee I wanted. Purty neat!

Product description from Amazon.com:
"Using your favorite brand of coffee, cold-brewing the ground beans produces a coffee that is naturally low in acid--approximately 67 percent less acidic than coffee brewed by conventional hot-brew methods such as a Mr. Coffee-type system. The super-smooth coffee concentrate that may be refrigerated for up to 14 days without any deterioration in taste or freshness. And, there's no waste. Cold-brewed coffee can be made one cup at a time, and at the strength you prefer, simply by adding steaming hot or iced cold water or milk. It's also microwavable. Using your favorite brand of coffee, cold-brewing the ground beans produces a coffee that is naturally low in acid--approximately 67 percent less acidic than coffee brewed by conventional hot-brew methods such as a Mr. Coffee-type system. The super-smooth coffee concentrate that may be refrigerated for up to 14 days without any deterioration in taste or freshness. And, there's no waste. Cold-brewed coffee can be made one cup at a time, and at the strength you prefer, simply by adding steaming hot or iced cold water or milk. It's also microwavable."

I've had it on my Amazon.com wish list forever now, and a few days ago I got it!

How it works:
1. Insert the plug to the outside bottom of the plastic container.
2. Make sure the filter is very wet, then put it in the inside bottom of the plastic container.
3. Pour 2 cups water into plastic container.
4. Add 1/2 pound of coarse ground coffee.
5. In a gentle circular motion pour 5 cups of water.
6. Add another 1/2 pound of coarse ground coffee.
7. Wait 5 minutes and pour 3 - 3 1/2 more cups of water. Press any grounds down with the back of a spoon - try not to stir, but make sure there aren't any pockets of dry grounds.
8. Cover with a paper towel and wait 12 (or more depending on the strength you want; but the acidity & caffeine will increase the longer it cold brews) hours.
9. Pull the plug while holding the plastic container over the glass decanter. It makes 48 ounces.
10. Pop the lid on your decanter and stick it in the icebox. It'll keep for 2 weeks! You can freeze it too. The instructions suggest pouring it into ice-cube trays; then simply pop one cube in your cup and add boiling water. Easy!

The cold brewing process can be a little messy - make sure you position the plastic container over the decanter before you pull that plug! You have to use a coarse ground coffee beans, if they are ground too fine, it will clog the filter. Make sure to rinse the filter (no soap), it's reusable up to 10 times and needs be stored in a plastic bag then put in the icebox. It'll keep for 3 months. The Toddy system can be put in the dishwasher for cleaning - except for the filter. The instructions don't say, but I wouldn't put the stopper in the dishwasher either; I suggest washing it by hand.

The instructions that came with the Toddy, are very basic; you'll have to play around with it a bit to find what coffee/water ratio works best for you. I followed the Toddy directions and the coffee came out a little too weak. When mixing, Toddy recommends using 1 ounce of concentrate to every 3 ounces of boiling water. Even though I don't like my coffee as "thick" as most in South Louisiana, by following those directions, I find it didn't have that strong of a taste. Although, my Mississippi friends probably would love it! Lol! My solution was to add more concentrate and less water. But I need to work that ratio out a little better. I want to be able to add more water and less concentrate.

The coffee does tastes incredibly smooth too and not the least bit bitter. It's the smoothest tasting coffee I've ever had!

The Toddy has a good rating on Amazon.com and I suggest if you're thinking about purchasing one, make sure to read the reviews for tips from other buyers - like cold brewing your used coffee grounds a second time. I found that little helpful tip after I threw away my batch of used grounds!

You can find all kinds of recipes online too. Just Google "cold brew recipes". You'll get like 164,000 hits!

If you don't want to fork over $30 for the Toddy, no problem. You can make your own Toddy. Google "homemade cold brew coffee" and around 40,100 results pop up. One of my favorites is from Malcom McFarren at INeedCoffee. I think he may have figured out the cheapest method by using two Taco Bell 32 ounce cups, a soda bottle, and a piece of cardboard! It looks like something a College student put together. Go check it out!

Or you can head over to youtube and search "cold brewed coffee" for tons of cool coffee videos!

I really like my Toddy. It's so easy to fix a cup a coffee from concentrate. I just measure out enough for one cup, boil some water in my teapot and I'm done. It takes about 3 minutes total. A fresh, hot cup of coffee! If you want iced coffee, it's even faster; just add some ice and cold milk!

I still need to work out my favorite combination of coffee and water - but that's no biggie. I don't think I'll be using that big Brewstation again anytime soon - not even when I have company! Why would I want to go back to drinking and wasting pots of bitter-tasting coffee?


Have Fun!

StumbleUpon.com
Related Posts with Thumbnails