Monday, October 31, 2011

Happy Halloween!

Happy Halloween!

Here's my little Blossom!


All ready to "Save the World"!

You can see how I made Serenity's Powerpuff Girl Costume by clicking HERE!

Have Fun!


Mini Mod

StumbleUpon.com

Happy 5th Birthday Serenity!

My baby is 5 today!!
Happy Birthday Serenity!
She is our sweet little love, and so very precious to us!


Words can never express how happy Mommy and Daddy are that you're a part of our little family!
Love you muches my sweetie!

Serenity's birthday dress is by courtneycourtney!

Have Fun!

StumbleUpon.com

Sunday, October 30, 2011

DIY: Powerpuff Halloween Costume

This year Serenity wanted to be the Powerpuff girl, Blossom.
I looked - but I couldn't find a costume that would fit her anywhere!

That meant I would have to make it.
That meant I would have to sew my very first A-line dress.
I didn't want it to be reversible - so THAT meant I needed to learn how to install a zipper (video) for the first time!

I ended up using a store-bought pattern (Simplicity 2194), but I seriously don't like store-bought patterns.

Next time I make an A-line dress I'll buy the Shannon Shift Dress PDF pattern!
It looks so cute, and I love PDF patterns.
The whole sewing process looks so easy because most of them have tons of helpful, detailed step-by-step pictures that guide you from start to finish.

Okay, here's how I put together Serenity's Blossom's costume.

After cutting out the dress, I cut off the bodice and a "block" out the middle.


I made a couple of templates for the middle piece.
I added 1/2" at the top and bottom of the templates for the seam allowances.


Then I cut out the black pieces for the waist.


I sewed the waist pieces to the bottom of the dress pieces first.
Serged the seams, ironed the seams UP, then top stitched.


Then I sewed the bodice pieces on.
Serged the seams, ironed the seams DOWN, then top stitched.


I had the thing on - sewed up nice and pretty, but when I tried to open the seam with my seam ripper, I made a BIG mistake!
I didn't realize I'd caught the zipper instead!
I had to drop everything and run to Hobby Lobby to get a new zipper before it closed.
NOTE TO ME: Always be careful ripping the zipper seam!!!


Because I'd messed up, installing the second zipper was a little difficult - and very time consuming.
But I got it!


For the final steps, I sewed the facing around the neckline of the dress and used bias tape facing for the sleeves.
I didn't like sewing that big piece of facing around the neckline - it really wasn't required for this simple costume, but I was following the pattern and didn't even think about it until it was done and I got to the following step - bias tape facing for the sleeves.
Oh well - next time I'll know!

I rolled hemmed the bottom with my serger.

Do you see how my zipper is a slightly off?
Not really sure what I did wrong, but I'm just glad I got the thing working!


Okay now for Blossom's ridiculously big red bow!
I zoomed in on this picture:


Then used my monitor as a lightbox to trace around the bow and created a template.
I used red broadcloth for the bow.
Actually, I used broadcloth for the entire costume, since it was 30% off at Hobby Lobby this week.


I sewed 1/4" around the edge, and clipped all the corners before turning it inside out.


Next I stuffed it with some polyfill.


Finally, I used to my glue gun to close the opening, and triple stitched in the middle to create the "knot" in the bow.


I'll probably hot glue the bow to Serenity's orange wig.
I found some white tights on Amazon.
And Serenity will be wearing her little black Mary Janes!

It was very late by time I finished, so I couldn't get any good outdoor pictures, but here's one I took with my cell.
I plan to get more pictures will my Canon tomorrow.

Serenity is so HAPPY that I made her Blossom costume!
She was doing some practice high kicks and punches - pretending to get the bad guys!
She said, "Mommy I'm going to SAVE THE WORLD!"
That's my baby!!
Link

Happy Halloween!!

UPDATE: You can see pictures of Serenity in her entire costume HERE.

Have Fun!!


What I'm Making Monday

StumbleUpon.com

Friday, October 28, 2011

Mini Mod

Another Mini Mod week with Baby Making Machine!!

I love participating in Mini Mod, but this week I totally forgot to grab my Canon and only got pictures of Serenity with my cell.
It's an older one (3GS), so it doesn't take the best pictures.

I totally need the new 4S iPhone - with that awesome 8MB camera!

This week I've got two cute outfits to share.


In the picture below, Serenity is wearing the Lilo costume I made last year for Disney.
She's all dressed up for the Halloween party at her Dance class.

To make the dress, I used Leila & Ben's Sweet Little Dress PDF pattern.
It's so simple to sew, the instructions are excellent - it's one of my favorite patterns and I use it over and over!
For the Lilo dress, I simply made the dress longer.
I did that by cutting the bodice on the 3T line and the length on the 5T line.
I also didn't put elastic around the sleeves so the dress would look more like Lilo's.
To make the leaves on the dress, I re-sized one I found online and made super simple appliques.
I didn't sew my appliques down, but it's a good idea to do that just in case.
So easy - so darn cute!

I also made the pretty Hibiscus clippie in her hair, and the leis around her neck.
You can find the silk flowers I used HERE and HERE.

If you want to learn how to make your own clippies, check out my clippie tutorial HERE.
Serenity's little blue flip-flops are from Old Navy!


The pretty dress Serenity is wearing in this next picture is of course a courtneycourtney!
Courtney is my absolutely favorite children's clothing designer.

She wore this outfit to the Pumpkin Patch today!

The dress is upcycled and recycled at it's best because not only is the dress made using only salvaged knits, it's also a hand-me-down!

Serenity's adorably matching Hanna Andersson mules are a sweet hand-me-down find on Ebay.
Awesome savings on both pieces!
Gotta love it!

I made her crocheted headband - you can find my instructions HERE.


Have fun!

Mini Mod

StumbleUpon.com

Wednesday, October 26, 2011

Pumpkin Oranges

I've been looking for some cute way to package treats for Serenity's dance class - around 20 little girls!

So it had to be something quick and easy.

Then I came across these adorable little oranges dressed up to look like pumpkins!

Momtastic made them for Halloween decor - but I thought they would be cute treats to hand out too!

It's a fun activity that you and your kids can to together.

POST-IT-NOTE:
I checked to make sure the marker didn't bleed through the rind onto the meat - so the oranges are safe to eat!


Materials:
Oranges
Yarn
Sharpie (or any black marker, I used a dry erase one)
glue gun & glue


Draw on the faces.
I tried a Sharpie at first, but it stopped working so I used a dry erase marker.
It worked but I had to go over the markings again once it dried.


Cut 4 strips of yarn about 3" long.


Put a strip of hot glue at the top of the orange.


Lay the yarn on top of the glue.


Put another strip of glue on top of the yarn.


Pinch the yarn together until the glue dries.


Our "Pumpkin Patch"!
One draw back, my dry erase marker dried up completely by time I finished all the oranges (I made 33).
Maybe next time I'll try a Sharpie Magnum Marker ($1.05 free shipping w/Prime)!


Have fun!

StumbleUpon.com

Friday, October 21, 2011

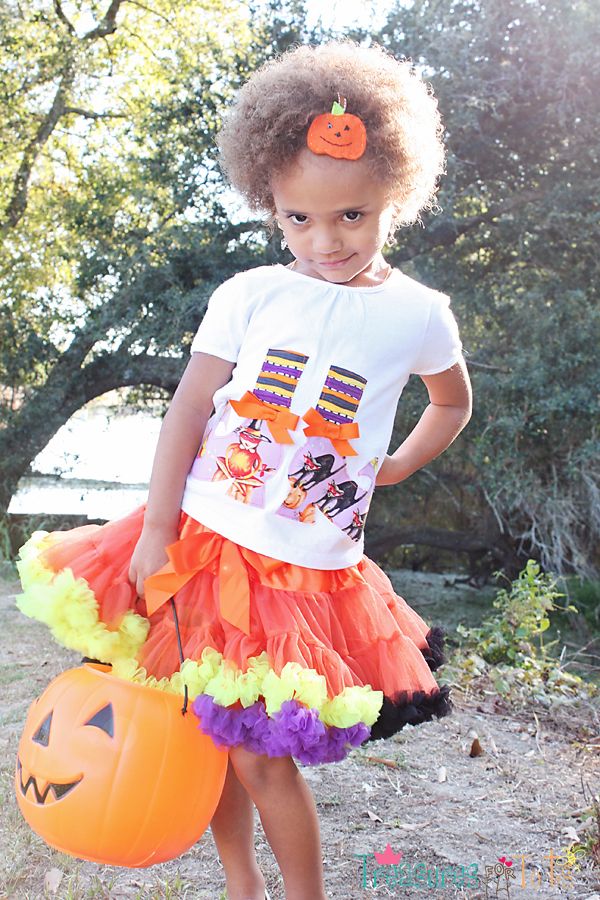
Fun Halloween Outfit


I love this outfit!

Serenity's pretty pettiskirt is only $25 (and FREE fast shipping) from Momi Boutique!

I made the Witch's Tee shirt a couple of years ago and it still fits perfectly!
If you'd like to make one too, it's super easy!
You can find my tutorial, HERE.

I also made Serenity's little pumpkin clippie.
It's another quick, easy and inexpensive project!
You can find my tutorial, HERE.


Have fun!

Mini Mod

StumbleUpon.com

Monday, October 17, 2011

Portable Tea Table

My husband and I finally got around to putting together a little portable tea table I got the idea to build months ago.
He works in Brazil two months at a time now and I wanted to wait until he got home because I'm not as comfortable with power tools as Ana White!

I'm going to try to explain how we built it, but at some point we did something wrong.
The table is supposed to fold up all nice and neat (I wanted to put a small handle on one end so Serenity could carry it around), but I miscalculated and it doesn't fold up the way I planned.
I'll try to figure out exactly what I did wrong and post an update when I do.
Maybe you know?
If you do, please share!

Still, it's such a cute little table - even though it doesn't fold up quite right.
It's the perfect size for Serenity to play tea party with her friends and dolls - indoors and outdoors, which was the whole idea behind building it.
It's great as a photo prop too!

Okay, bear with me when it comes to explaining some of the hardware - I have no idea the real names of some of these things and I don't know building terms!
A very nice older gentlemen at Lowe's was extremely patient with me when I was trying to explain what I needed to build it - without knowing what anything was called!
He stuck with me though and together we found everything.


Materials Needed:
Power drill
Jig-saw
Sander
#10 flat washers
1 7/8" wooden dowel
2) 1 1/2" threaded aluminum posts
2) 1" threaded aluminum posts
bathroom wall hook
2 aluminum fasteners
(ignore the other two in the picture)
1 can of spray paint
2) 1x2x4 pine
1) pre-cut circle grade pine


Cut 4 legs (around 18" long) from the 1x2x4.
Cut a small curve on one end and a 45 degree angle on the other end.
We actually forgot to cut the bottom of the legs until almost the last step and had to take the table apart.
A lot of wasted energy.


Sand it smooth.


This is how the hardware is placed underneath the table:


Set the bathroom hook aside for now, and using the legs to keep the fasteners straight, screw in place.


Drill a hole (big enough for the aluminum fasteners to fit) in the center of both of the fasteners and sand them smooth.


Drill a hole near the top of two of the legs.


Using the 1" threaded aluminum post, attach two of the legs.
Use washers to stabilize the legs.


Cut a smaller piece of the 1x2x6, the width of the two legs you just attached.


Attach this smaller piece about 2" from the bottom of the legs.
Make sure to pre-drill your holes.


To figure out how wide the other two legs need to be, place them inside the ones you just attached to the table.
Then measure for the smaller cross piece of wood.
Check the picture below for reference:


Now screw down that smaller cross piece to the second set of legs.
Remember to pre-drill the holes so you don't damage the wood.


Screw the dowel to the other end of the second set of legs.
Counter-sink the screws.
And of course, pre-drill the holes first!


Carefully put the table together.
At the place where the legs cross, drill through both pieces of wood and insert the 1 1/2" threaded aluminum post.
Repeat for the other side.


Spray paint it pink (or whatever), and give it to your Darling Stinker for a Tea Party!


Have fun!

Making

StumbleUpon.com
Related Posts with Thumbnails