skip to main |
skip to sidebar
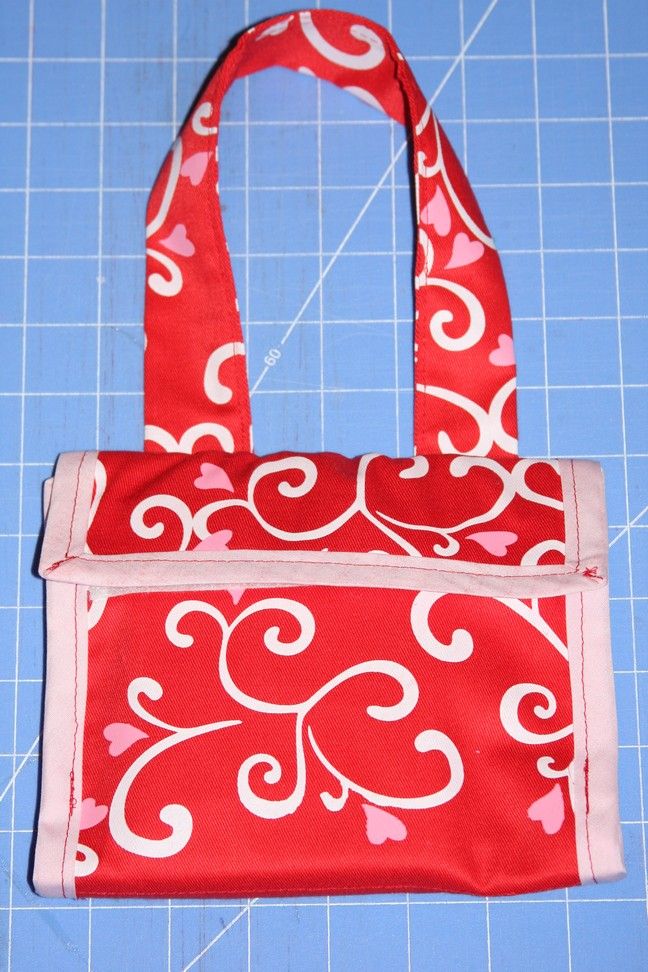
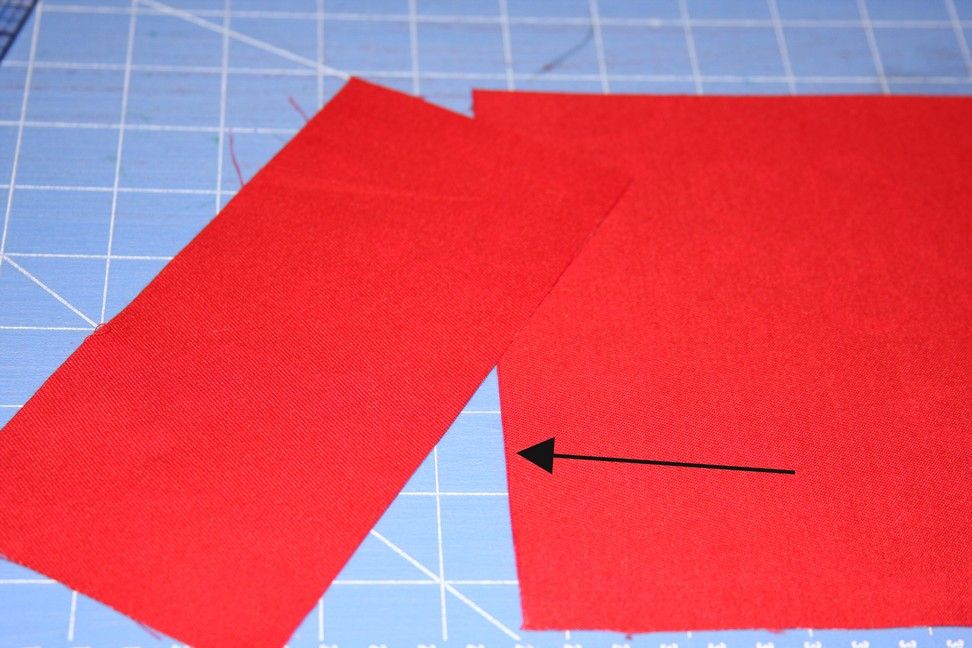
While I was at Target a couple of weeks ago I picked up a couple of Valentine napkins (2/$2.50) and Valentine placemats in the cheap aisle (don't you just LOVE that aisle?). Since then, I've been trying to figure out what to do with them.
I finally decided to create an Art Purse using just one napkin and a few other materials I had on hand. It's really pretty easy to make, the hardest thing I had to do was mitering the corners!! So don't expect those to be all nice and neat when you look at close ups of the purse!!!
I say purse, but you can shorten the handle, get a more boyie napkin and material to create a cute tote perfect for a boy. So actually, I think it'd be great for boys and girls - don't let all that pink and sweet hearts fool you! It's not too often I have sewing projects for boys since I don't have one!
Now I need to figure out what to do with the placemats!
Ok, here we go!! Remember to click on a picture to ZOOM in!
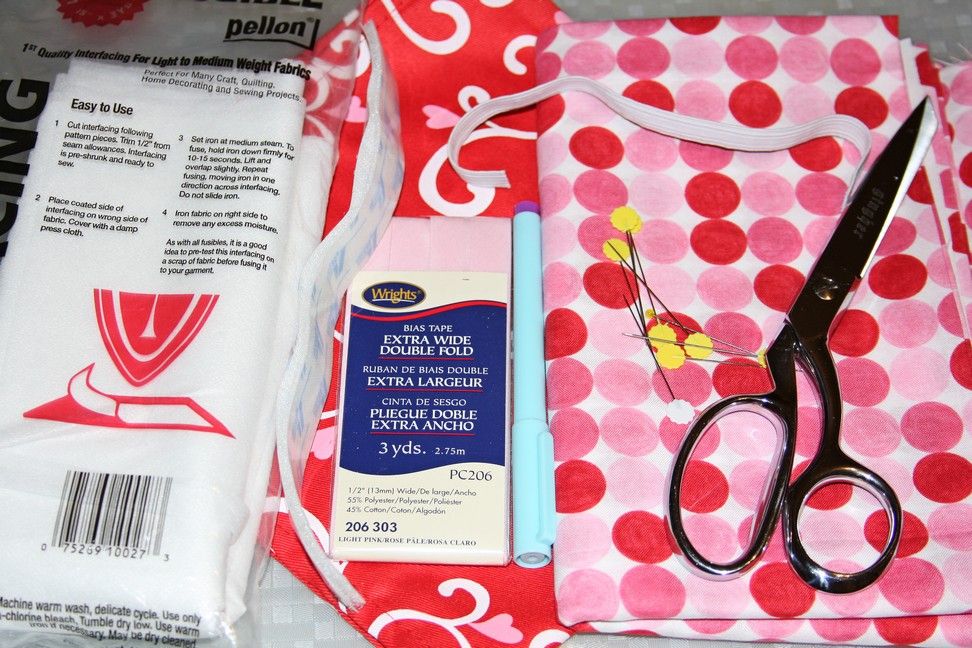
Materials needed:
(1) Valentine napkin (17" x 17")
(1) 17"l x 8" w rectangle of coordinating material
(1) 17"l x 8" w rectangle of fusible interfacing
double-fold bias tape
disappearing ink pen (or chalk or something to mark fabric)
scissors
Velcro (I used the iron-on kind, but use whatever you like)
8" piece of 3/8" elastic
thread
pins
Dritz ezy-hem (optional)
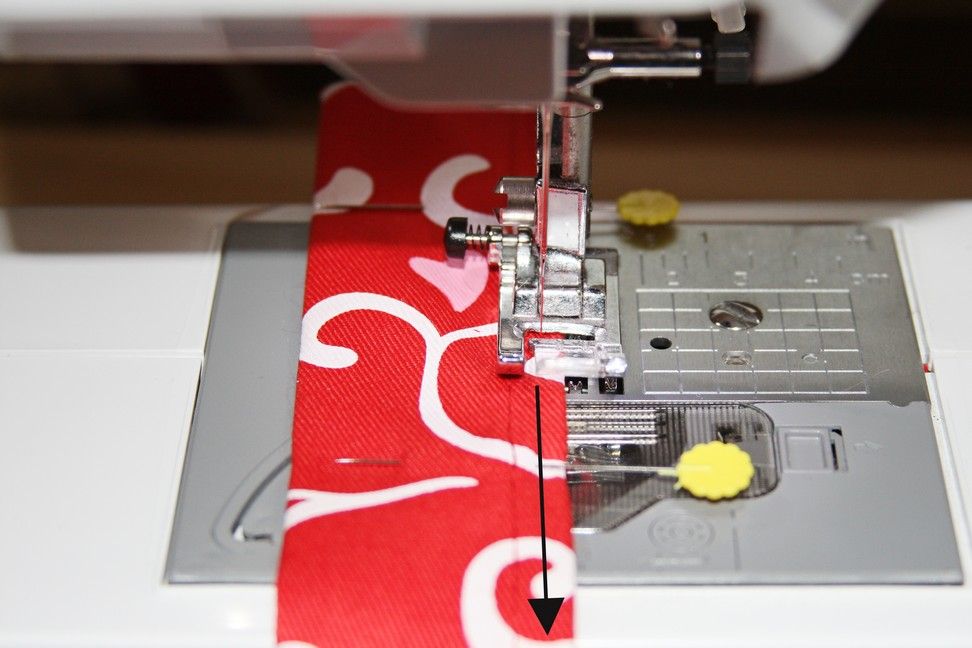
Cut off a 3" x 17" piece of the napkin. Use an ezy-hem (or whatever you got) to iron a 1/4" hem on the cut edge. Fold over and pin to the opposite side. This is your handle.
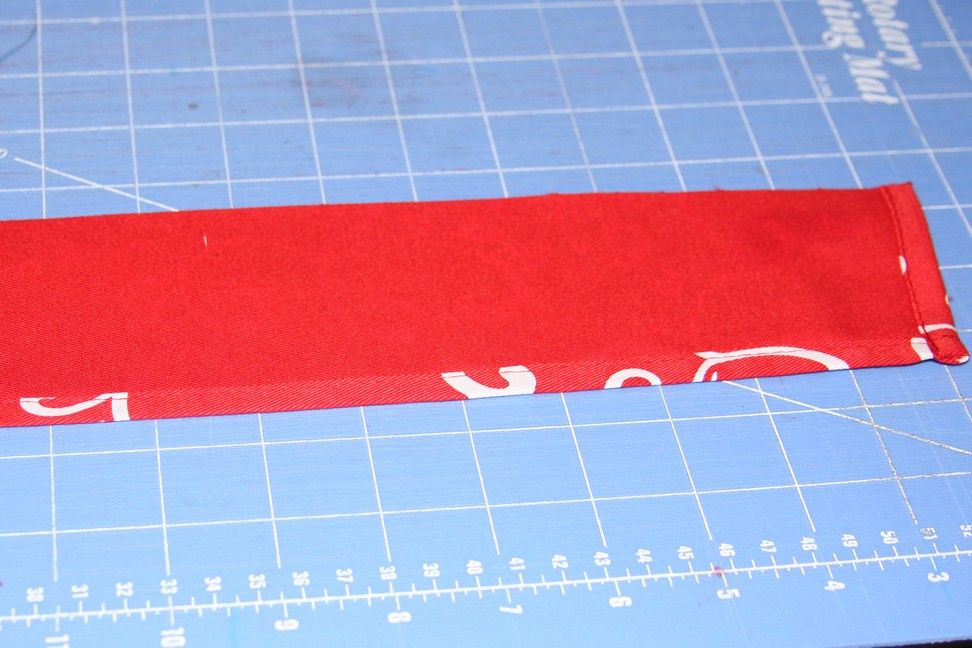

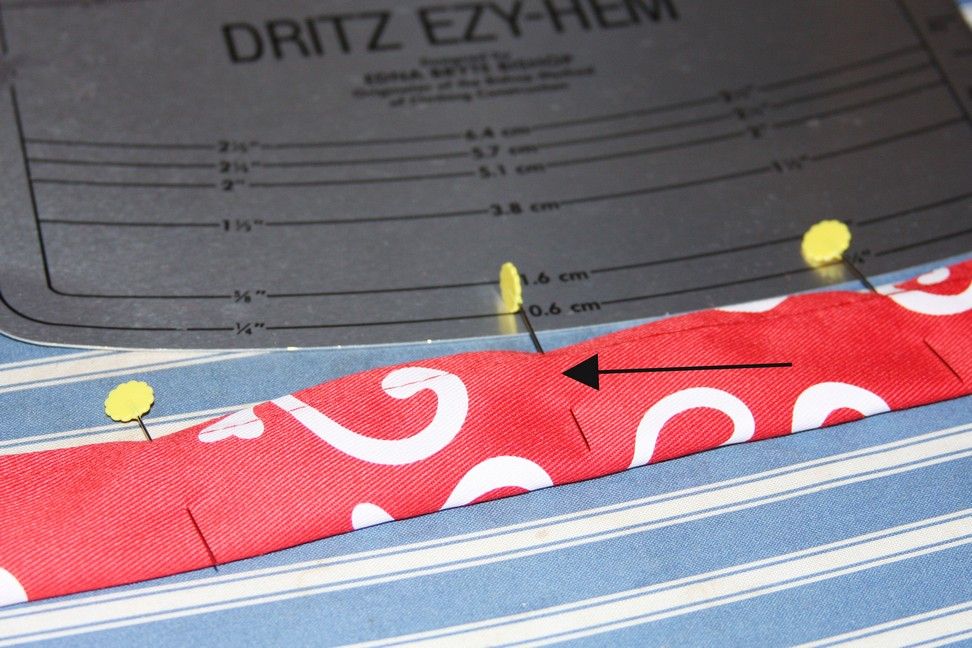
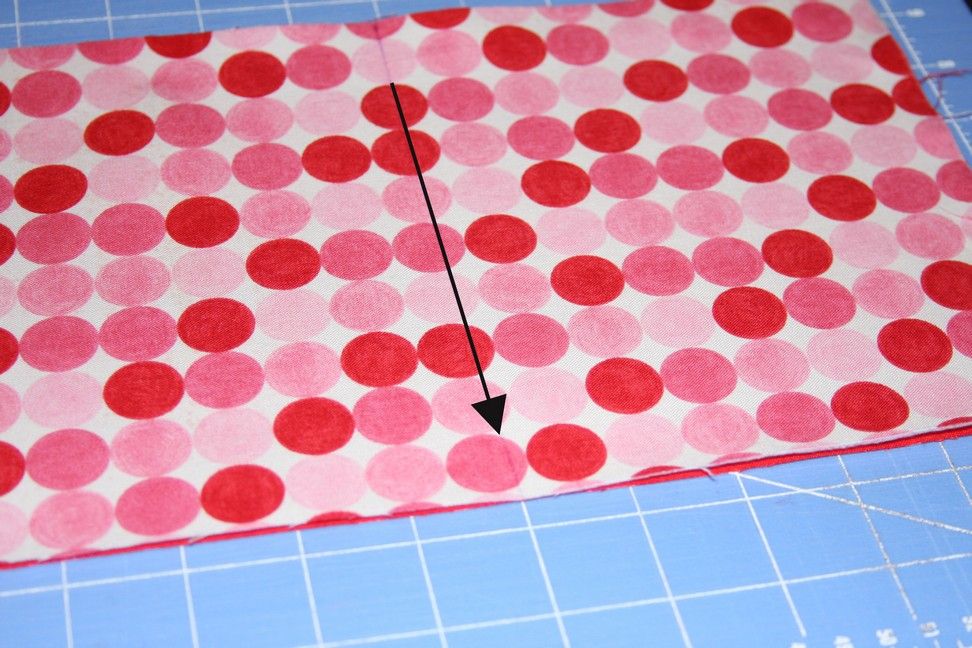
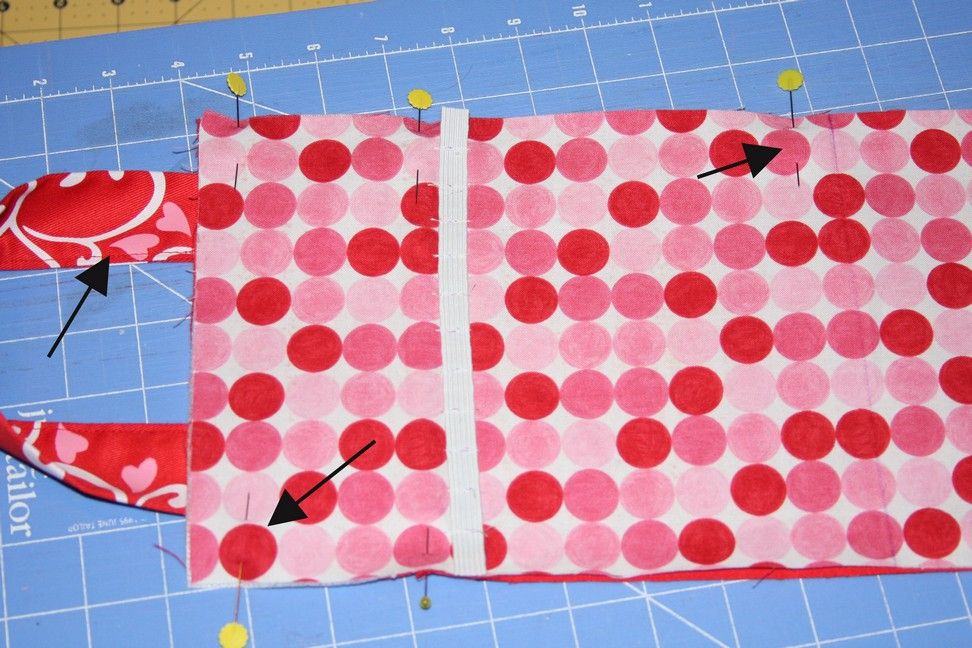
Sew the edge and trim the ends. Now cut a piece that is 7 1/2"w x 17"l. Trim all the folded ends until you are left with a piece that is roughly 7"w x 16"l - and four cut sides. If your piece is a little longer or wider or both, it's no big deal. From the bottom, measure 13" long, mark a straight line across, and then cut along that line. Now flip the napkin over, place the handle on top - making sure it's 1" away from edge on both sides.
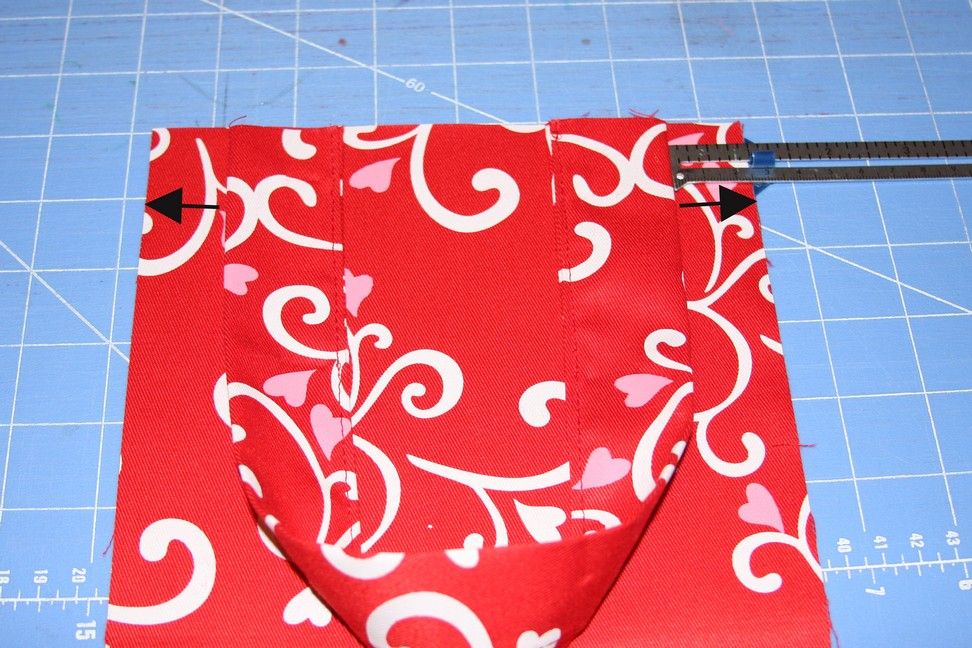
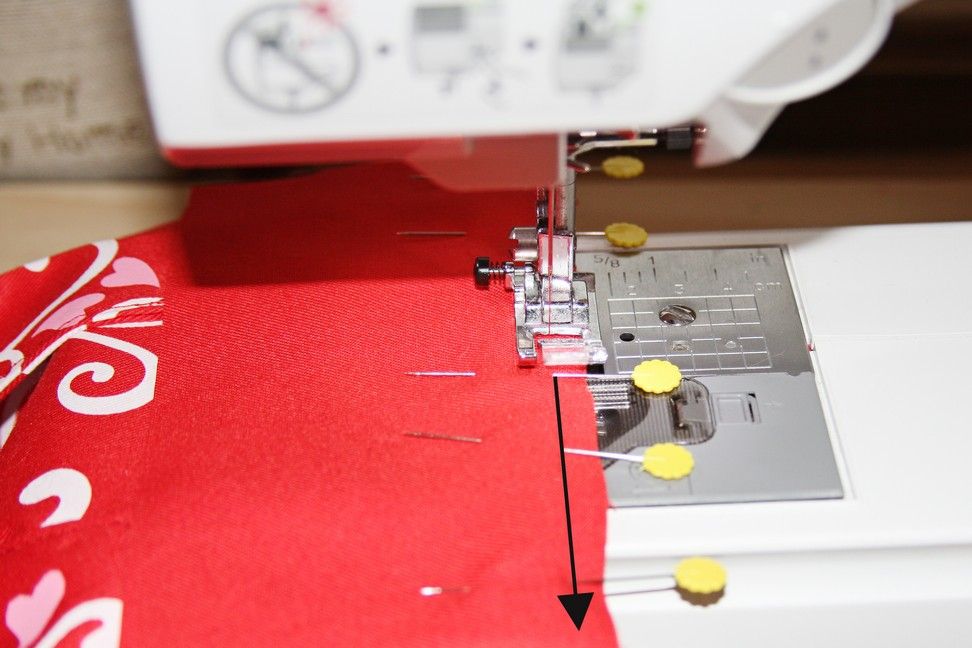
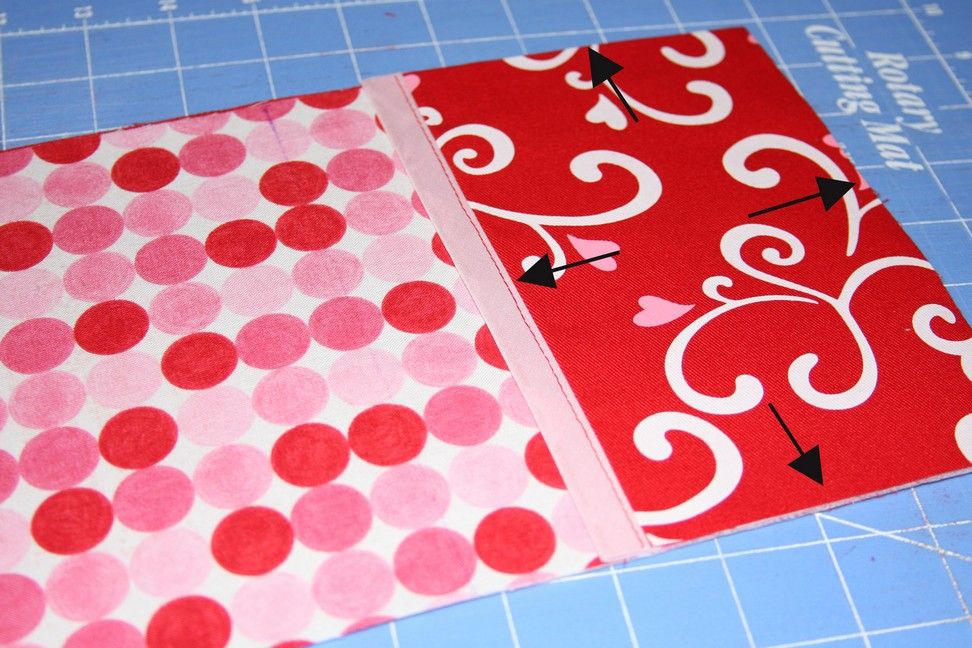
Lay the piece that you cut off on top of the handle and the main napkin piece - right sides facing. Pin in place. Sew 1/4" from the edge. As you can see in the 3rd picture, I pinked the edges - that part is optional. Cut a piece of material and a piece of interfacing that is the same size as the napkin construction. When measuring the napkin, make sure the handles are facing UP. Apply the interfacing to the material - follow the instructions on your interfacing packaging.

Measure 6" from the bottom of the material and mark a straight line with the disappearing fabric ink pen or chalk. Cut a piece of the leftover napkin 7" wide and however long you'd like your first pocket to be - just don't past the 6" marker line! Sew a piece of bias tape across the top of the pocket.
Later when you're sewing the purse together, you'll need to position the first pocket like the one in the 2nd picture below. Next, cut another piece of the leftover napkin about 4 1/2" l x 7" w, fold it in half, and then iron.
POST-IT-NOTE: Anytime you need to iron the wrinkles from the Valentine napkin - always put a cloth on top first. The napkin has a plasticity feel to it, so it might melt if you put the iron directly on it!
Sew a piece of bias tape across the top and bottom of the second pocket.
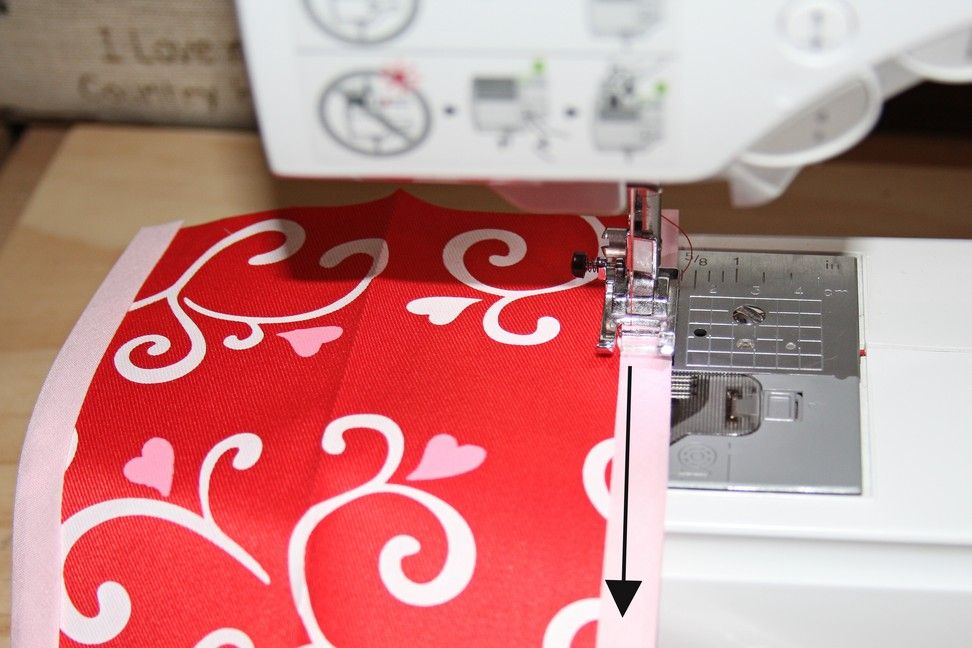
Later, before you sew the bias tape on, you'll position the second pocket like the one in the 1st picture below. Actually, folded in half, it'll create a "pouch" rather than a pocket. Place it right above the 6" marker line. With the pouch in place, measure where you'd like the crayons to be. Pin the elastic in place, and using a crayon as your guide, mark where you'll need to sew between them, and then sew over the marks on the elastic. Try not to make the marks too close, or your purse will bunch up. I did that with my second art purse! Oops!
Now with the handles UP, pin the material to the napkin.

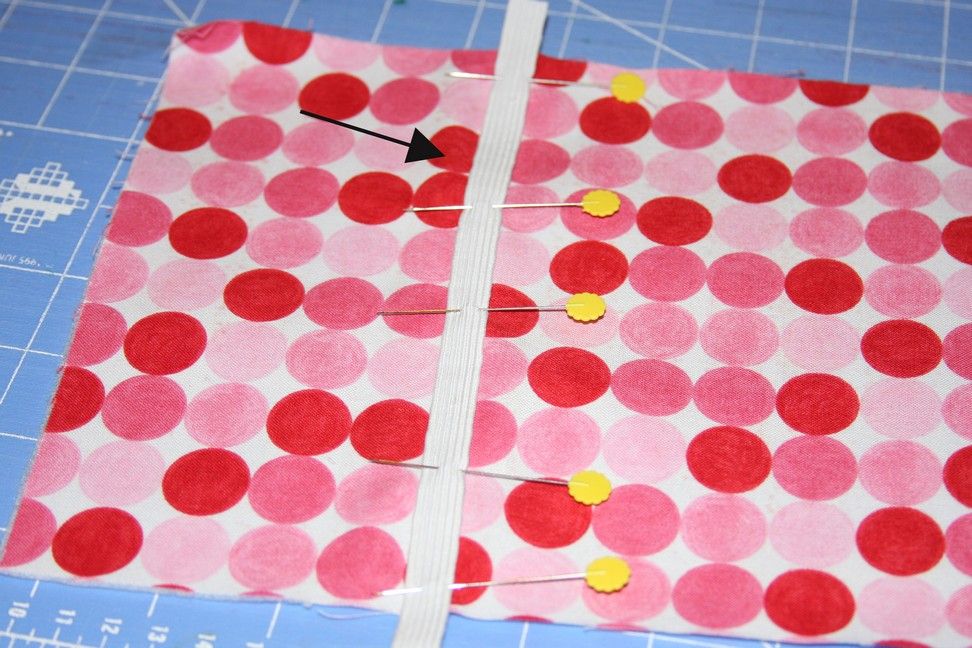
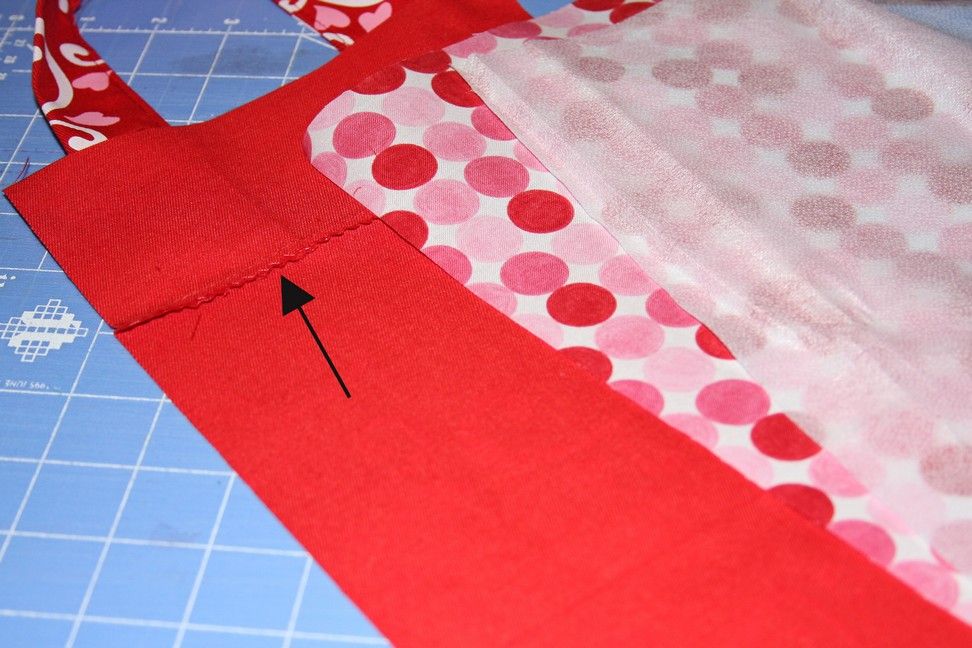
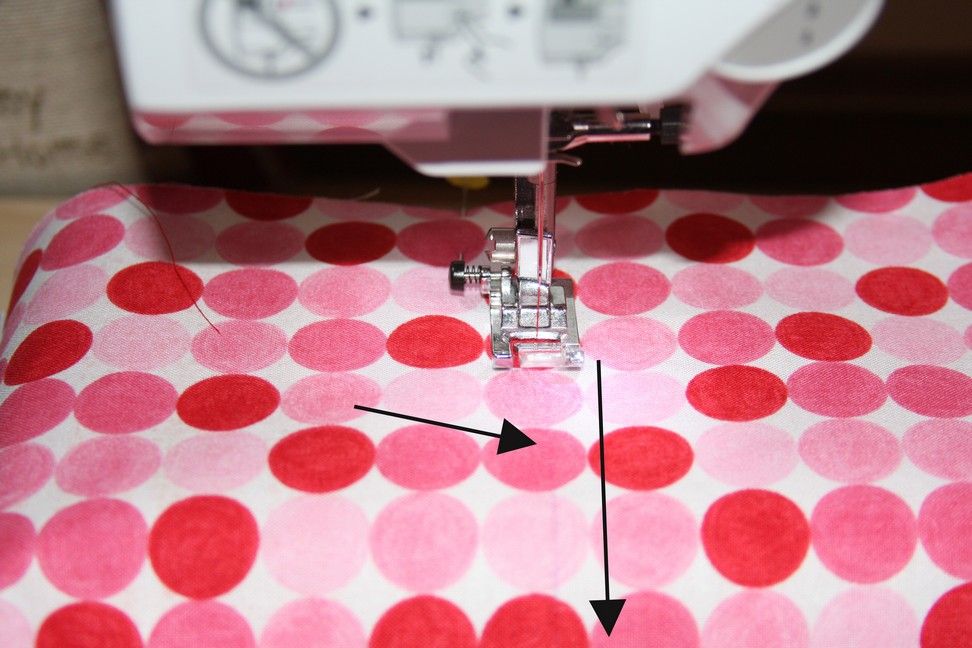
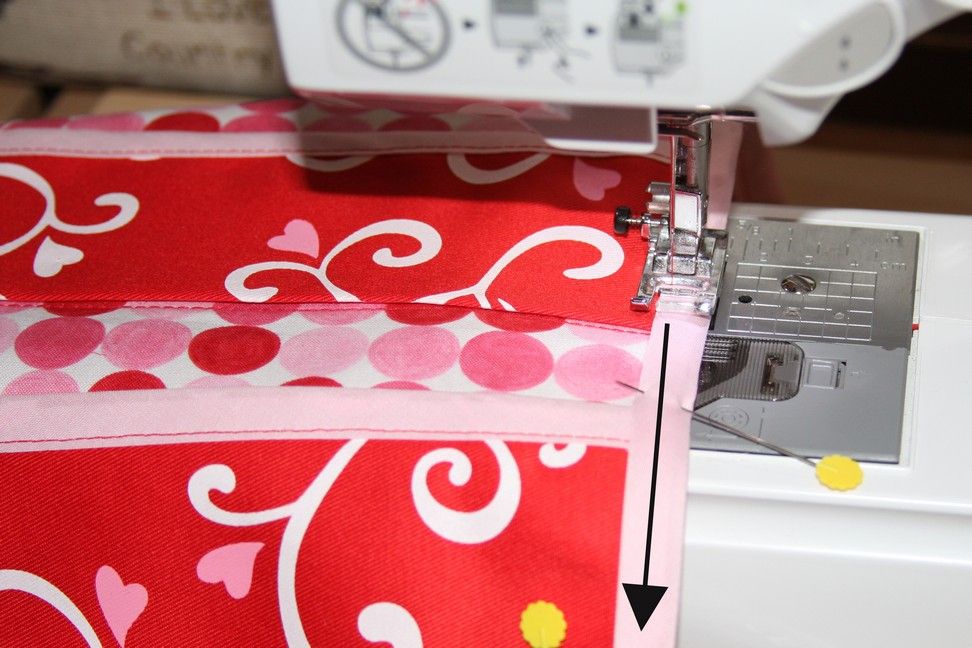
Sew a double or triple stitch along your 6" mark line. Flip the purse over, and with the handles still pointing UP, sew along the seam near the handles (back-stitch over the handles). In the 3rd picture, you can see where the seam and the line marker has been sewed. These lines will allow the art purse to fold much nicer.
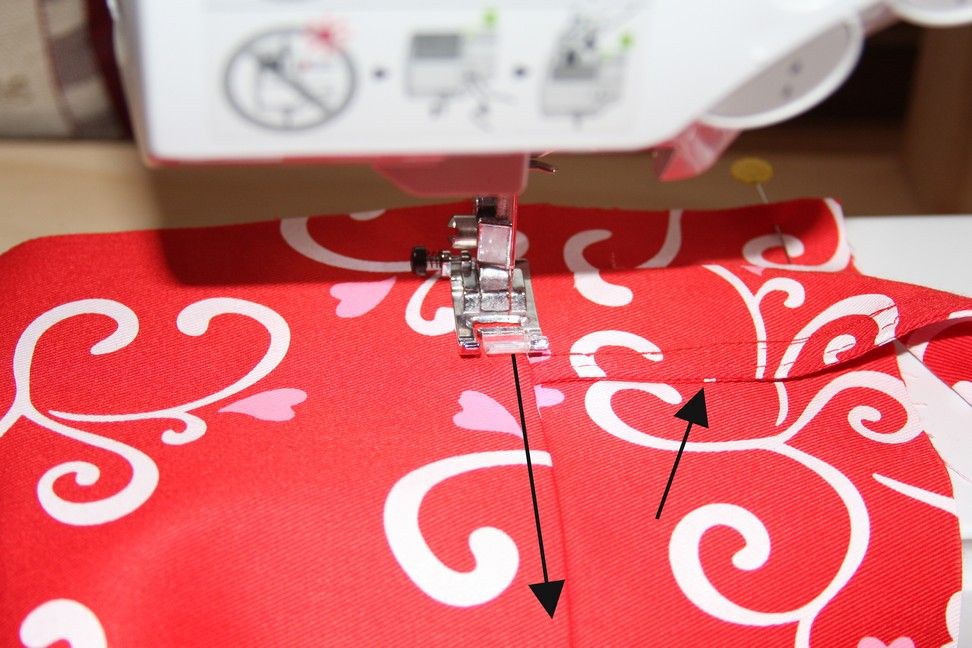

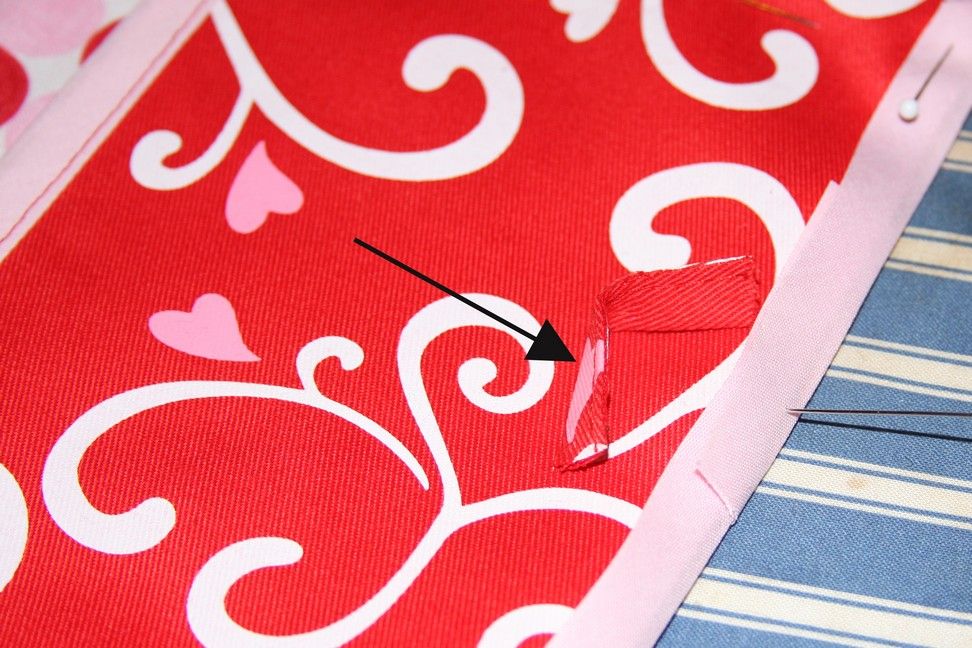
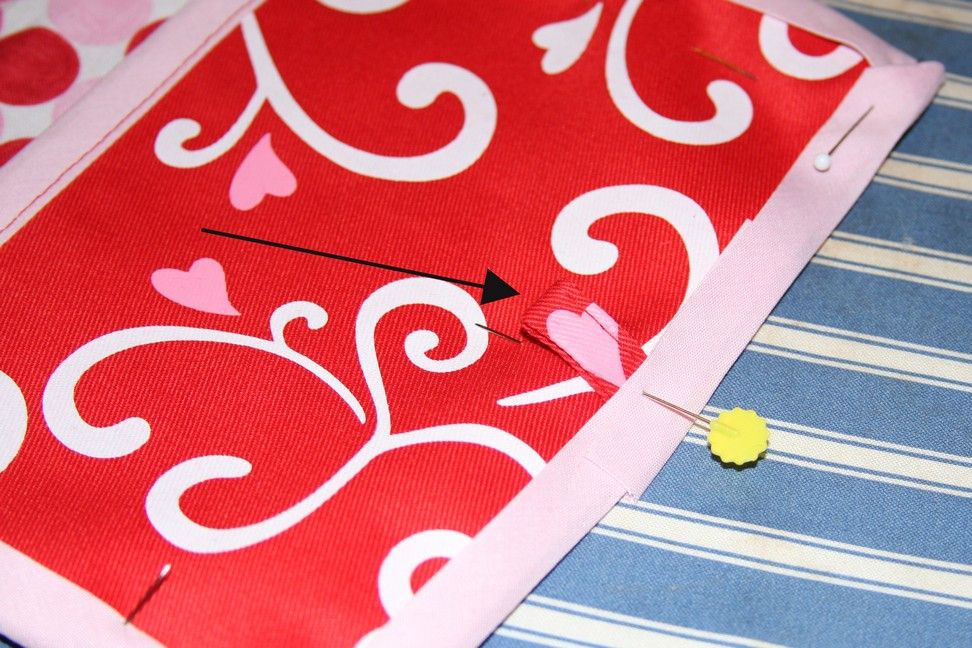
Pin the pocket and pouch in place like I showed you above. Next, take a small piece of the folded napkin edging that you cut off earlier - just enough to hold a pencil (1 1/2"l or so), and pin in place. Finally, put bias tape around the entire art purse - make sure to miter the corners the best you can, and sew it down. I like to back-stitch over the opening edges of the pocket and pouch on both sides to make it just a little more secure.
Take your time!
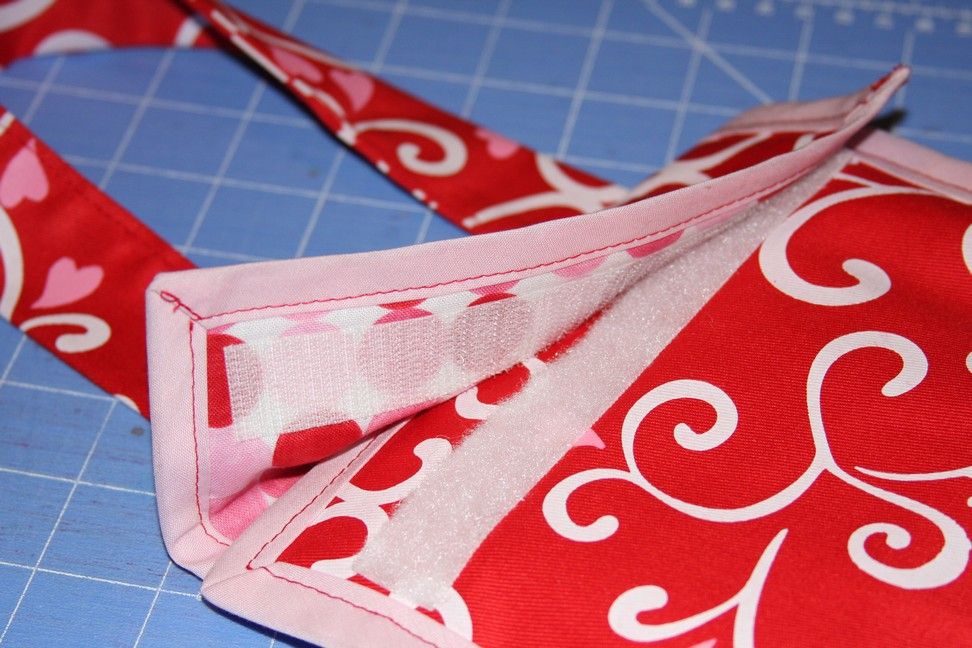
Cut a piece of Velcro almost as wide as the purse. Then just follow the instructions on the packaging to iron it in place. If you decide to sew, make sure to apply the Velcro before you sew the material to the napkin.

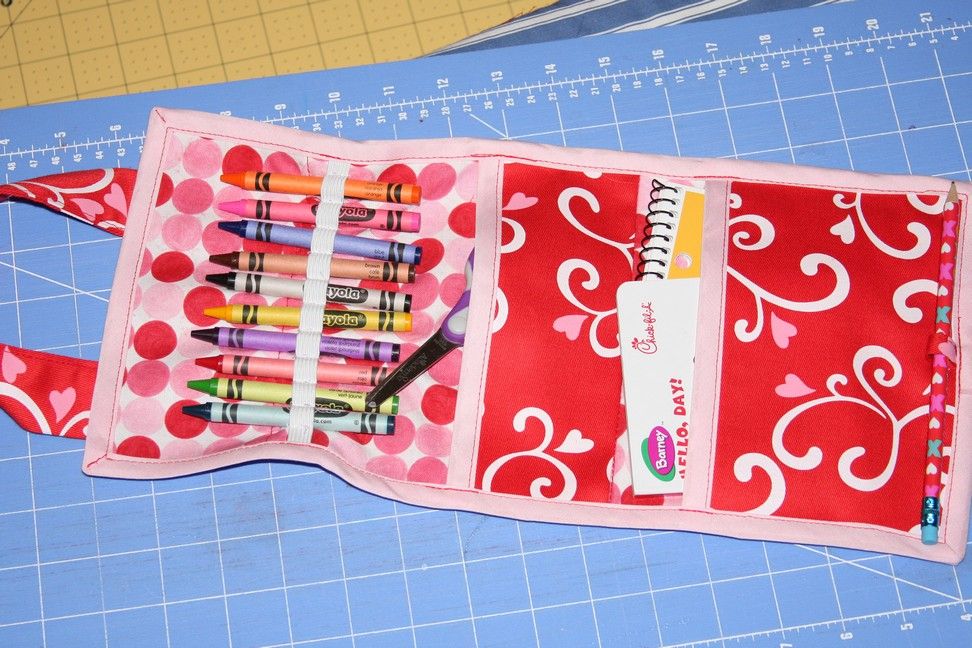
All done!!
See how my art purse kinda bunches up a bit? I should've spaced the crayons out a little bit further - and I put the elastic a little too high on this one too. Oh well! I guess I just need to practice a little more! It will still close pretty, Serenity just can't put the crayons high like in the picture!
It's the perfect size to hold everything Serenity likes to use to create her masterpieces too! I was trying to use just one napkin to create a workable art purse/tote, but it's very easy to adjust if you'd like it bigger - just use regular material for the whole thing! I would add interfacing to all the material pieces to make it studier if you do. You could try adding handles on both ends too!
I hope y'all like my latest tutorial!! Thank you for stopping by!
Have fun!