The Clover Wonder Knitter (Hobby Lobby and Michael's, $8.99) is a neat little gadget that so easy to use. It's a modern Knitting Nancy. A Knitting Nancy isn't just for older people, it's also a great way to introduce children to basic knitting techniques!
Good Things for Girls has an activity kit that includes a sweet little French Knitting doll - I think it would be a fun Easter gift for your daughter, niece, or granddaughter.
Wayne's This and That has an interesting post about The Lost Art of Knitting Nancys. He provides a very detailed list of different Knitting Nancys, how to use one, make them, and he even tests a few pretty cool-looking Nancys.
When I bought my Clover Wonder Knitter, I was so disappointed with the directions. The images are B&W and tiny - okay for a reminder, but not to learn how to use it for the first time.
It gave me the idea to put together a very easy-to-follow picture tutorial.
Remember you can click on any picture to ZOOM in!
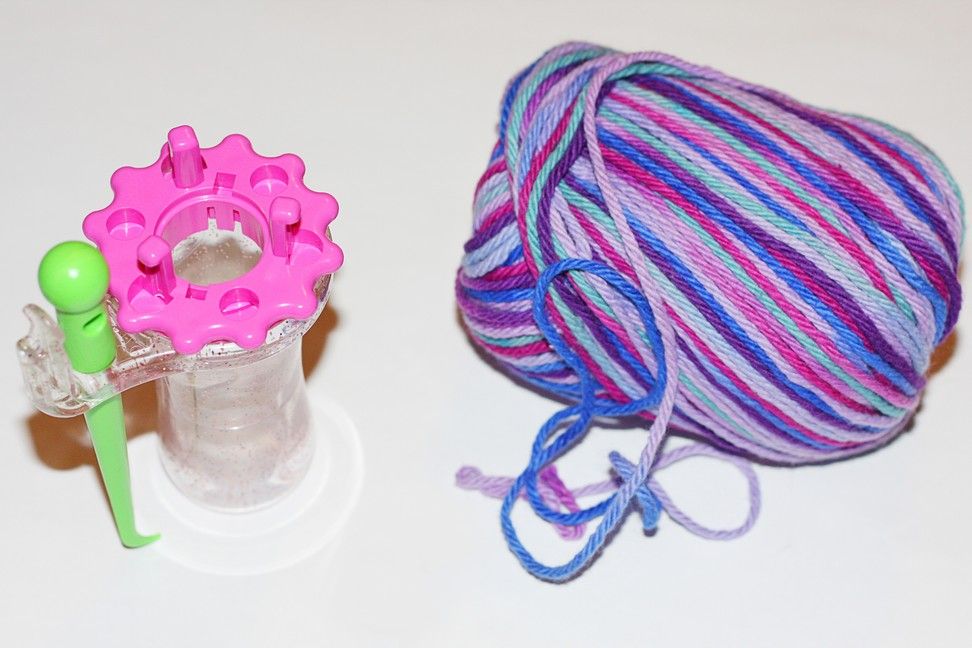
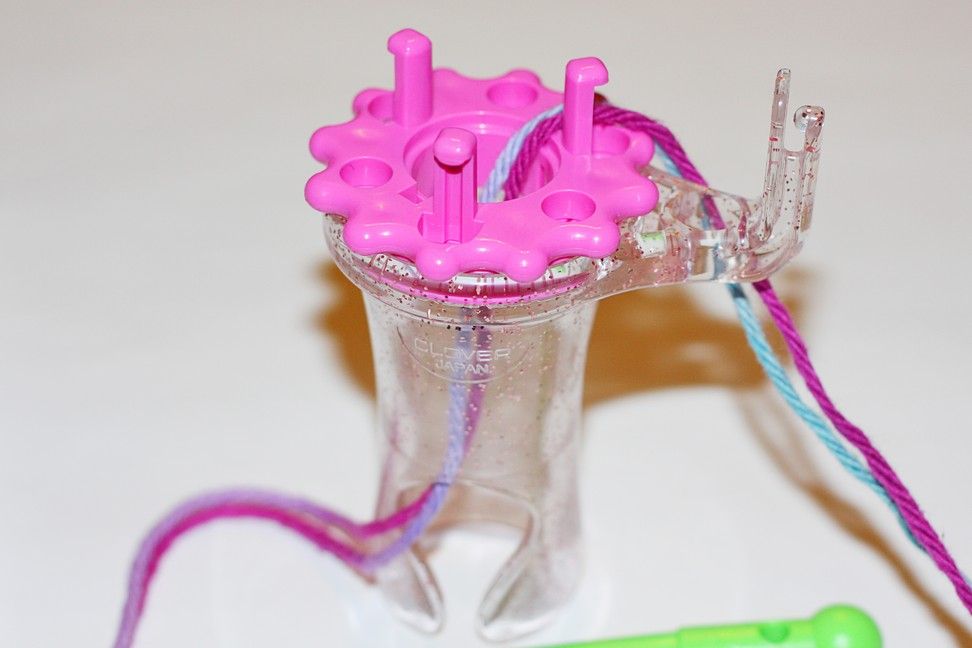
1. You're going to need the WK, yarn (I'm using cotton yarn) and scissors (not pictured).
2. In the rest of my pictures I'm knitting two threads of yarn at one time. These instructions are the same no matter if you're using one or two threads of yarn.
3. Place the end of the yarn into the WK.

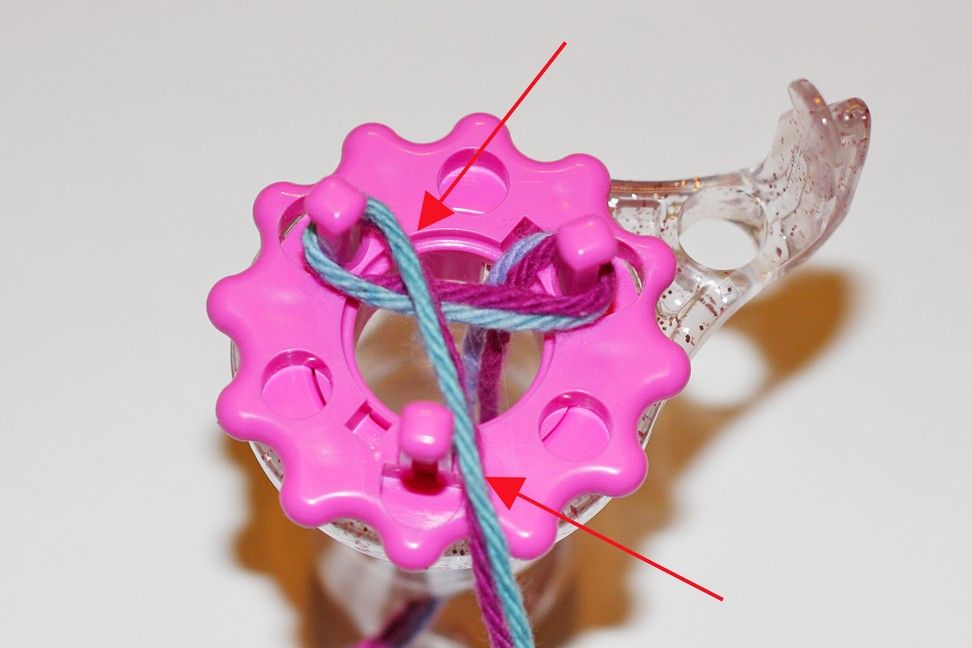
2. You're going to wrap the yarn around each post in a clockwise direction.
3. Start with the post in front of the piece that holds your hook - wrap just like the first picture.
4. Then move on to the second post in a counterclockwise direction, and wrap like the second picture - in the same clockwise direction.
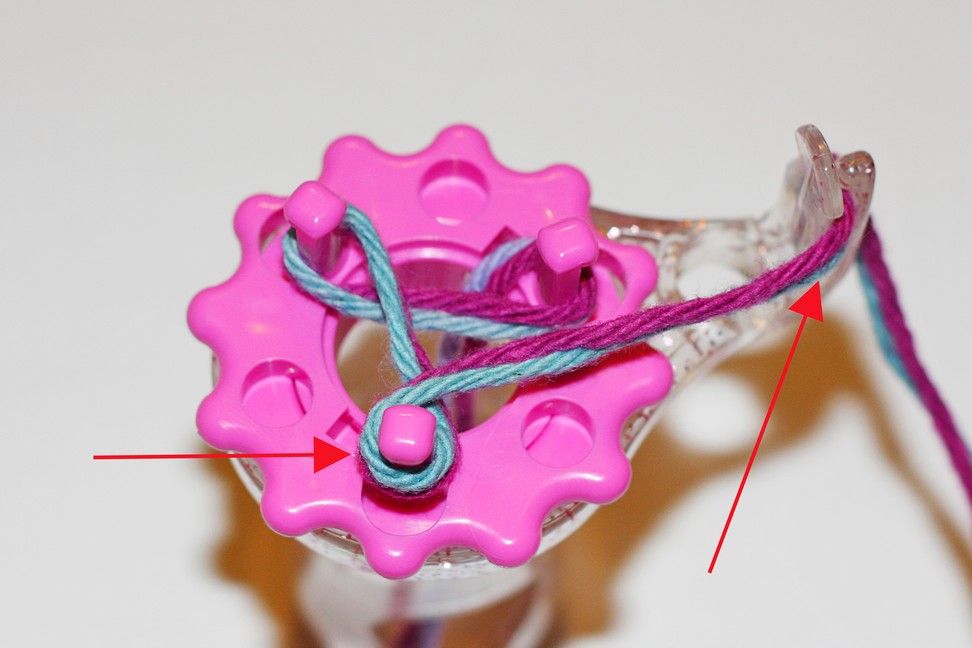

3. Now wrap the last post (clockwise) and anchor the yard on the little guide - it's right behind where the hook is stored.
4. You're going to hold the WK like I'm doing in the second picture. It's best in the beginning to keep a firm hold of the yarn coming out of the bottom of the WK and the yarn on the guide so the braid isn't too loose.
5. Use your thumb to turn the pink attachment as you knit. That will bring around the yarn you'll be working with on each post. Refer to the second picture.

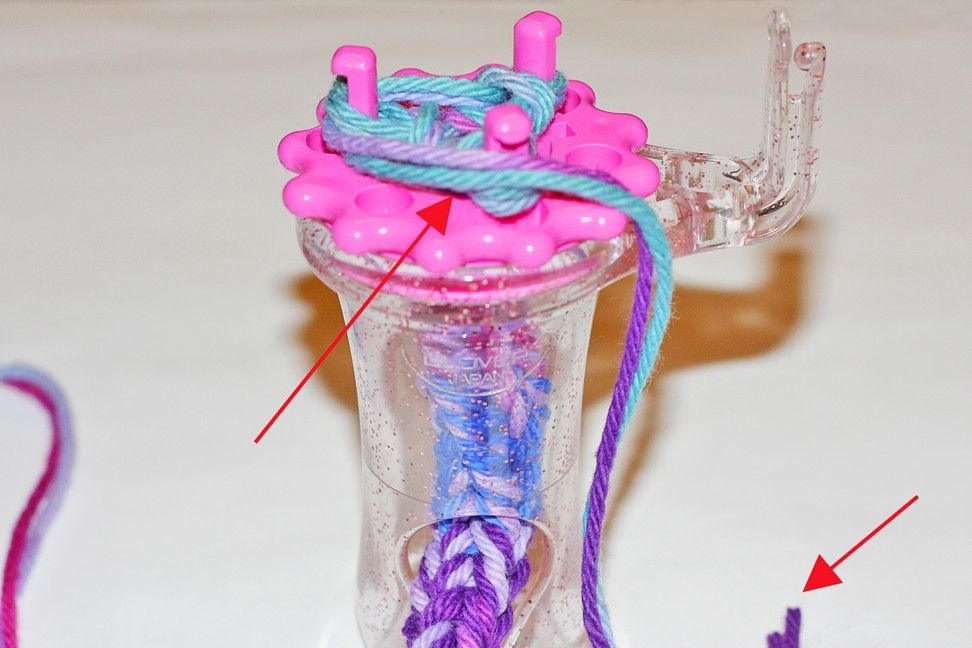
6. Using your hook, pull the bottom loop over the loose yarn and then on the post.
7. Repeat steps 5 and 6 until the piece is as long a you want it.
8. Cut the end of your yarn - be sure to leave a long piece to work with.
(I'm sorry the second picture doesn't show my cut end better.)
9. You're going to continue to turn the pink attachment as normal to bring around the yarn you need to work in the next step.
(I put the cut end of the yard back on the guide in the following pictures.)

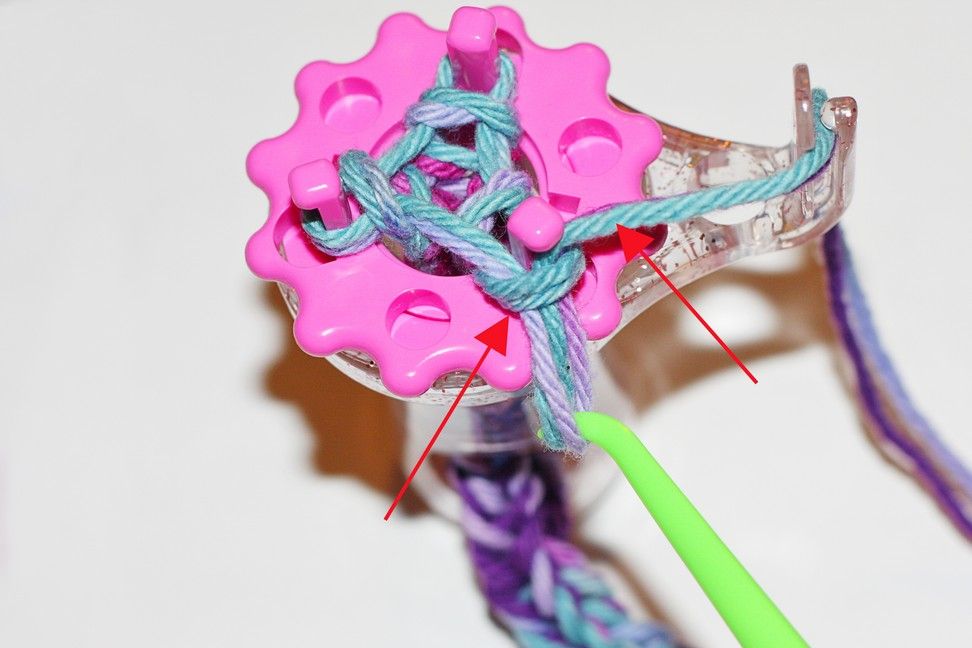
10. Insert the hook as usual in the bottom loop.
11. This time hook the loose yarn at the top and pull it all the way through the bottom loop.
12. Repeat steps 9-11 to work the next two posts the same way.
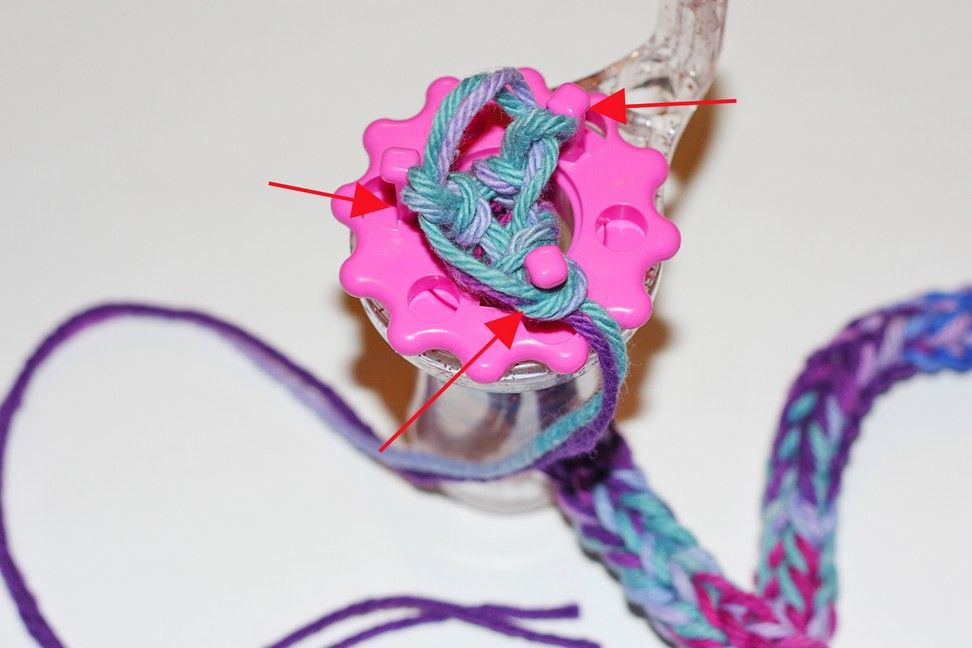

13. Once all the posts are finished, pop the yarn off carefully.
14. Pull the end to tighten.
All done!
Do you want to know what the braid I just created is for? Stay tuned for my next tutorial!!
UPDATE:
Here's the new tutorial!
Good Things for Girls has an activity kit that includes a sweet little French Knitting doll - I think it would be a fun Easter gift for your daughter, niece, or granddaughter.
Wayne's This and That has an interesting post about The Lost Art of Knitting Nancys. He provides a very detailed list of different Knitting Nancys, how to use one, make them, and he even tests a few pretty cool-looking Nancys.
When I bought my Clover Wonder Knitter, I was so disappointed with the directions. The images are B&W and tiny - okay for a reminder, but not to learn how to use it for the first time.
It gave me the idea to put together a very easy-to-follow picture tutorial.
Remember you can click on any picture to ZOOM in!


1. You're going to need the WK, yarn (I'm using cotton yarn) and scissors (not pictured).
2. In the rest of my pictures I'm knitting two threads of yarn at one time. These instructions are the same no matter if you're using one or two threads of yarn.
3. Place the end of the yarn into the WK.


2. You're going to wrap the yarn around each post in a clockwise direction.
3. Start with the post in front of the piece that holds your hook - wrap just like the first picture.
4. Then move on to the second post in a counterclockwise direction, and wrap like the second picture - in the same clockwise direction.


3. Now wrap the last post (clockwise) and anchor the yard on the little guide - it's right behind where the hook is stored.
4. You're going to hold the WK like I'm doing in the second picture. It's best in the beginning to keep a firm hold of the yarn coming out of the bottom of the WK and the yarn on the guide so the braid isn't too loose.
5. Use your thumb to turn the pink attachment as you knit. That will bring around the yarn you'll be working with on each post. Refer to the second picture.


6. Using your hook, pull the bottom loop over the loose yarn and then on the post.
7. Repeat steps 5 and 6 until the piece is as long a you want it.
8. Cut the end of your yarn - be sure to leave a long piece to work with.
(I'm sorry the second picture doesn't show my cut end better.)
9. You're going to continue to turn the pink attachment as normal to bring around the yarn you need to work in the next step.
(I put the cut end of the yard back on the guide in the following pictures.)


10. Insert the hook as usual in the bottom loop.
11. This time hook the loose yarn at the top and pull it all the way through the bottom loop.
12. Repeat steps 9-11 to work the next two posts the same way.


13. Once all the posts are finished, pop the yarn off carefully.
14. Pull the end to tighten.
All done!
Do you want to know what the braid I just created is for? Stay tuned for my next tutorial!!
UPDATE:
Here's the new tutorial!


SO weird to come over and read this. I was just looking at these on Friday in a little shop wondering if I should get one for my oldest for her bday. I remember having so much fun with one as a kid- except it was a big spool with nails in the top. lol
ReplyDeleteJust a quick note to let you know that a link to this post will be placed on CraftCrave.com in the Handcraft category today [29 Mar 03:00pm GMT]. Thanks, Maria
ReplyDeleteThanks for joining Get Your Craft on Thursday. Please join me next week for another wonderful party!!
ReplyDeletePlease stop by next week I am having guest over each day and I would love for you to tell them HI!
My 8.5 year old daughter just bought this for herself. You re right-the directions stink! We found a Youtube tutorial and now your directions. Thank you!
ReplyDelete