I've been making tutus for about three years now - mostly for Serenity, my nieces, and my friends' girls.
When I make them, I don't usually make just one - I make lots of them!
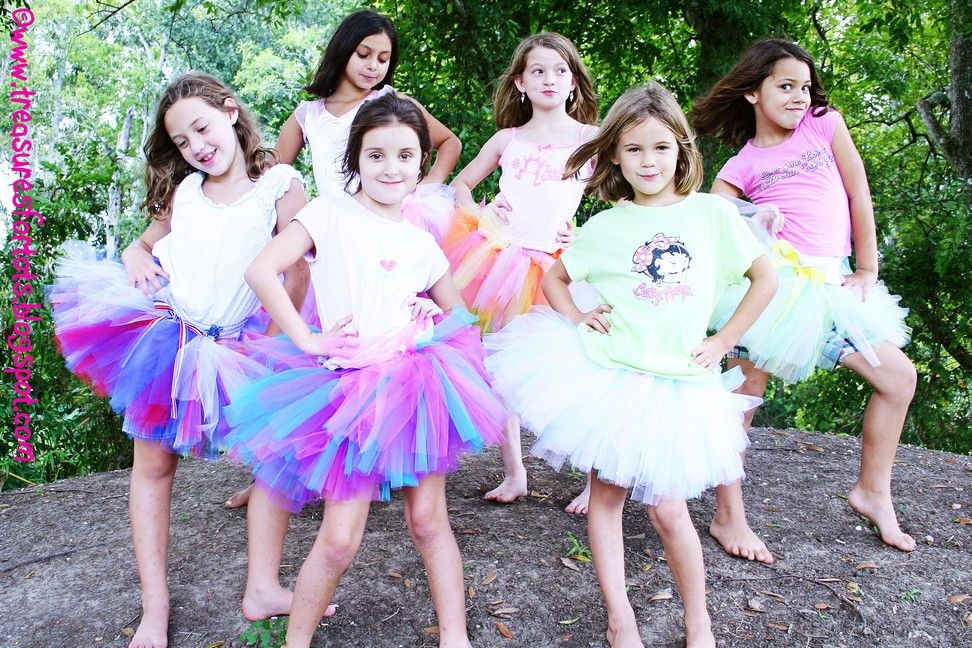
I even had a tutu-making slumber party for my nieces (Sierra and Lauren) and my friends' little girls a couple of years ago, and I taught all of them how make tutus - smart, huh?
I certainly didn't want to make SIX tutus!!
Besides, they had fun and learned a neat new project!
That's all of the rotten little stinkers in the picture above wearing the tutus they made themselves!
You can learn how I taught the girls to make their own easy No Sew tutus by clicking HERE!
If you already know how to make a tutu, then you know the most aggravating part is measuring and cutting the tulle.
If you already know how to make a tutu, then you know the most aggravating part is measuring and cutting the tulle.
It's so time-consuming!
But not for me - 'cause I figured out a super quick and easy method.
Listen up!
I was complaining to my friend Teensie a few years ago when I was making around a hundred tutus (well, it seemed like that many!) - there just had to be an easier way!
She said maybe I could figure out a way to wrap it - then something just clicked (you know how it is), and this is how I ended up doing it!
She said maybe I could figure out a way to wrap it - then something just clicked (you know how it is), and this is how I ended up doing it!
I'd never seen tulle cut this way before, and I never, never, never cut tulle any other way now!
I'm planning Princess Packs for Serenity's upcoming 3rd Birthday Party and I'm making tutus for the little Princess party guests as part of the PPs.
I'm planning Princess Packs for Serenity's upcoming 3rd Birthday Party and I'm making tutus for the little Princess party guests as part of the PPs.
I need to make a least ten tutus - just to make sure I have enough.
TEN!
Of course I'm gonna use my quick and easy method, and that gave me the idea to share with y'all.
If you'd like to learn how I satin wrap tutus, check out my post,
If you'd like to learn how I satin wrap tutus, check out my post,
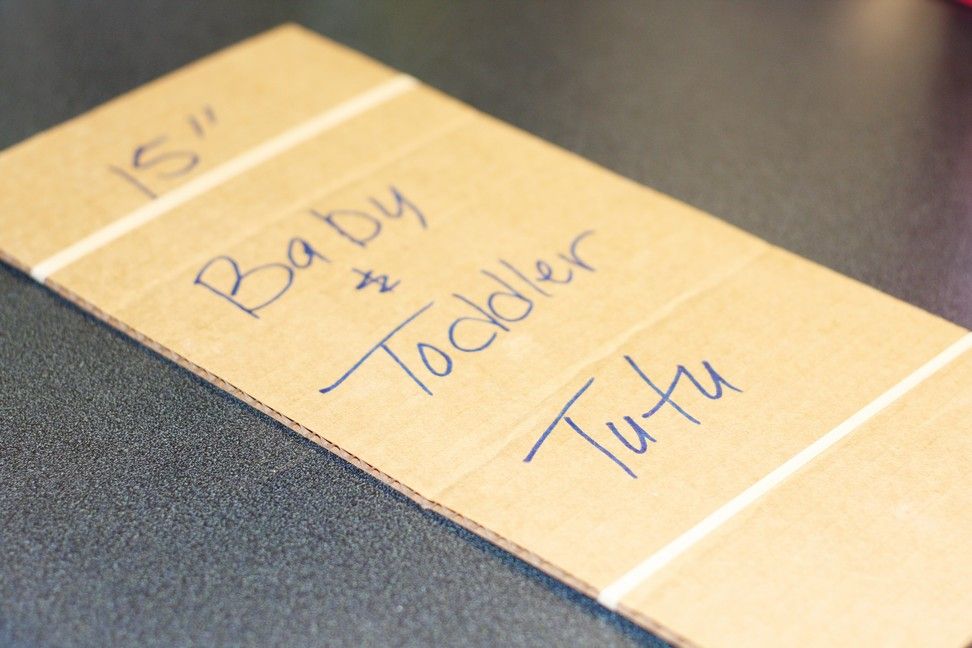
Cut out a piece of cardboard 15" long and about 7" wide.
The width doesn't have to be exact, but the length does.
I like to use the flap from a cardboard box.
You'll need two rubber bands too.
When making a baby or toddler tutu or even a super short tutu for tweens & teens, I cut my pieces 15" long.
You can make it however long or short you prefer.
Remember to cut the cardboard about twice the length you'd like your finished tutu to be.
My tulle pieces are 15" long so my finished tutu is around 7" - 7 1/2" long.
I like to label my cardboard pieces too.
Next, wrap your tulle (I use the 6" spools) around the cardboard evenly.
Make sure you're not wrapping too tight - if the cardboard is bending in the middle, then it's way too tight.
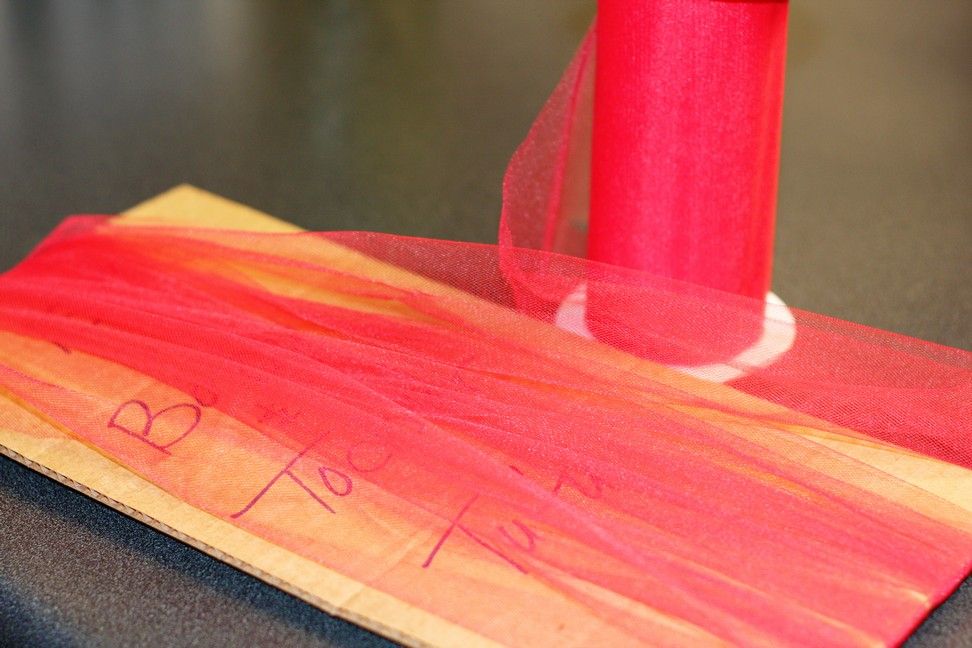
Once you've finished wrapping (I usually wrap the entire roll so I don't waste tulle - I'll show you how to store leftover tulle in a minute),
secure both ends with the rubber bands.
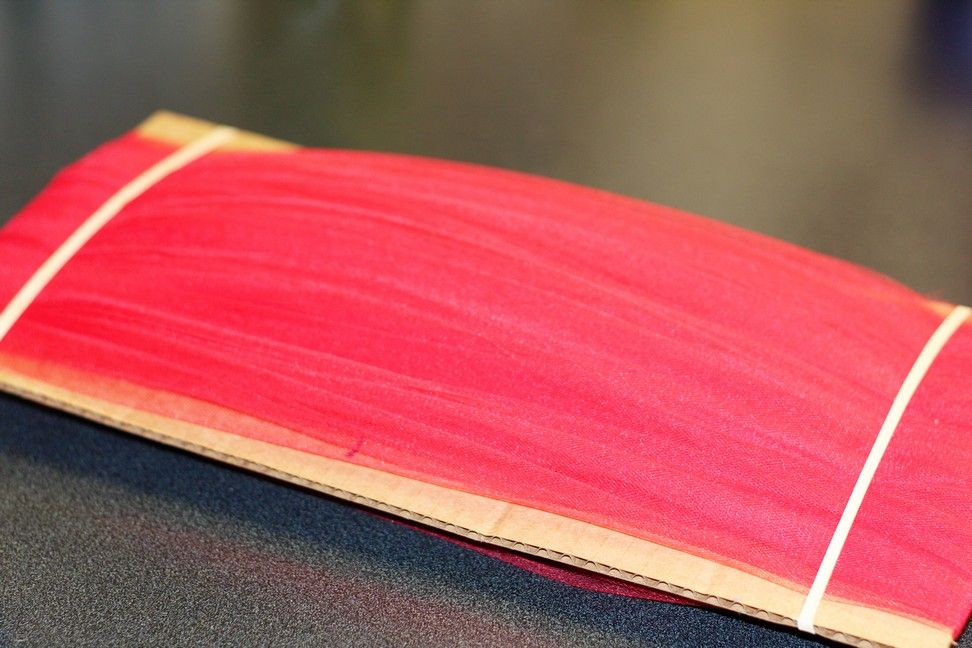
Carefully and slowly, cut the ends of the tulle using the edge of the cardboard as your guide.
Make sure you don't pull up on the tulle while cutting it or it'll be shorter on one end.
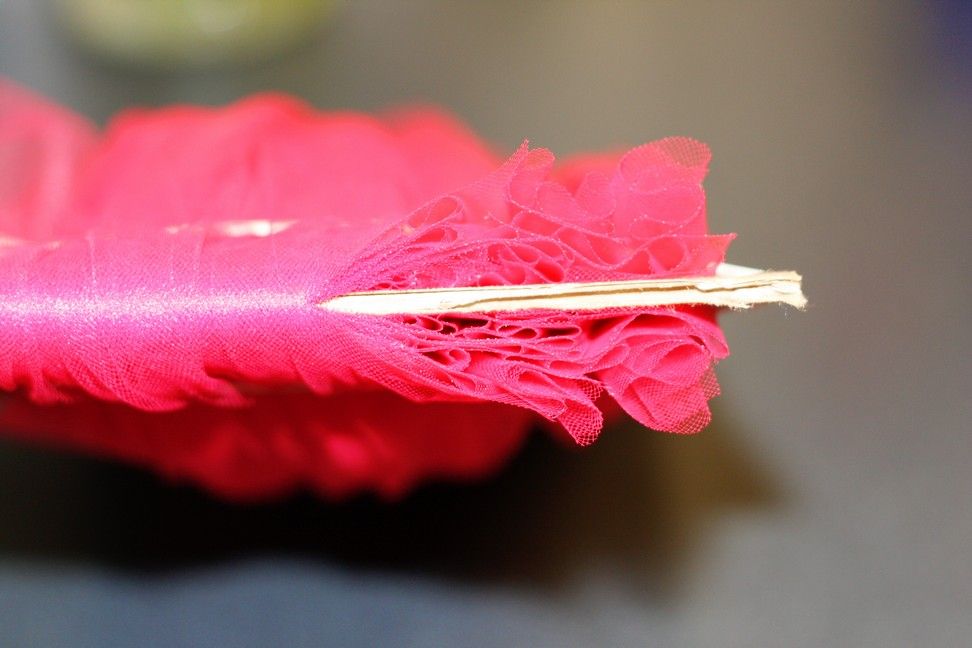
Remove any scraggly pieces you might have.
Here's a picture with both of the ends cut - you can see my scraggly pieces in the front.
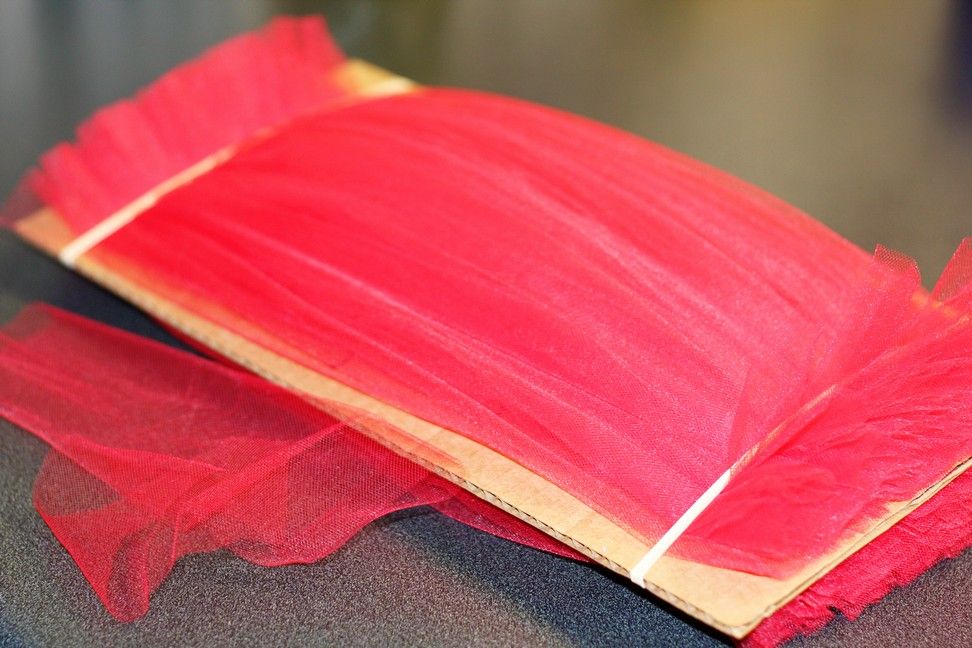
Pull the tulle off the cardboard, and ta-da!
You're done!
Perfectly cut pieces of tulle - quick and easy!
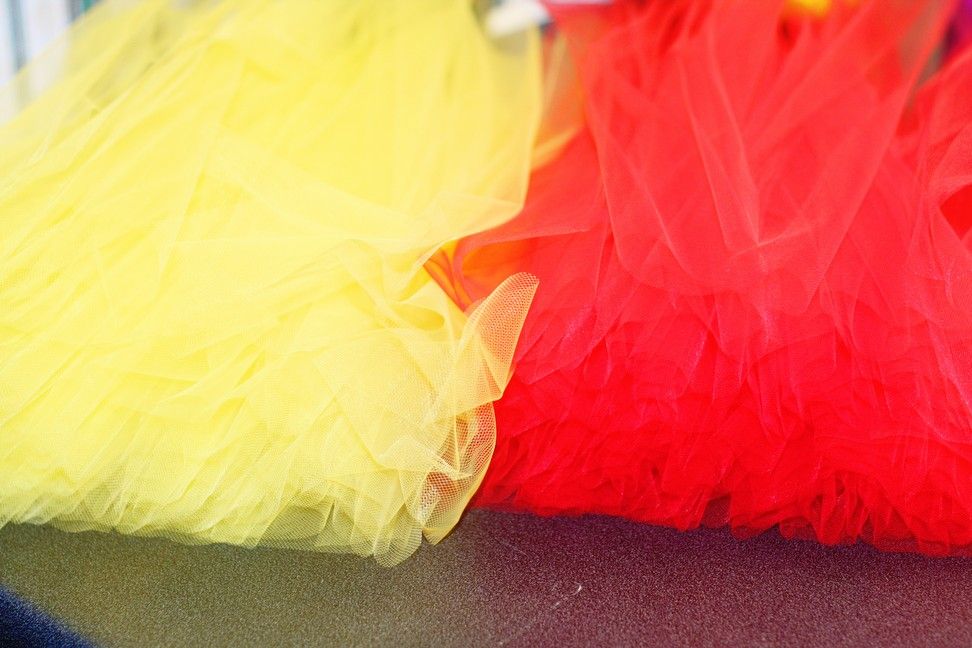
Below are the pieces I cut for a Snow White tutu:
Store any leftover tulle pieces on the cardboard.
All nice and neat and tidy!

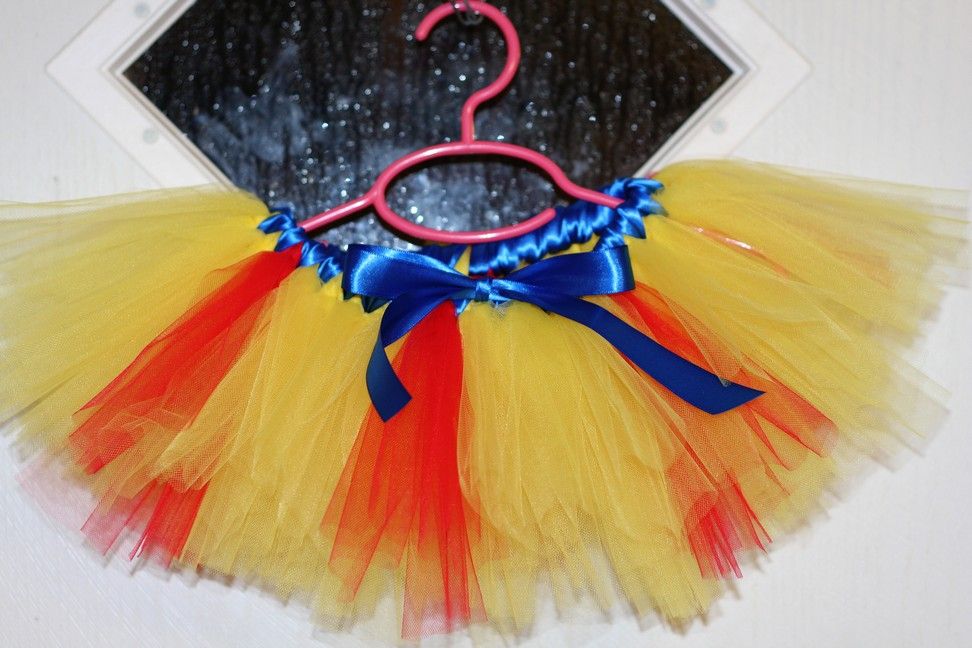
Here's my finished tutu!
I usually use a slip knot when I make tutus, but this time I tried a double knot for the first time.
It came out pretty good and it was quicker to make.
This is also the first time I used a satin ribbon to wrap the waist of the tutu.
I really like how it turned out!
The tutu may look a bit uneven in the picture because of the hanger, but it's not.
Making a satin wrapped tutu is easier than you think - for sure easier than I thought! I used 3 yards of ribbon, but it all depends on how big of a tutu you're making.
I'm sure people do it different ways, but I wrapped my tutu like this:
Leave a "tail" of ribbon at the beginning (to tie into a bow), and wrap from the inside-out, threading the ribbon between every two pieces of tulle until you've work your way around. Be sure you don't pull the ribbon too tight as you're wrapping. When you've finished wrapping, tie the ribbon into a bow, cut off the excess, use a lighter to seal the ends, and hot glue the bow in place so it won't come undone.
Here's my picture tutorial that will show you how I wrap a tutu:
You can find the 6" spools of tulle at JoAnn's, Hobby Lobby, Nashville Wraps, and many other online stores.
Look around - you can probably find it cheaper than your local stores - and that includes shipping and handling charges!
To learn how to make a tutu, you can follow my No Sew Tutu tutorial or Google "how to make a tutu" for almost 560,000 results!
EDIT 1/11/11:
I created this tutorial over two years ago, now when you Google "how to make a tutu" there are over 14,500,000 results!
WOW!
To learn how to make a tutu, you can follow my No Sew Tutu tutorial or Google "how to make a tutu" for almost 560,000 results!
EDIT 1/11/11:
I created this tutorial over two years ago, now when you Google "how to make a tutu" there are over 14,500,000 results!
WOW!
Little Birdie Secrets shows you how to make and inexpensive Baby Chick tutu costume! Tutus make GREAT costumes and cool holiday outfits! Here's Serenity all dressed up for the Mardi Gras earlier this year! I crocheted her leg warmers and sewed her bead bag too.

POST-IT-NOTE:
BTW people, this was taken in February - have you noticed that Serenity is wearing shorts under her tutu?!
The leg warmers ended up coming off later too 'cause it got very warm (you would say "hot") that day!
Blink - and our "Winter" is gone!
Of course little girls don't need a reason to dress up in a tutu!
Here's a picture of Serenity and her friends Cobee Lynn and CeeCee wearing tutus while playing outside.
Why?!
Because that's what all little girls should wear when they play outside!
Of course little girls don't need a reason to dress up in a tutu!
Here's a picture of Serenity and her friends Cobee Lynn and CeeCee wearing tutus while playing outside.
Why?!
Because that's what all little girls should wear when they play outside!
POST-IT-NOTE 2:
I would like give a HUGE thank you to One Pretty Thing and Everything Your Mama Made and More and Tip Junkie for linking this post!
Have fun!


Thank you for the step by step! You did a great job explaining! I love the satin ribbon tie waist! The pics are so cute of the girls!
ReplyDeleteYour tutus turned out fabulously! I made a bunch of these last Christmas for friends with little girls and they are always such a big hit! :)
ReplyDeleteWhat a wonderful tip! You have saved my sanity today!
ReplyDeleteThanks for the great tips!
ReplyDeleteOMGosh Angela, this it the first time i checked out you blog and i LOVE it. Wish i woulda done it sooner. You are doing such a good job with it. Love Love Love IT!!!!! I'm gonna make a tutu whoo hoooo!
ReplyDeleteNicole laCroix
I just cut 30 squares of tulle and I almost went insane!!!! Too late but a wonderful tip to save for the future! Weel done!
ReplyDeleteThe last time i made a tutu, I cut ea. strip individually and it was so time consuming :(
ReplyDeleteI LOVE your idea !! I'm following your blog so I can remember your idea for future tutu's !
Ok, when I saw this I thought... Hmm... Not too many ppl outside of Louisiana celebrate Mardi Gras... So I went back to look where you're from- Girl we're neighbors! Lol... I'm just a couple hours away in BR. :-) It's so nice to meet a fellow Mommy blogger from these parts! Have a great Thanksgiving!
ReplyDeleteI wish I had known about your tutu cutting method in March when I had to make 5 tutu's ;)
ReplyDeleteI just referred a friend to your site/tutorial that was interested in learning to make tutu's !
I'm a tutu kind of girl. I always wanted a little girl who would enjoy one of these. I have a girl but she was more into bugs and not tutus. Thanks for sharing! Please be sure to visit my blog not only for the thrify post this week but also for my give-a-way post of Vintage Sterling Silver. Don't forget to participate to win!
ReplyDeleteSo easy! I love it! thanks for sharing! : )
ReplyDeleteI wish I had a tutu to make for someone but I live in a world of boys!
ReplyDeleteThese are so cute!
Smart!! And wow, look at all that sass! Cute photo!
ReplyDeleteSerenity i SUCH a doll in the Mardi Gras set!
ReplyDeleteLove the tutorial! I will for sure make one for my little 3-year-old. She will love it!
ReplyDeleteLove the Mardi Gras tutu.
ReplyDeleteThanks again for joining "Get your Craft on Thurs."
Adorable!!!!!!!!
ReplyDeleteThanks for the great tip about cutting the tule. That's always the most mundane part of that project. I'm totally going to do that now!
That is a fantastic tip, that's what I do too! Great minds think alike! The pictures are all adorable!
ReplyDeleteThanks for sharing and for linking back!
Thanks for sharing! It saved me sooooo much time!
ReplyDeleteI am SO happy I found your blog today! It saved me! I was trying so hard to make my own tutu for a photo shoot this weekend and I was failing miserably at it and it was all because of cutting the tulle. Your way is amazing and I finished my cute little tutu in just 30 minutes! Thanks so much! :)
ReplyDeleteWhat a great cutting tip! You have just saved me sooooo much time! Thanks a bundle!
ReplyDeleteThanks for the cutting tip! I also wanted to share with your readers that I found rolls of tulle on Etsy for less than $5 with shipping!
ReplyDeletegreat instructions! thank you! i really like the mardi gras tutu....how did you get it to lay that way? do u know how many yards and how long it is? i'm making my first one for a friend and that looks like what she is wanting. thank you so much!
ReplyDeleteHey!!! Sorry it took me so long to comment here but I wanted to tell you this is GENIUS!!!!! Now this is something I can do! I'll be sure to link back to you when I give this a try cause wow, what an idea! And I LOVE making tutus but the same problem... I hate measuring, cutting, etc.
ReplyDeleteThanks so much for linking up on my linky and sharing your awesome creation!
This is simply amazing!! Such a great idea! You have just saved me HOURS of time. Thank you so much for sharing this.
ReplyDeleteI cannot emphasize enough to you, how much this tutorial has come in handy over the last few months!! Thanks for sharing it!
ReplyDeleteWe link to you in the post we have scheduled for tomorrow! You can check it out at:
http://holidaysnobs.blogspot.com/, but it won't be up until after 9:00pm MST.
Thanks!!
I love this tutu and want to make one for my daughter. I went to joann's and all they had was lemon yellow? It looked to light. What color yellow did you use?
ReplyDeleteWhat color is the yellow in the snow white tutu... all I can find is lemon yellow at joannes but it seems to be to light. please email me...
ReplyDeletecdc29204@yahoo.com
amanda
Thank you SO much you made my life like 100x easier! By the way codwholesale.com great cheep tulle!
ReplyDeleteSo as I was JUST cutting each piece one at a time and becoming SO FRUSTRATED, I came to good ole google and did a search on cutting tulle, up popped your blog and I am ever so grateful for this. THANK YOU THANK YOU THANK YOU for this quick and easy step. Brilliant! I am a follower now!!! :)
ReplyDeleteYou are my new best friend because of this trick lol I love tutus but really didn't like making them cause they were such a pain in the butt to cut the tulle. Thanks so much!!!
ReplyDelete^^^^^^^^^^^^^^^^^^^^^^^^^^^^^^^^^^^^^
ReplyDeleteHahahaha!! Thank you!! Glad it helped you so much!!
you seriously just made the easy tutu even easier (and your friend) are fabulous! not to mention that i've been trying to find a solution for the itchy waistband-i guess it's been one of those 'so easy i didn't see it' solutions. thanks!
ReplyDeleteI'm making 10+ tutus over the next couple of months - thank you for the tip! You just saved my sanity.
ReplyDeleteLOL! You're welcome!!
ReplyDeleteBrilliant! I'm definitely adding this to my "Tutotorial" that I posted a few months ago :)
ReplyDeleteMoore Babies
I'm glad you like my tutorial and find it so helpful Stevie! I don't mind you adding my idea to your tutorial, but please link back to my tutorial too please! Thank you!!
ReplyDeleteThank you for posting this tutorial. It was most helpful in creating my daughter's Halloween costume, my first handmade tutu! I linked back to your blog! http://shopbonnenouvelle.blogspot.com/2011/11/pinterest-challenge-and-tutorial.html
ReplyDeleteThank you for linking! I'm so glad you found it helpful! Love your daughter's adorable Dorothy costume!! She is too cute!
ReplyDeleteWhat a genius idea.
ReplyDeleteOne thought though wrt cutting the tulle with out stretching it and making on side longer than the other. If you cut two rectangles of card and wrapped it round both then you could inset one leg of your scissors in between the two pieces of cardboard and then cut along the top with out having to struggle to get the scissors in.
Just a thought :p
I absolutely will link back!!
ReplyDeleteI actually posted a new post today to share your strategy with all of my readers here!
@BeadsAndBarnacles: I'm very careful not to stretch the tulle, and I find it's not hard at all to insert the scissors to cut. But I've been making tutus for years now and I could probably do the cutting blindfolded! ;)
ReplyDeletethis is the way i cut to do a pompom so i get it lol also did you put the tulle on elastic before you wrapped the ribbon??? thanks Pam
ReplyDeleteThanks so much for your tutorial! I had recently started 'wrapping' my tulle around my small 8x12 cutting board and then cutting it with a rotary. LOVE the idea of using cardboard and rubber bands and then using to store! Thanks so much! And I Always wondered how to do the ribbon wrap! :)
ReplyDeleteI am a little confused. I tried the warp around the cardboard trick with a little tulle just to make sure I was doing it right - I ended up with tulle cut the correct length but 6" wide (I used the spool like your example). Typically when I make tutus my strips are about 2" wide. Do you use wider strips?
ReplyDeleteYes I use strips that are 6" wide x 7 1/2" long. You can cut them in half (or more) so they aren't as wide if you want to; it all really just depends on your personal preferences. Hope this helps!
ReplyDeleteVery cute. I am not crafty at all, so this is probably obvious, but what do you tie these to to make the waist band?
ReplyDeleteThank you! I use a ribbon as the waistband. Sometimes I use elastic. You can find my NO-SEW tutu tutorial here:
ReplyDeletehttp://treasuresfortots.blogspot.com/2009/11/easy-no-sew-tutu-tutorial-giveaway.html
I make tutu but I find the tulle I use gets messed up after there wear it one time. What type of tulle do you use?
ReplyDeleteI buy my tulle online from Nashville Wraps: http://www.nashvillewraps.com/tulle/6-tulle/c-033158.html
ReplyDeleteThanks for the awesome tutorial! Cutting the tulle drives me crazy, this worked perfectly! I linked up to you over at Paper Catnip & Cupcakes, hope you will stop by :)
ReplyDeletehttp://papercatnipcupcakes.blogspot.com/2012/01/tutus-bows-oh-my.html
Maybe I'm in over my head but I'm gonna try to make A tutu dress for my darling dghtr! Saw on on etsy for $120!!! SO I'm gonna try it and wanna make a rainbow tutu for her 2nd bday art party also. I got 12. Colors 1 yrd each . The. Large kind on a bolt. Will this method still work ? Just maybe cut down a little?
ReplyDelete@Nelson: I think using tulle by the yard will work just fine (just cut it down into strips similar to how I did it above) and it sounds like you've bought more than enough to make a tutu dress! They can get very expensive online!! Good luck and Happy 2nd Birthday to your little darling!
ReplyDeleteHi, thanks for the cardboard tip. I have a tulle question, if you wouldn't mind. I purchased a tutu at a pet event for my dog. I love it and wanted to try and make one for my new dog. The tulle type is what is hard for me to figure out. I went to Joanne Fabrics and none of the tulle was as stiff or sparklie as this one. The one I bought is white sparkle skirt and it's pretty stiff. I have been searching and searching for tulle that is stiff and with sparkle but I really don't know what I am looking for. Any advice would be great? Thanks (rcheltrvel@aol.com)
ReplyDeleteI am making these for Big Sister's Birthday party!! I linked you on my blog! howtomom.info
ReplyDeletethanks for the great tip! I went to Jo Ann's and asked for the cardboard that the bolts of fabric come on. They gave it to me for free. I think this work great with making tutus. Thanks again for your advice.
ReplyDeleteThank you! This is sooooo helpful!! I will definitely be cutting my tulle this way from now on!
ReplyDeletethank you, thank you, thank you
ReplyDeleteBrilliant tutorial. Really clear and way to follow.. Great pics and gorgeous models. Wish I'd known about this idea last year when I was making costumes for Seussical the Musical. I made tutus for the Tree Frog and Flamingo, then all the Jungle Animals wanted one. I used the long method!!!!
ReplyDeleteOMG! You just saved me so much time!
ReplyDeleteYour wrapping and cutting technique has just made my life SO MUCH EASIER!!! Thank you for posting this! :)
ReplyDeletegreat idea, thank you!! I have a question for ya...how do you make the colors looked 'stacked' on top of each other? I get how you did the color blocking like on the snow white one, but how did you do the mardi gras one? It looks like the different colors are on top of each other? Help!! :)
ReplyDelete@Cari Kent: I made the Mardi Gras one pretty much the same way I did the Snow White one. The only difference is that I used an elastic waist for the Snow White and a ribbon waist for the Mardi Gras. With the Mardi Gras one I scrunched the tulle more tightly together so it's much fuller and that gave it more dimension when I tied it around Serenity's waist. Hope this helps!
ReplyDelete-Treasures for Tots
@Angie - Love these ideas!This will make all those tutus so much easier! Also, I love your daughter's name...that's my oldest daughter's name also and I've never heard anyone else have it before! :)
ReplyDeletei just made my daughter her first tutu for her halloween costume, she's going to be a peacock! i used your tutorial and when i got done, the waist band was about 3 or 4 inches too big for her. did i tie the knots too tight and stretch out the elastic band? i wanted the back to be fluffier than the front since i'm going to put a few feathers on it. if i take everything off and just switch to a ribbon for the waist band, would that still be possible to make it fluffy in the back?
ReplyDeletethank you thank you for yer tips and tutorial!! the cutting was a breeze and i'm using elastic instead of ribbon. fantastic!
ReplyDeleteHow long would you recommend a tutu for a 5 and 7 year old? I'm thinking the strips should be about 20 inches long that way they're not too short.
ReplyDeleteThis sounds wonderful. I plan on making an adult tutu (for Halloween), and so I want to cut the tulle longer for myself (obviously). When you cut your tulle, are you cutting on both sides? Couldn't you just cut one end and therefore end up with 30 inch strips that would result with 14 14.5 inch strips for a longer tutu? Because if that would work, this would be amazing and I would be thrilled. Thank you for posting this.
ReplyDeleteP.S.
Your daughter is too cute for words.
Thank you ,Thank you Great step by step for a grammie od 3 beautiful girls .
ReplyDeleteI think I missed something here. What do you tie the strips of tulle onto? Why are the tutu's only half the length of the strips?
ReplyDeleteThanks a bunch!! I'm going to make this for my daughters first birthday !!
ReplyDeleteI am so glad I found this tutorial! I am making my very first tutu within the next week and Im very anxious! Thanks for posting this!
ReplyDeleteSo happy I found your tutorial going to make my 1st grandchild her first Tutu
ReplyDeleteOh my gosh you are a genius! Thank you for sharing your great idea! :) I was so frustrated!
ReplyDeleteIf you put two cardboards on top of each other and then wrap your tule you can put your scissors in between. Then it is even more easy to cut your tule...
ReplyDeleteGreetings from Holland
omgosh i dont know why i didnt think of this thank you so much!
ReplyDeleteThank you so much for sharing your time saving tips. I was able to make two tutu's this afternoon for a friend's wedding. Love how you showed me how to cut the Toole faster. Thank you so much!!!!
ReplyDelete